
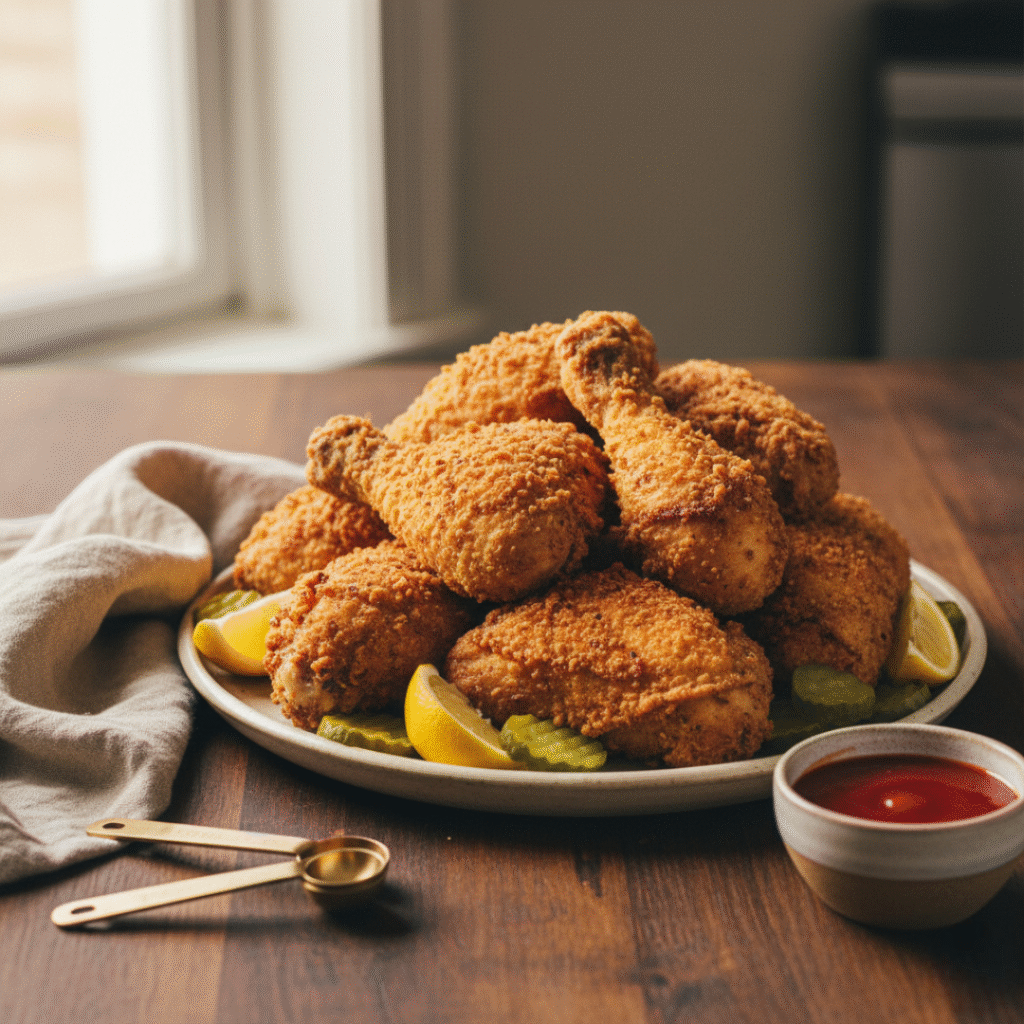
Look, Making proper Southern fried chicken takes some time and effort. But once you taste that first piece with its crispy, golden crust and juicy meat inside, you’ll get why people have been making this dish the same way for over a hundred years.
This isn’t some fancy restaurant recipe with ingredients you can’t pronounce. This is real, honest-to-goodness fried chicken that just works. The kind that makes your kitchen smell amazing and has everyone suddenly appearing in the kitchen asking “when’s it ready?”
Why This Recipe Works
The secret isn’t really a secret at all. It’s buttermilk and patience. That’s it. The buttermilk makes the chicken tender and adds this tangy flavor that’s hard to describe but impossible to forget. Then you coat it twice in seasoned flour, which gives you those crispy, crunchy bits that make fried chicken special.
Some people try to skip steps or rush it. Don’t. Trust me on this one. Good fried chicken isn’t fast food, but it’s worth every minute.
What You Need
For Soaking the Chicken:
- 1 whole chicken cut into 8 pieces (or just buy 8 pieces – I won’t judge)
- 2 cups buttermilk
- 2 tablespoons hot sauce (leave it out if you don’t like spicy)
- 2 teaspoons salt
- 1 teaspoon black pepper
- 1 teaspoon garlic powder
- 1 teaspoon paprika
For the Crispy Coating:
- 3 cups all-purpose flour
- 2 tablespoons cornstarch
- 1 tablespoon salt
- 2 teaspoons black pepper
- 2 teaspoons garlic powder
- 2 teaspoons onion powder
- 1 teaspoon paprika
- 1 teaspoon cayenne pepper (use less if you’re sensitive to heat)
- 1/2 teaspoon dried thyme
- 1/2 teaspoon dried oregano
For Frying:
- Vegetable oil or peanut oil (you’ll need a lot – enough to fill your pot 2-3 inches deep)
How to Make It
Step 1: Soak the Chicken
Grab a big bowl and pour in the buttermilk. Add the hot sauce, salt, pepper, garlic powder, and paprika. Mix it up with a whisk or just a fork.
Put your chicken pieces in there and make sure they’re all covered with the buttermilk. If some pieces are sticking out, add more buttermilk. Cover the bowl with plastic wrap and stick it in the fridge.
Now here’s the thing – you need to leave it there for at least 2 hours. But honestly? Overnight is better. I know, I know, you want to eat it now. But this waiting time is what makes the chicken tender and flavorful. The buttermilk is literally breaking down the meat fibers, making everything more tender.
Step 2: Set Up Your Coating
About 30 minutes before you want to start frying, take the chicken out of the fridge. This matters because if you throw cold chicken into hot oil, the temperature drops too much and you end up with greasy chicken. Nobody wants that.
Get a big shallow dish or bowl. Dump in the flour, cornstarch, and all those spices – salt, pepper, both kinds of garlic and onion powder, paprika, cayenne, thyme, and oregano. Mix it really well. That cornstarch? That’s what makes it extra crispy. Thank me later.
Step 3: Coat the Chicken
Here’s where it gets messy, so roll up your sleeves. You’re going to coat each piece twice, which sounds weird but it’s what creates that amazing crunchy texture.
Take a piece of chicken from the buttermilk. Let some of the buttermilk drip off, but don’t shake it too much. Put it in the flour mixture and really press the flour into the chicken. Get it completely covered, all the sides, everywhere.
Now – and this is important – dip it back in the buttermilk for just a second, then back into the flour again. Press the flour on firmly. You want it to look shaggy and uneven, not smooth. Those bumpy bits become super crispy when you fry them.
Put the coated chicken on a plate and do the rest of the pieces the same way. Once they’re all coated, let them sit for about 15-20 minutes. This helps everything stick together better.
Step 4: Get Your Oil Hot
Pour oil into a heavy pot – a Dutch oven works great – until it’s about 2-3 inches deep. Heat it on medium-high until it reaches 350°F. You really need a thermometer for this. If you don’t have one, go buy one. It’s like $10 and makes all the difference.
If you absolutely don’t have a thermometer, drop a tiny bit of flour in the oil. If it sizzles and rises right away, you’re good to go.
Step 5: Fry It Up
Carefully put 3-4 pieces of chicken in the hot oil. Don’t crowd them – they need space. You’ll probably have to do this in batches.
The oil will bubble like crazy around the chicken. That’s good. Just watch it. Fry for about 12-15 minutes, flipping the pieces halfway through with tongs. Drumsticks and thighs need the full 15 minutes. Breasts and wings are usually done around 12-13 minutes.
You’ll know it’s ready when it’s a deep golden brown color. If you want to be sure, use a meat thermometer – the inside should be 165°F. Or just cut into a piece and check if the juices run clear and there’s no pink.
Step 6: Let It Rest
When each batch is done, take the pieces out and put them on a wire rack, not paper towels. Paper towels make the bottom soggy and nobody wants soggy fried chicken.
Let the chicken sit for about 5 minutes before serving. I know that’s hard when it smells this good, but it lets the juices settle and makes the coating even crispier.
While you’re doing the next batch, keep an eye on the oil temperature. You want to keep it at 350°F. Use a spoon to scoop out any burned bits floating around.
Things That’ll Help You
Don’t skip the buttermilk soak. I can’t stress this enough. This is what separates okay fried chicken from amazing fried chicken.
Watch that oil temperature. Too hot and you’ll burn the outside while the inside stays raw. Too cool and you get greasy, sad chicken.
Use a heavy pot. Thin pots don’t hold heat well and your temperature will be all over the place.
Make extra. Seriously. This goes fast. Even if you think you have enough, make more.
Season everything. The buttermilk is seasoned. The flour is seasoned. This is how you get flavor all the way through.
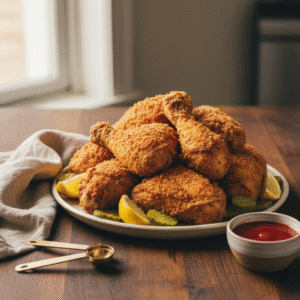
Southern Fried Chicken Recipe – Crispy, Juicy, Restaurant-Style
Equipment
- Heavy pot or Dutch oven
- Large mixing bowl
- Wire rack
- Slotted spoon
- Whisk or fork
- Cooking Thermometer
- Shallow Dish or Bowl
- Tongs
- Meat thermometer
- Plastic wrap
Ingredients
For the Chicken Marinade
- 1 whole chicken 3-4 lbs, cut into 8 pieces
- 2 cups buttermilk
- 2 tablespoons hot sauce optional
- 2 teaspoons salt
- 1 teaspoon black pepper
- 1 teaspoon garlic powder
- 1 teaspoon paprika
For the Crispy Coating
- 3 cups all-purpose flour
- 2 tablespoons cornstarch
- 1 tablespoon salt
- 2 teaspoons black pepper
- 2 teaspoons garlic powder
- 2 teaspoons onion powder
- 1 teaspoon paprika
- 1 teaspoon cayenne pepper
- ½ teaspoon dried thyme
- ½ teaspoon dried oregano
For Frying
- Vegetable oil or peanut oil
- 2-3 quarts enough for 2-3 inches depth in pot
INSTRUCTIONS
- Marinate the Chicken: In a large bowl, combine buttermilk, hot sauce, salt, pepper, garlic powder, and paprika. Add chicken pieces, ensuring they're fully submerged. Cover and refrigerate for at least 2 hours, preferably overnight.
- Prepare the Coating: In a shallow dish, mix flour, cornstarch, salt, black pepper, garlic powder, onion powder, paprika, cayenne pepper, thyme, and oregano. Mix thoroughly with a whisk.
- Remove Chicken from Fridge: Take the marinated chicken out 30 minutes before frying to bring it closer to room temperature.
- Double Coat the Chicken: Take one piece from the buttermilk, let excess drip off. Coat completely in flour mixture, dip back in buttermilk briefly, then coat in flour again. Press firmly to create a shaggy texture. Place on a plate and repeat with remaining pieces. Let sit for 15-20 minutes.
- Heat the Oil: Pour oil into a heavy pot or Dutch oven to 2-3 inches depth. Heat to 350°F (175°C) using a cooking thermometer to monitor temperature.
- Fry the Chicken: Carefully add 3-4 pieces to hot oil. Don't overcrowd. Fry for 12-15 minutes, flipping halfway through. Dark meat needs 14-15 minutes, white meat needs 12-13 minutes. The coating should be deep golden brown.
- Check for Doneness: Internal temperature should reach 165°F when checked with a meat thermometer. Juices should run clear.
- Drain and Rest: Remove chicken with tongs and place on a wire rack set over a baking sheet. Let rest for 5 minutes before serving. Maintain oil temperature at 350°F between batches.
Pro Tips for Perfect Fried Chicken
- Don’t skip the marinade time – The buttermilk tenderizes the meat and adds incredible flavor
- Maintain steady oil temperature – 350°F is the sweet spot for crispy, not greasy chicken
- Use a heavy pot – Cast iron or Dutch oven holds heat better than thin pots
- Don’t overcrowd the pot – This drops oil temperature and makes chicken soggy
- Let it rest on a wire rack – Never use paper towels, they trap steam and make the coating soggy
- Make extra – This disappears fast! Fried chicken is great hot, warm, or even cold the next day
What to Serve With It
You can’t go wrong with classic sides. Mashed potatoes, coleslaw, mac and cheese, cornbread, collard greens, biscuits – pick any combination and you’re good.
Some people like hot sauce on the side. Some people like honey to drizzle on top. Some people (like me) like both. Sweet tea or lemonade to drink is pretty much mandatory.
The Bottom Line
Making Southern fried chicken at home is one of those things that seems intimidating until you actually do it. Then you realize it’s not complicated – it just takes time and attention.
When you pull it off, though? When you bite into that crispy, flavorful, juicy chicken that you made with your own hands? That’s a pretty good feeling.
Your house will smell incredible. Your family or friends will probably show up in the kitchen before you even call them. And you’ll have something really good to eat.
Is it health food? Absolutely not. Is it worth making every once in a while? Absolutely yes.
The first piece is always the best – still hot, super crispy, and so flavorful you don’t even need anything on it. But honestly, the last piece is pretty great too. And if you’re lucky enough to have leftovers, fried chicken is one of those rare things that’s still good cold the next day.
That’s Southern fried chicken. Simple ingredients, classic technique, and results that never disappoint.