
Look, Philly cheesesteak has this reputation like it’s super complicated. Like you need some secret technique from Philadelphia or special equipment or honestly I don’t even know what people think.
But the reality is making one at home is stupid easy. Easier than ordering takeout actually. And it tastes way better because you control everything.
Here’s the thing though. Most people have never had a good Philly cheesesteak. Like they’ve had the food truck version that’s kinda greasy. Or the delivery version that showed up cold and soggy. But when you actually make it fresh at home with proper technique… wait, I’m getting ahead of myself.
The point is when you make it fresh, hot, with decent ingredients, it’s completely different from what you probably think it is. The bread is warm. The meat is tender. The cheese actually melts into everything instead of just sitting on top. The peppers have flavor.
This is food that’s actually worth making. Not greasy. Not sad. Just… good.
Wait Actually Why People Get This Wrong
So before we jump into the recipe, let me talk about why most homemade cheesesteaks don’t work.
People either use the wrong beef. Like they get thick slices thinking that’s better. Wrong. You need thin-sliced beef. The thinness is what allows it to cook fast and get tender. Thick beef just gets tough.
Or they don’t cook the vegetables enough. They think quick is better. But these peppers and onions need time to develop flavor. Eight to ten minutes minimum.
Or they don’t use enough heat for the meat. They’re scared of it burning so they use medium heat. But you need high heat. Real heat. That’s what creates the texture and flavor.
Or the cheese situation. They use the wrong type. Whiz and provolone work. Everything else is… well, it’s not the same.
Anyway, if you get these things right, the cheesesteak basically makes itself.
What You Actually Need
The Beef Thing
About 500 grams of thin-sliced beef. Ask your deli counter to slice it thin. Like seriously thin. Ribeye is traditional but chuck steak works too when sliced proper. The thinness matters more than the cut.
Bread
Two hoagie or sub rolls. Fresh from the bakery is way better than pre-packaged. I’m not even being fancy here. Fresh bread just holds up better and doesn’t get soggy as fast. That’s it.
The Vegetable Situation
Two large bell peppers, any color. Red, yellow, green, doesn’t matter. Slice them thin. One large onion too. Yellow onion is traditional but you know what? White works fine too.
Cheese
Here’s where it gets specific. Either Cheez Whiz or provolone. About 150-200 grams total. If using Whiz just get a jar. If using provolone get slices. American cheese technically works but it’s not… it’s not the thing, you know?
Oil And Seasoning
Three tablespoons of butter or oil, divided up. Salt and pepper. Optional garlic powder and Italian seasoning. That’s it.
Optional But Honestly Consider It
Mayonnaise. Hot sauce. Sautéed mushrooms. Jalapeños. Bacon. Tomato. Whatever. The base recipe is solid enough that additions work.
Alright The Actual Steps
Step 1: Start With The Vegetables
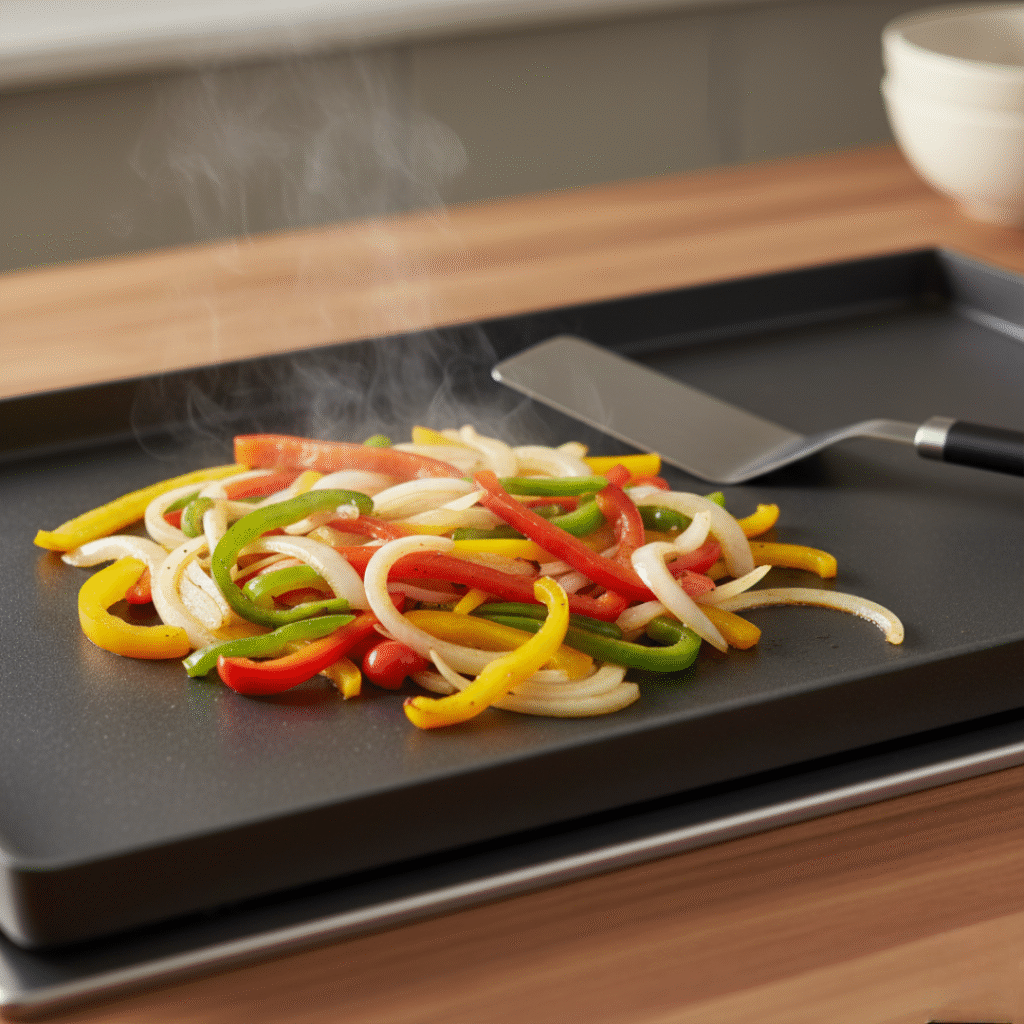
So you’re gonna heat a tablespoon of butter or oil in a skillet over medium-high heat. Once it’s hot—and I mean actually hot, shimmering—throw in your peppers and onions.
Now here’s where people mess up. They either cook them super fast thinking that’s better. Or they let them sit too long and they become mush. You want that middle ground.
About eight to ten minutes. Stir them sometimes but not constantly. Let them actually develop color. They should soften but still have texture. You know what I mean? Not crunchy. Not mush.
Season with salt, pepper, and optional garlic powder. Transfer to a plate.
Step 2: The Beef Situation (This Is Where Technique Matters)
Okay so this is the step that matters most. Add another tablespoon of butter or oil. Get it hot. I’m talking medium-high, almost smoking hot.
Add all your thin-sliced beef at once. Now this is important—don’t stir it immediately. Let it sit for about 30 seconds to a minute. This creates texture. This creates flavor. Just leave it alone.
After that, start breaking it up. Cook for another 2 to 3 minutes. Total time should be like 4 to 5 minutes. The beef should be cooked through. Season with salt and pepper while it’s cooking.
Actually wait. Don’t use a regular skillet if you have a griddle. A griddle works better because the surface is bigger and heat distributes… anyway, either works. Skillet is fine.
Step 3: Combine Everything Together
Push your cooked beef to the side of the skillet. Add your cooked peppers and onions back. Mix them together. Keep heat on medium-high.
This is where everything becomes one thing instead of separate ingredients.

Step 4: The Cheese—This Is Critical
Lower heat to medium. This is important because if the heat is too high the cheese breaks.
If you’re using Cheez Whiz, just dollop it on top. The residual heat melts it. Stir it in so it coats everything. Like seriously coats everything.
If you’re using provolone slices, lay them on top and let the heat melt them. Same thing. You want it coating the meat and peppers.
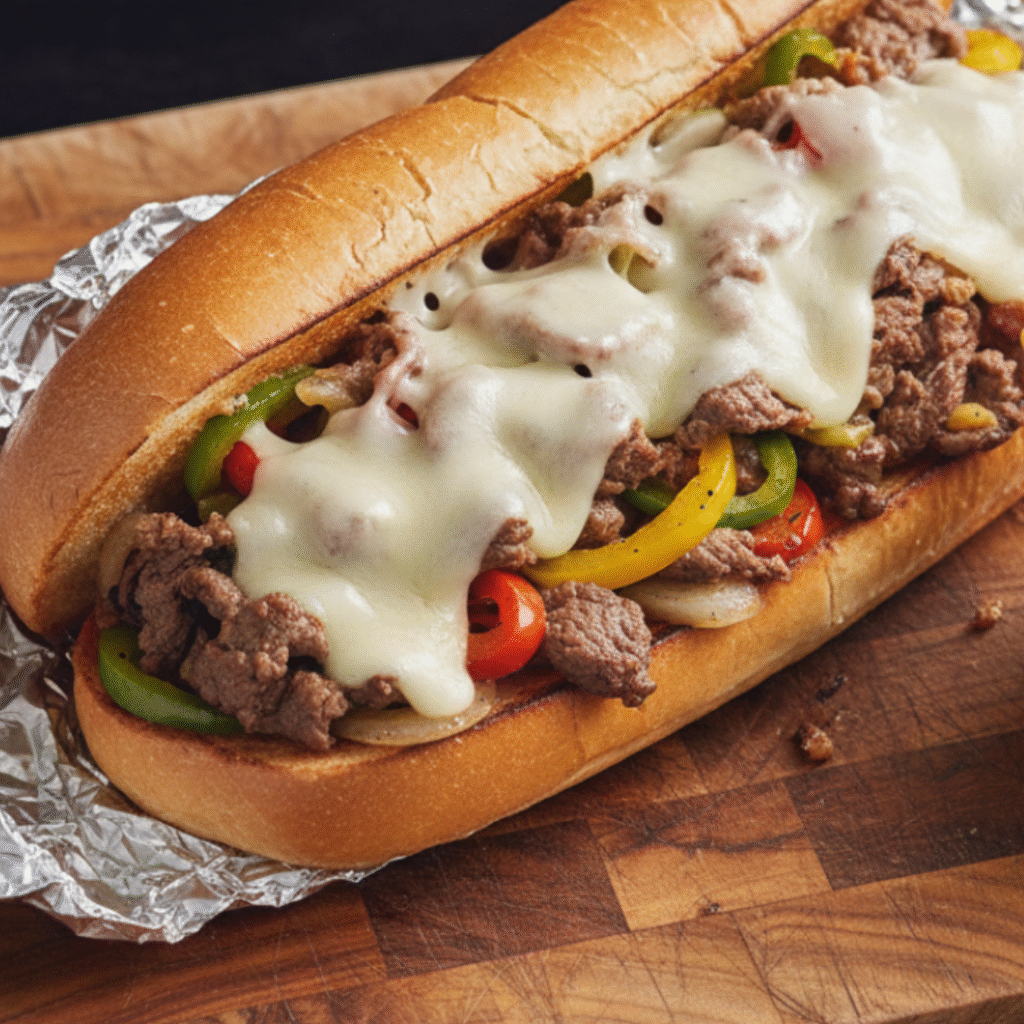
This takes about 2 to 3 minutes. The whole point is the cheese should coat everything and bind it together. Not just melt on top. Coating. That’s different.
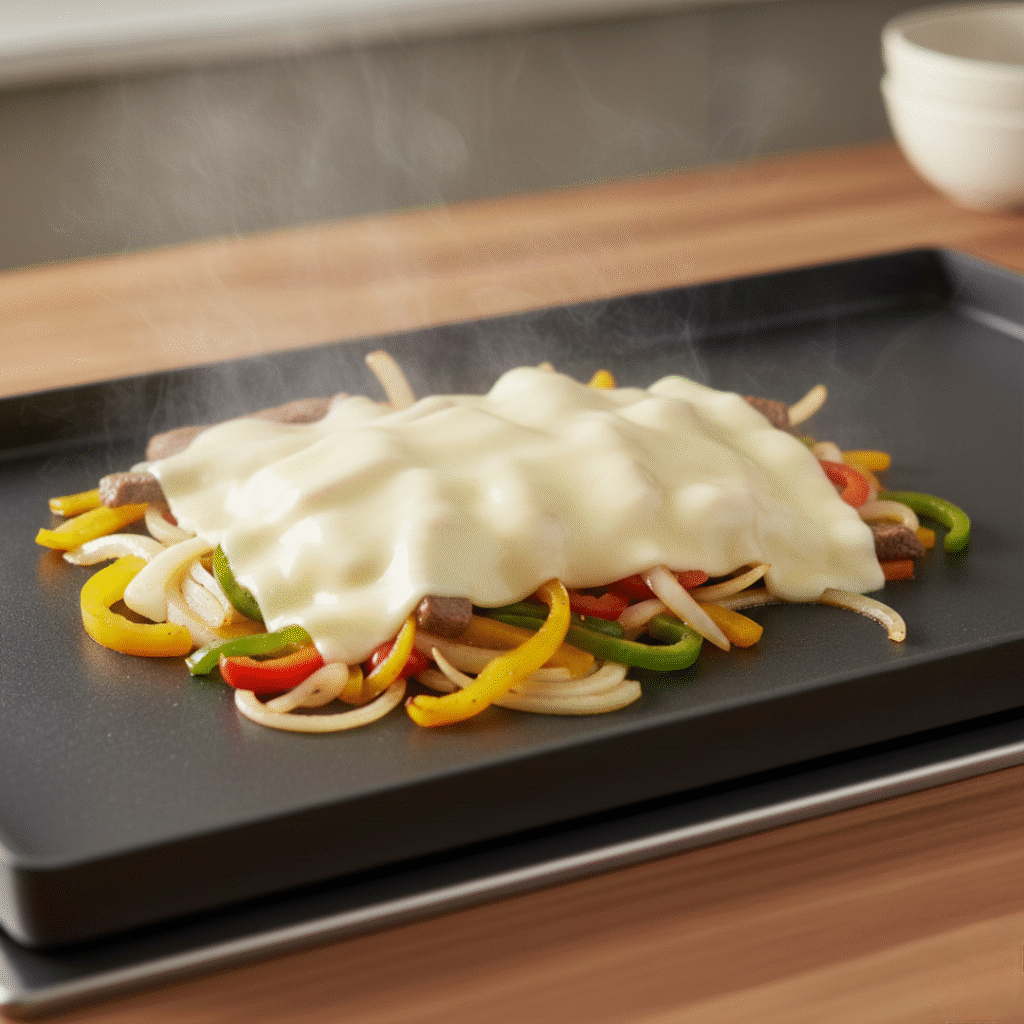
Actually I realize I keep saying the same thing about the cheese but it genuinely matters. The difference between a good cheesesteak and a sad one is whether the cheese coats everything or just sits on top.
Step 5: Toast The Bread And Do The Assembly Thing
While cheese melts, warm your hoagie rolls. Oven at 375°F for 2 to 3 minutes. Or skillet for 1 to 2 minutes per side. Just until warm and slightly golden. Some people butter the inside first. That’s nice but not required.
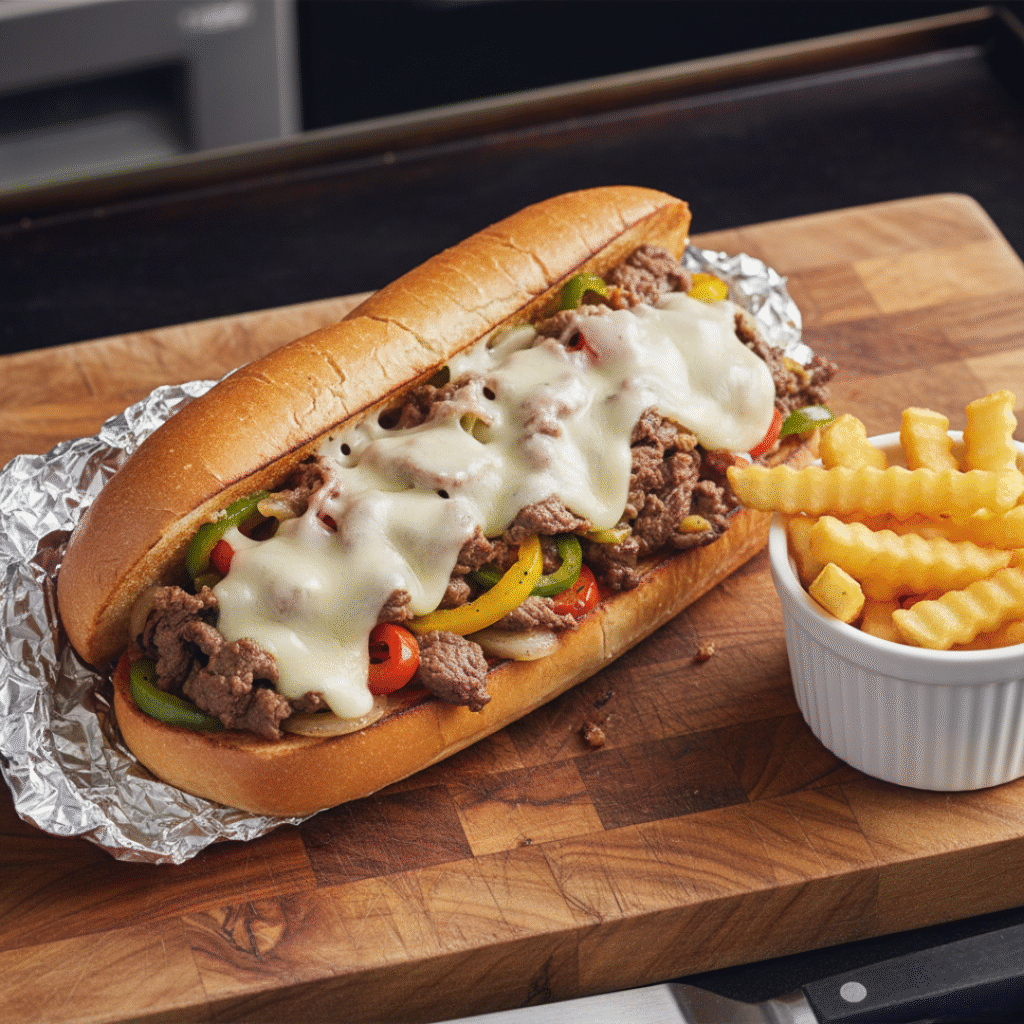
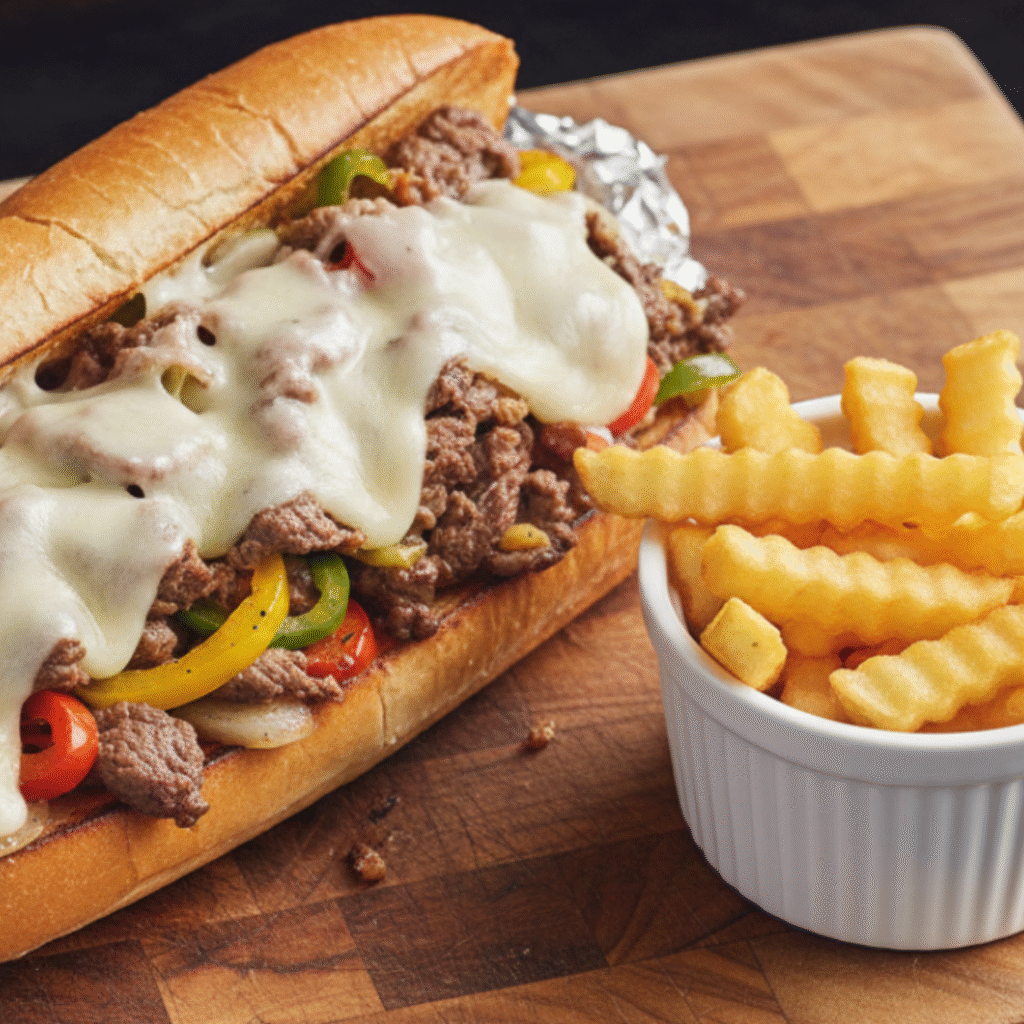
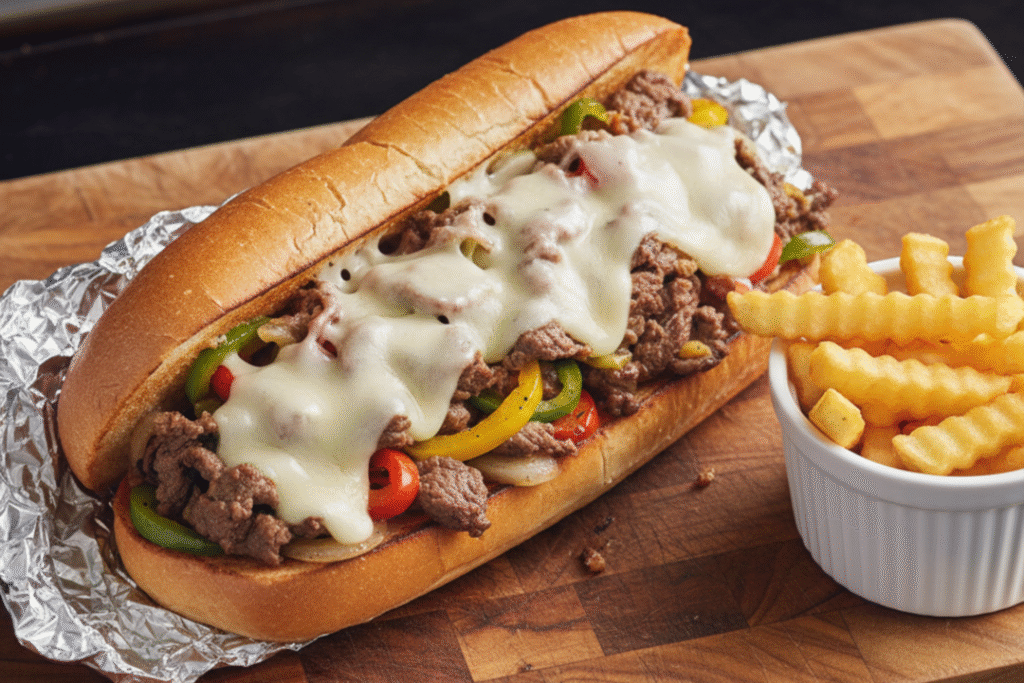
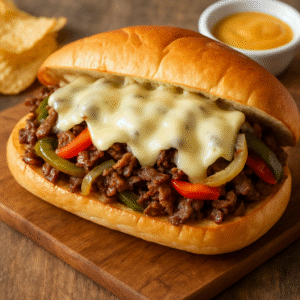
Open each roll. Pile your cheese-coated meat and vegetable mixture inside. Be generous. Overstuff it. This is a cheesesteak, not a salad.
Wrap in foil or wax paper. Serve hot.
That’s it. Five steps.
Okay Actually Why This Order Matters
So people ask why vegetables first. Wouldn’t it be faster to do everything together?
No. Because vegetables take longer to cook than beef. If you do them at the same time, vegetables aren’t done or beef is overcooked. By doing vegetables first, they’re done and ready when the beef is done. Everything finishes at the same time. Everything is hot when you assemble. That’s the point.
And the order of assembly matters. Vegetables first because they take longest. Beef second because it’s quick. Combine them so they’re the same temperature. Add cheese so it binds everything. Toast bread last so it’s warm when you assemble.
If you skip steps or do them out of order, something’s cold or things don’t come together right.
Also I realize I haven’t mentioned this but the beef really does need to be thin. Like, ask the deli counter to slice it thin. Don’t buy the packaged deli beef. That’s different. Real thin-sliced from the counter is what works.
Other Sandwich Recipes That Use Similar Technique
Italian sub is basically cold cuts and cheese but similar technique.
Meatball sub is similar but different filling.
Roast beef sandwich for dinner.
Po’boy from New Orleans.
Cuban sandwich pressed and hot.
Banh mi Vietnamese style.
Buffalo chicken sandwich.
Basically once you understand how to make hot sandwiches, variations are pretty easy. You learn the fundamentals with cheesesteak then adapt.
Pro Tips
Get your beef from the deli counter, sliced thin. Seriously. This is the number one thing people get wrong. Thin beef cooks right. Thick beef doesn’t.
Use a skillet or griddle with good heat. Non-stick is fine but cast iron or stainless holds heat better. You need actual heat for this to work.
Don’t crowd the pan. Add all the beef at once but give it room. It needs to cook not steam.
Cook vegetables first. They’re slower. Doing them first means everything finishes together.
Toast your bread. Optional but it’s better. Warm bread stays crispy longer than cold bread.
The right cheese matters. Whiz and provolone work. Everything else is different. Use the right type.
Assemble hot. Everything needs to be hot. Cold meat and cold bread don’t work together.
Don’t use wet vegetables. Cook them until excess moisture is gone. Wet vegetables make soggy sandwiches.
Serve immediately. Cheesesteaks are best right after assembly. They get sad as they sit.
Season properly. The meat, the vegetables, everything needs salt and pepper. Don’t skip it.
Medium heat for cheese. Low heat melts it. High heat breaks it. Medium is the sweet spot.
5 Easy Steps to Make Philly Cheesesteak with Cheese & Peppers
Equipment
- Large skillet or griddle
- Sharp knife for slicing
- Cutting board
- Two plates
- Tongs or spatula
- Foil or wax paper (for wrapping)
- Optional: oven for toasting bread
Ingredients
For The Cheesesteaks:
- 500 g thin-sliced beef ribeye or chuck, sliced thin
- 2 hoagie or sub rolls fresh
- 2 large bell peppers thinly sliced
- 1 large onion thinly sliced
- 150-200 g Cheez Whiz or sliced provolone cheese
- 3 tbsp butter or oil divided
- Salt and black pepper to taste
- ½ tsp garlic powder optional
- Pinch of Italian seasoning optional
Optional Toppings:
- Mayonnaise
- Hot sauce
- Mushrooms sautéed with peppers
- Jalapeños
- Bacon
- Tomato slices
INSTRUCTIONS
1. Slice Your Vegetables:
- Cut bell peppers into thin strips. Thinly slice your onion. Have them ready. Everything cooks fast so you need ingredients ready to go.
2. Cook Peppers And Onions First:
- Heat 1 tablespoon of butter or oil in a large skillet over medium-high heat. Once hot, add peppers and onions. Cook about 8 to 10 minutes, stirring occasionally. You want them soft with some color but still textured. Not mushy. Season with salt, pepper, and optional garlic powder. Transfer to a plate.
3. Cook Your Beef Properly:
- Add another tablespoon of butter or oil to skillet. Get it really hot. Medium-high, almost smoking. Add all your thin-sliced beef at once. Let it sit undisturbed for 30 seconds to 1 minute for color. Then break it up and cook 3 to 4 minutes more. Total time about 4 to 5 minutes. Beef should be cooked through but tender. Season with salt and pepper.
4. Combine Meat And Vegetables:
- Push cooked beef to the side of skillet. Add cooked peppers and onions back. Mix together. Keep heat on medium-high.
5. Melt Your Cheese:
- Lower heat to medium. If using Cheez Whiz, dollop it on top and let residual heat melt it. Stir so it coats everything. If using provolone slices, lay them on top and let them melt. Takes about 2 to 3 minutes. The cheese should coat and bind everything together.
6. Toast Your Bread:
- While cheese melts, warm your hoagie rolls. Oven at 375°F for 2 to 3 minutes or skillet for 1 to 2 minutes per side. Just warm and lightly golden.
7. Assemble Your Cheesesteak:
- Open warm rolls. Pile cheese-coated meat and vegetable mixture generously inside each roll. Be generous. Overstuff. This is the point.
8. Add Optional Toppings:
- Add mayo, hot sauce, mushrooms, whatever you want.
9. Wrap And Serve:
- Wrap in foil or wax paper. Keeps it warm and easy to eat. Serve immediately while hot.
Notes
- Keep components separate for up to 3 to 4 days in fridge
- Meat and vegetables freeze up to 2 months
- Don’t freeze assembled sandwiches
- Reheat components separately then reassemble
- Calories: 650 to 750
- Protein: 40 to 45g
- Fat: 35 to 40g
- Carbs: 45 to 50g
- Fiber: 2g
Stuff That Goes Wrong And How To Actually Fix It
Meat is tough and chewy
You probably used thick beef instead of thin. Or you overcooked it. Next time get thin-sliced and keep the heat high but cooking time short. 4 to 5 minutes total.
Vegetables are mush
Cooked too long. They should take about 8 to 10 minutes and still have texture. Shorter time and higher heat next time.
Cheese won’t melt
Either your heat is too low when you add it or you’re using the wrong cheese. Make sure the pan is still hot. Whiz melts easy. Provolone melts easy. Other cheeses… might not.
Sandwich is soggy
Your vegetables have too much moisture. Cook them longer so the water cooks out. Or your bread is old. Use fresh bread.
Everything is cold by the time you eat
You assembled too early and waited. Do everything up to adding cheese, then immediately assemble and serve. The whole process should flow into eating.
Meat is falling apart instead of staying together
Your slices are too thin (wait that shouldn’t happen) or your pan isn’t hot enough. Heat matters. You need proper heat to help everything bind.
The cheese looks broken or separated
Heat was probably too high when you added it. Lower to medium. Gentle heat melts it. High heat separates it.
Storage (Because You Might Have Leftovers)
Right After Making
Eat it. Hot. Immediately. Cheesesteaks aren’t good cold. They’re not good the next day either. This is a fresh-eat meal.
Components Separately
If you have leftover meat, vegetables, or bread store them separately.
Cooked meat – Fridge for 3 days max.
Cooked vegetables – Fridge for 4 days.
Bread – Counter for 1 to 2 days. Freezer for 2 months if you want.
Don’t Store Assembled
Seriously don’t make them and store them. The bread gets soggy. The cheese gets hard and waxy. Everything separates. It’s sad.
Freezing Individual Components
Meat freezes fine for 2 months. Vegetables freeze okay. Bread freezes well. Just thaw and reheat when you want cheesesteaks.
Reheating If You Must
Best way is reheat everything separately then reassemble.
Meat and vegetables in a skillet over medium heat for 3 to 4 minutes. Bread in the oven at 350°F for 2 to 3 minutes. Assemble with fresh cheese.
It won’t be as good as fresh but it’s edible.
Questions People Ask
Can you use any beef?
Thin-sliced is what you need. Chuck steak, ribeye, whatever. When sliced thin it works. Thick cuts don’t cook right. Ask your butcher. They’ll do it.
What if you can’t find Cheez Whiz?
Provolone slices work great. American cheese works okay. Regular cheddar is… not ideal. Avoid anything that doesn’t melt easily into the meat.
Can you make this without peppers and onions?
Technically yes. It’s not traditional but you can do it. Plain meat and cheese on bread. But the vegetables add flavor so they’re worth including.
How do you toast the bread?
Oven at 375°F for 2 to 3 minutes. Or skillet for 1 to 2 minutes per side. Just warm and lightly golden. Don’t burn it.
Can you use a different roll type?
Sure. Soft rolls, ciabatta, French bread. Hoagie roll is traditional but any good bread works. Just needs to hold up to moisture.
What if the meat sticks to the pan?
Heat or oil situation. Make sure heat is right and you have enough fat. Sticking usually means insufficient heat or insufficient fat. Both matter.
Can you make these ahead for a party?
Prep components ahead but don’t assemble. Assemble right before serving or the bread gets soggy. This matters for group events.
How many does this make?
Two cheesesteaks with this amount. Double everything if you need more. Pretty straightforward math.
What’s the best way to eat this?
Hands. They’re messy. That’s the appeal. Napkins are essential.
Can you make vegetarian?
Skip the meat and use extra vegetables. Mushrooms especially. It’s not traditional but it can be good. The technique is the same.
Why This Actually Works
The technique matters because each step sets up the next step.
Vegetables first means they’re ready when the beef is ready. Everything is at the same temperature when you combine.
Thin beef means it cooks fast and gets tender instead of tough.
High heat for the beef means it develops flavor and texture.
Combining warm ingredients means the cheese melts into everything instead of just sitting on top.
Melted cheese that coats everything is what makes a cheesesteak actually work. It binds the ingredients together.
Hot bread that’s just warmed means it’s warm when you eat it but not so warm it dries out.
Immediate assembly and serving means everything is at peak temperature when you eat.
These things working together is what creates an actual good cheesesteak. Skip parts or do them wrong and something falls apart.
Why You’d Want To Make This At Home
Tastes better. You control ingredients and cooking. You know what’s in it. No mystery stuff.
Cheaper than ordering. Store-bought cheesesteaks cost a lot. Homemade is way less.
Faster than delivery. 30 minutes start to finish. Faster than waiting for food to arrive.
Impressive. People think you’re amazing when you make sandwiches like this. It’s easy but it seems fancy.
Customizable. Make it your way. Your cheese. Your vegetables. Your toppings.
Teaches you technique. High heat cooking. Melting cheese. Building layers of flavor. These are skills you use elsewhere.
Fun. Seriously there’s something satisfying about making a really good sandwich.
You can make it whenever. Don’t need a sandwich shop. Just make it at home. Midnight? Sure. Tuesday? Go for it.
The Thing About Making Cheesesteak At Home
It’s simple food made well. Not complicated. Not fancy. Just proper technique with decent ingredients.
Once you make it once you realize how pointless ordering takeout is. You make something better in less time.
Then you start experimenting. Different cheeses. Different vegetables. Different meats. The foundation is strong enough that variations work. You understand why things work so you can adapt.
This is food that matters because it’s real. Not chain restaurant stuff. Not food truck stuff. Real food you made properly.
Leave a Comment