
That smell of barbecue ribs cooking on a charcoal grill? There’s nothing like it. The smoke, the sizzle, the way your neighbors start walking by a little slower.
Today, I’m going to show you how to make ribs that will have everyone asking for them. Here’s the truth – ribs aren’t tough. All they need is time and patience. But when you bite into tender, smoky, fall-off-the-bone ribs, you’ll understand why it’s worth every minute.
what you Need
For Ribs:
2 racks of baby back or spare ribs
yellow mustard
your favorite BBQ sauce
To rub:
¼ cup brown sugar
2 tbsp red capsicum
1 tbsp each: black pepper, salt, chili powder, garlic powder, onion powder
1 teaspoon red chilli (optional)
Other Accessories:
Charcoal and wood chips (hickory or apple)
Apple Cider Vinegar in Spray Bottle
heavy-duty foil
meat thermometer
Preparing the Ribs
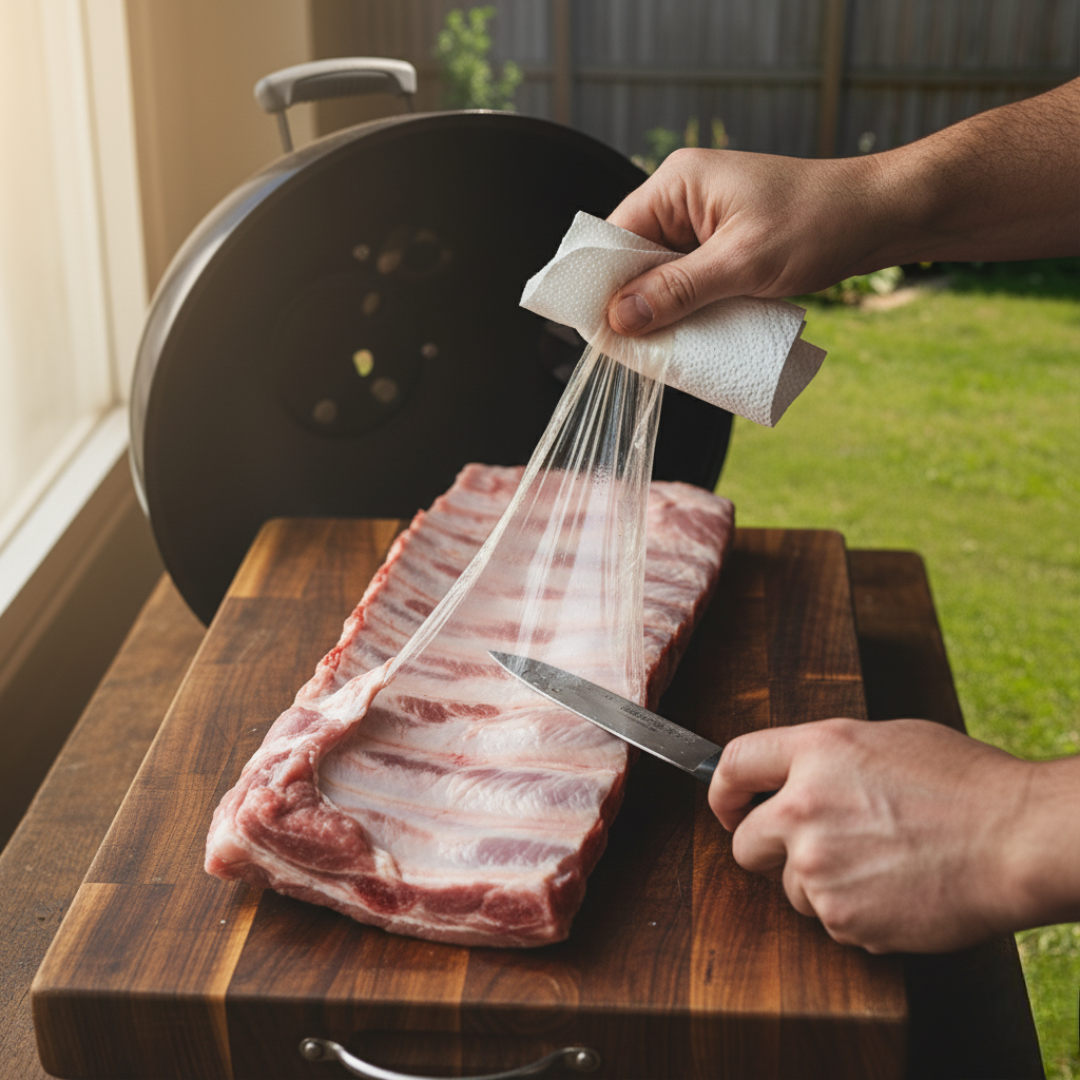
First, flip your ribs. See that shiny membrane on the bone side? Slide a knife under it, grab it with a paper towel, and peel it off. This lets the smoke get into the meat.
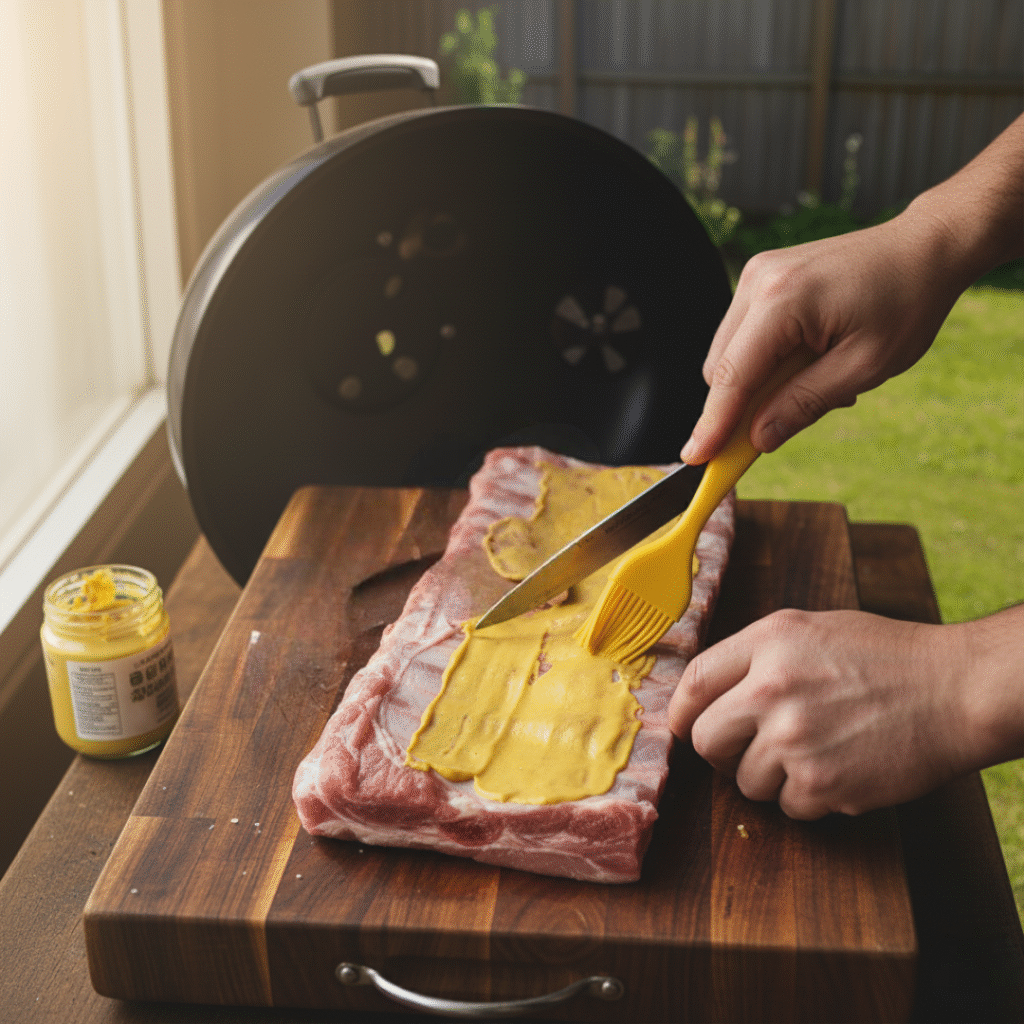
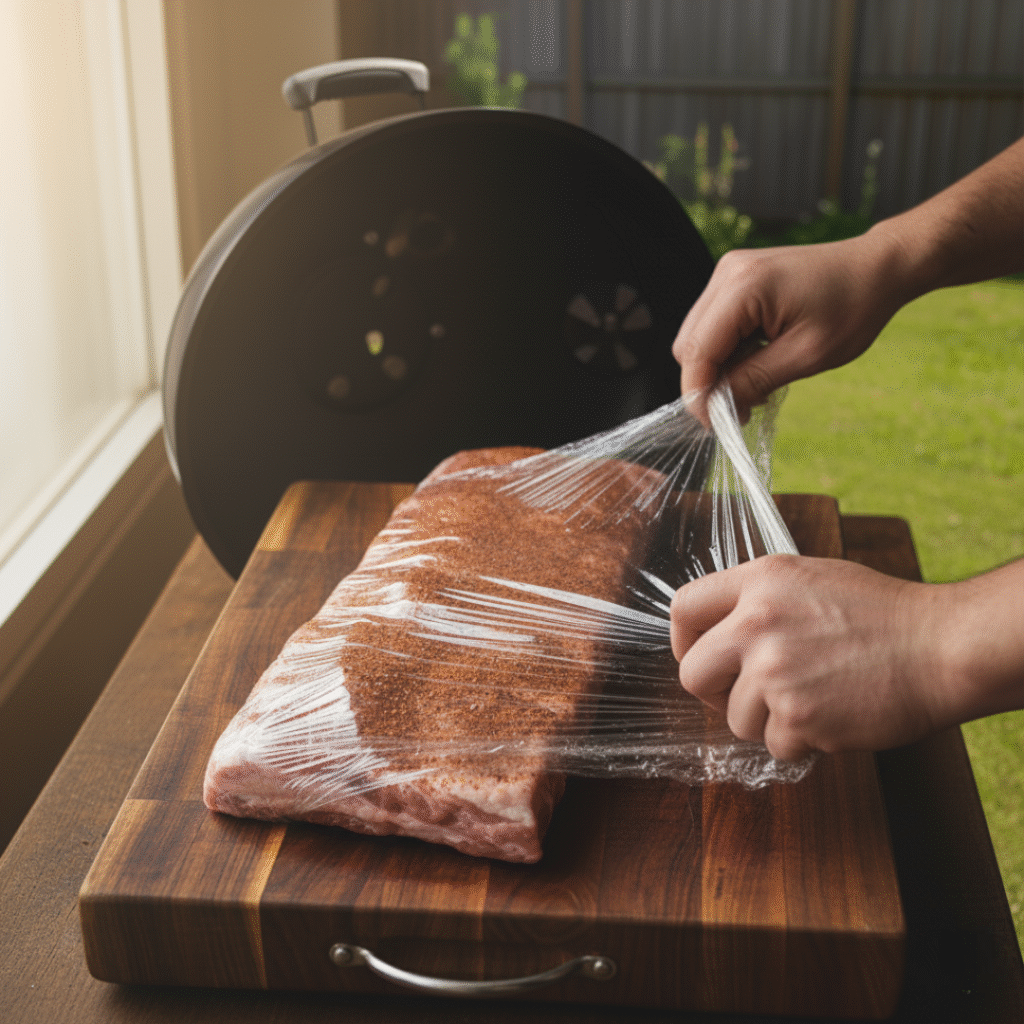
Trim off any big fat chunks. Then spread a thin layer of mustard all over the ribs. You won’t taste it – it just helps the seasoning stick.
Mix all your rub ingredients together.
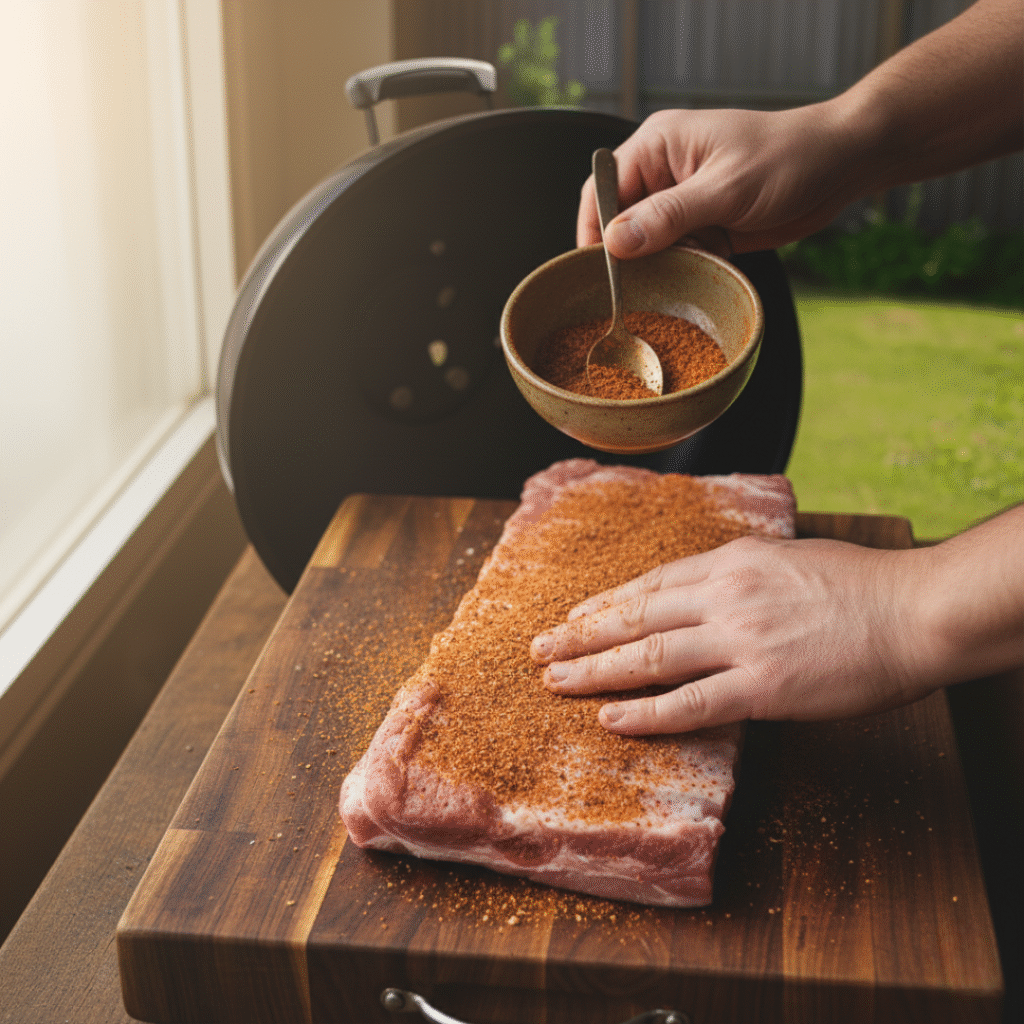
Cover every inch of those ribs with it. Press it in good. Wrap them in plastic and put them in the fridge for at least 2 hours. Overnight is even better.
Overview
Table of Contents
Setting Up Your Charcoal Grill
Light your charcoal in a chimney starter. When the coals are covered in gray ash, dump them all on one side of the grill. Just one side. This gives you a hot zone and a cool zone.
Toss 2-3 wood chunks on the coals for smoke. Open the bottom vent halfway and the top vent all the way. Put the lid on and let it get to 225-250 degrees.
This two-zone setup is key. Your ribs will cook on the cool side with no direct heat under them.
Time to Cook
Take your ribs out of the fridge 30 minutes before cooking. Put them on the cool side of the grill, bone side down. Close the lid.
Every 45 minutes, open up and spray them with apple cider vinegar. This keeps them moist and helps build that crust.
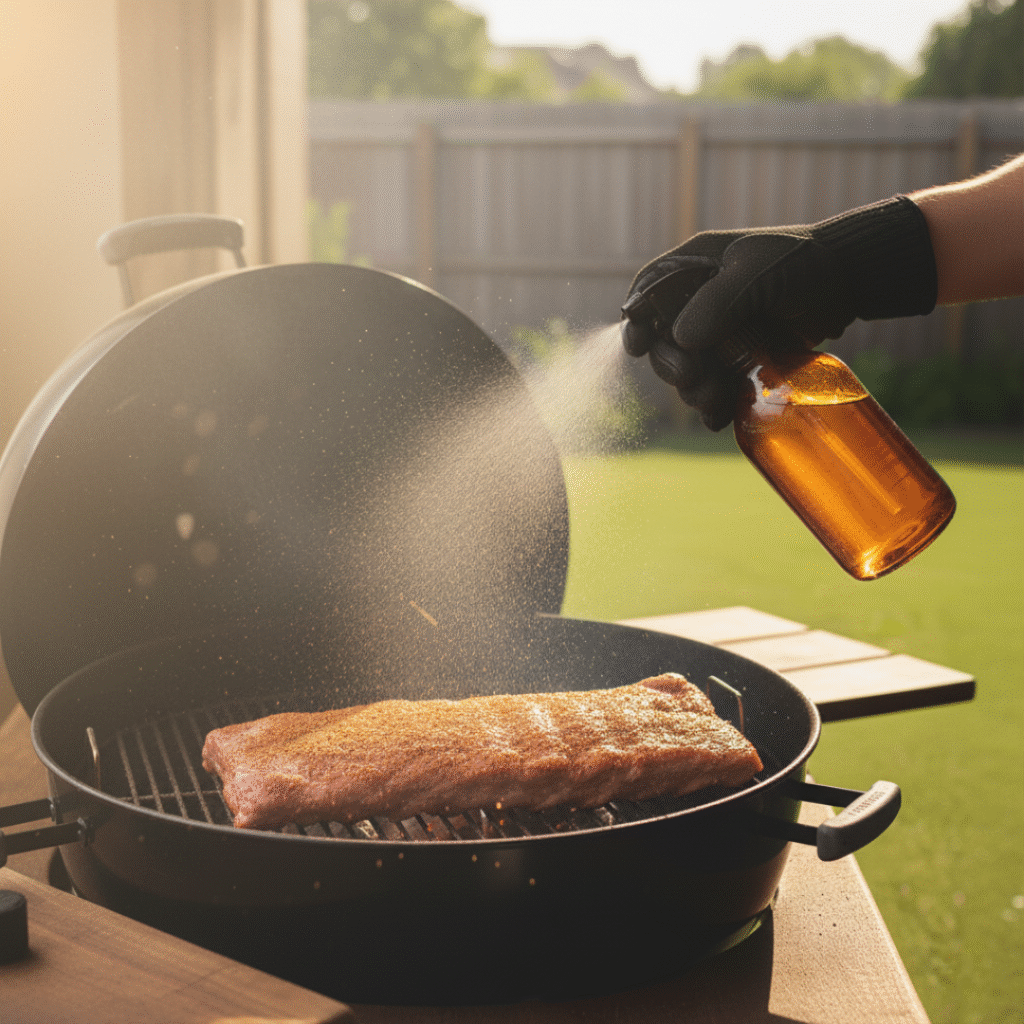
Check your temperature every hour. If it drops below 225, add more lit charcoal. If you want more smoke, add another wood chunk. Keep it steady at 225-250 degrees.
Let them cook for 2-3 hours for baby backs, 3-4 hours for spare ribs. You’ll know they’re ready for the next step when the meat starts pulling back from the ends of the bones.
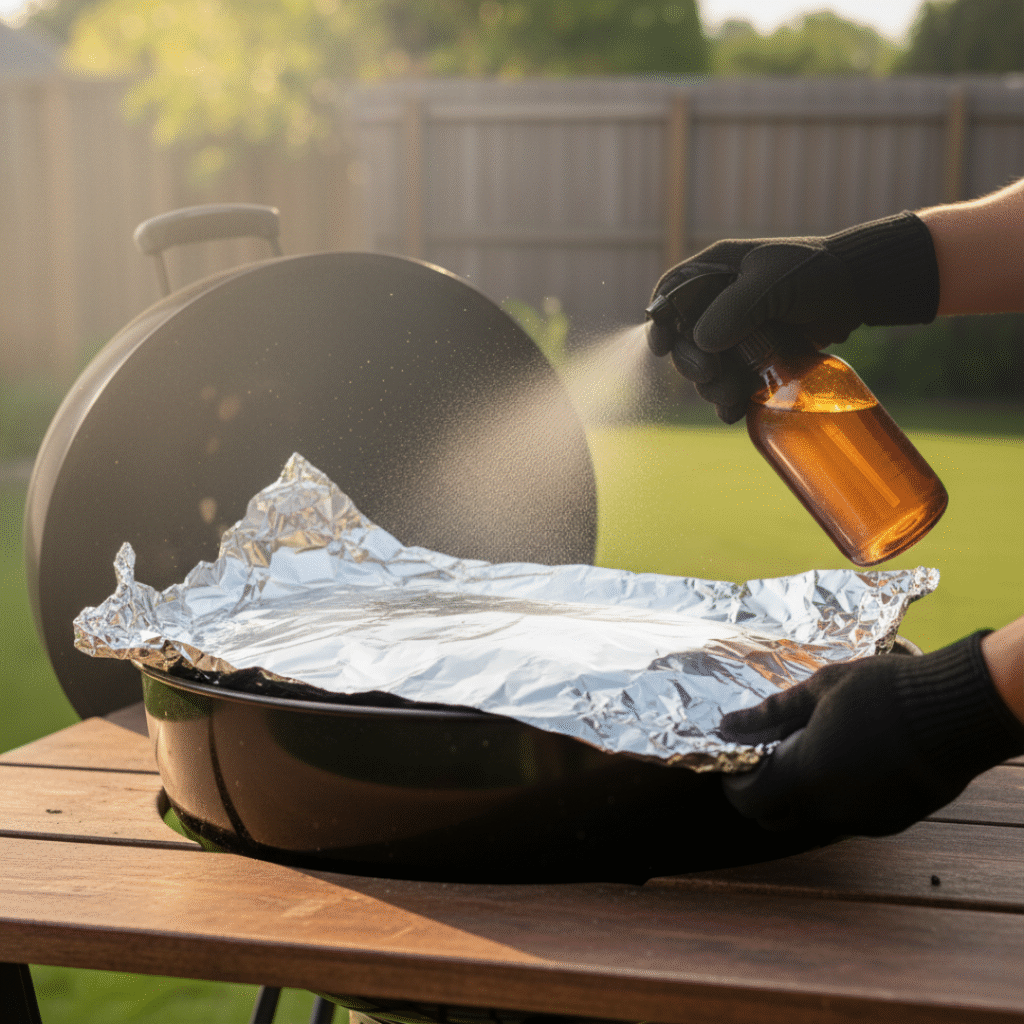
The Wrap
Take the ribs off and wrap each rack tight in foil. Spray them once more before sealing. Put them back on the grill for another hour to hour and a half.
This is when they get really tender. The steam inside that foil breaks down all the tough stuff.
The Finish
Carefully open the ribs – be careful of hot steam. Apply BBQ sauce all over them. Place them back on the grill, meat side up, no foil. Give them 20-30 minutes.
The sauce will become sticky and caramelized. Brush on a second layer of sauce halfway through. How to tell when their work is done Pick them up from the middle with tongs. They should bend easily. Insert a toothpick between the bones – it should stick in like butter.
If you have a thermometer, you should want 195-203 degrees. The meat should pull easily from the bone but not fall off completely. That’s the sweet spot.
Rest and Serve
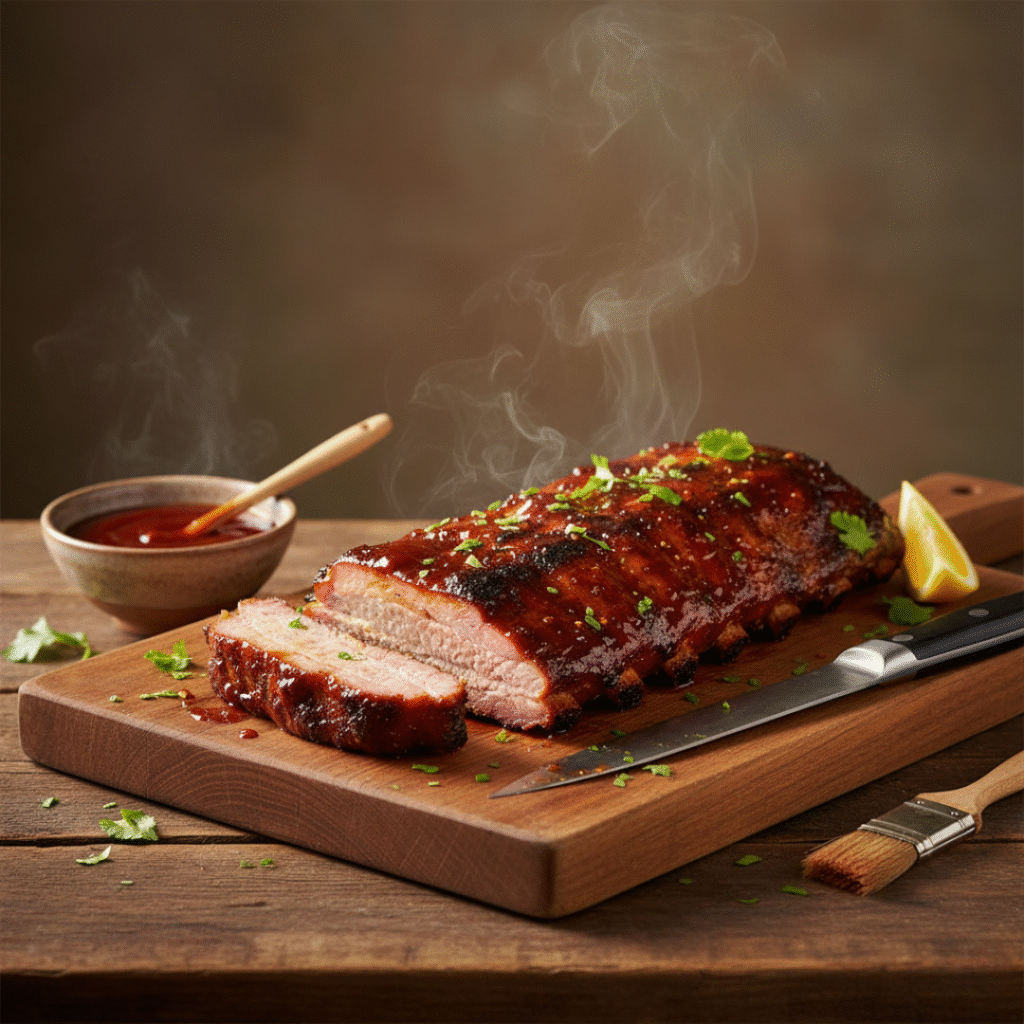
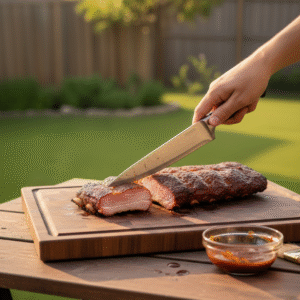
Remove them from the grill and leave on a cutting board for 10 minutes. This causes the juice to collect back into the meat.
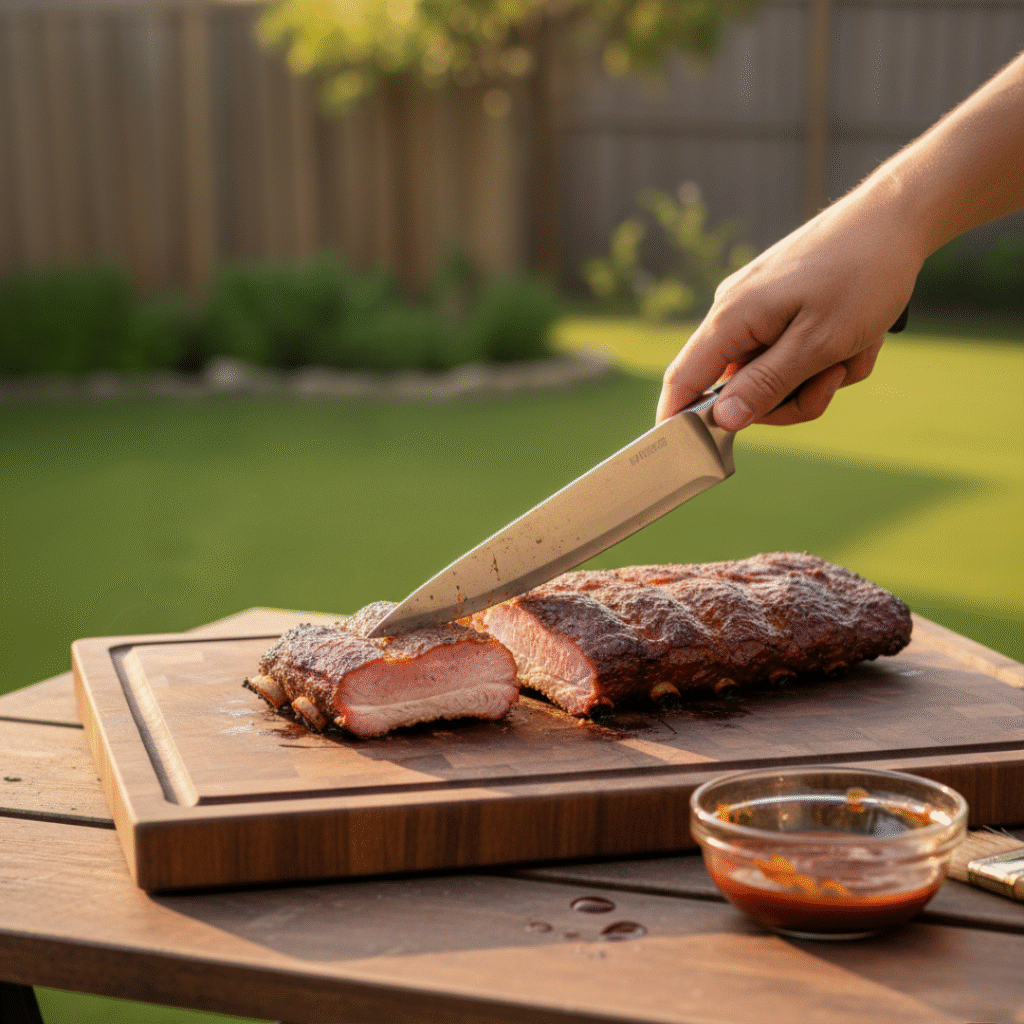
Then cut between the bones. You’ll see black bark on the outside, a ring of pink smoke just underneath, and tender flesh everywhere else. This is what we are looking for.
Quick Tips
Keep your temperature between 225-250. Too hot and you’ll dry them out.
Do not open the lid too much. Every time you do this, you lose heat and smoke. The sauce goes on last. Sugar burns, so don’t add the sauce too quickly.
Let them rest before cutting. It makes a difference. Add coal to your fire before it goes out. Stay ahead of it.
What to Serve With Your Ribs
Great ribs deserve great sides. Here’s what goes perfect with them:
Coleslaw – That creamy, crunchy slaw cuts through the richness of the ribs. The cool freshness balances all that smoke and sauce. Mix shredded cabbage with mayo, vinegar, sugar, and a little salt. Simple and classic.
Cornbread – Slightly sweet, super moist cornbread is a BBQ staple. It soaks up any extra sauce on your plate. Serve it warm with butter melting on top.
Baked Beans – Slow-cooked beans with bacon, brown sugar, and molasses. They’re sweet, savory, and stick-to-your-ribs good. The flavors match perfectly with BBQ.
Mac and Cheese – Creamy, cheesy comfort food. The smooth texture contrasts with the meaty ribs. Go for the real deal with sharp cheddar, not the box stuff.
Grilled Corn – Throw some corn on the cob on that grill while your ribs are cooking. Brush with butter, sprinkle with salt. Sweet, smoky, and uses the fire you already have going.
Potato Salad – Cold, creamy potato salad is a BBQ must. Potatoes, mayo, mustard, pickles, and hard-boiled eggs. Make it the day before so the flavors blend.
Pickles and Onions – Simple but important. The tangy crunch of pickles and raw onions cuts through the fat and refreshes your palate between bites.
Barbecue Ribs on a Grill – A Delicious Cooking Experience
Equipment
- Charcoal grill (Weber kettle or similar)
- Chimney starter
- Meat thermometer
- Spray bottle
- Tongs
- Basting brush
- Heavy-duty aluminum foil
- Sharp knife
- Cutting board
- Paper towels
Ingredients
For ribs:
- 2 racks baby back or spare ribs 4-5 pounds
- 2 tbsp yellow mustard
- 1 cup BBQ sauce
- Apple Cider Vinegar for sprinkling
Dry Rubbing:
- ¼ cup brown sugar
- 2 tbsp red capsicum
- 1 tbsp black pepper
- 1 tablespoon salt
- 1 tablespoon chili powder
- 1 tbsp garlic powder
- 1 tbsp onion powder
- 1 teaspoon red chilli optional
For the grill:
- 8-10 pounds charcoal
- 4-5 pieces of wood hickory or apple
INSTRUCTIONS
- Prep the ribs: Remove membrane from bone side. Trim excess fat. Coat with thin layer of mustard.
- Make the rub: Mix all dry rub ingredients in a bowl.
- Season: Apply rub generously to all sides of ribs. Wrap in plastic and refrigerate 2 hours or overnight.
- Setup grill: Light charcoal and arrange on one side of grill. Add wood chunks. Adjust vents to maintain 225-250°F.
- Cook: Place ribs bone-side down on cool side of grill. Close lid. Spritz with vinegar every 45 minutes. Cook 2-3 hours for baby backs, 3-4 hours for spare ribs.
- Wrap: Wrap ribs tightly in foil. Return to grill for 1-1.5 hours.
- Sauce: Unwrap ribs, brush with BBQ sauce. Cook uncovered for 20-30 minutes, applying second coat halfway through.
- Rest: Remove from grill. Let rest 10 minutes before cutting between bones.
Notes
Why This Works
Low and slow breaks down the tough connective tissue without drying out the meat. The smoke gives you that authentic BBQ flavor. The rub creates a flavorful crust. The wrap speeds up the tenderizing. The sauce adds that perfect finish.
It’s simple science that produces incredible results.
Frequently Asked Questions
Q: Can I make ribs faster?
A: Not really, not if you want them done right. You can crank up the heat but you’ll end up with tough, dry ribs. Low and slow is the only way. Think of it as an investment – you put in the time, you get amazing ribs back.
Q: Do I have to wrap the ribs in foil?
A: No, but it helps. Wrapping speeds up the tenderizing process and keeps them moist. Some pitmasters skip it for a firmer bark. Try it both ways and see what you like better.
Q: My ribs turned out tough. What went wrong?
A: Usually means they didn’t cook long enough or the temperature was too high. Ribs need time for that collagen to break down. Next time, cook them longer and keep the heat lower.
Q: Can I use this recipe on a gas grill?
A: You can, but you won’t get that authentic charcoal smoke flavor. If that’s all you’ve got, go for it. Just use wood chips in a smoker box and follow the same two-zone setup.
Q: How do I know when to add more charcoal?
A: When your temperature starts dropping below 225. Don’t wait until it’s dead. Light new coals in your chimney while the old ones are still going, then add them.
Q: Should I use a water pan?
A: Some people swear by it for adding moisture. I don’t think it’s necessary if you’re spritzing regularly and wrapping. But if you want to try it, put a pan of water on the cool side under the ribs.
Q: My bark looks burnt. Is that normal?
A: A dark bark is good. Black and bitter is bad. If it’s getting too dark, your temperature is too high or you sauced too early. Keep it at 225-250 and sauce only at the end.
Q: Can I prep these the night before?
A: Absolutely. In fact, that’s better. Season them, wrap them up, and let them sit in the fridge overnight. The flavors will penetrate deeper.
Storage and Reheating
Storing leftovers: Wrap individual ribs or sections tightly in foil or put them in an airtight container. They’ll keep in the fridge for 3-4 days, in the freezer for up to 3 months.
Reheating: Don’t microwave them – you’ll dry them out. Wrap them in foil with a splash of apple juice or water. Put them in a 250°F oven for about 20-30 minutes until heated through. Or throw them back on the grill for 10-15 minutes.
Make ahead: You can cook the ribs completely, let them cool, then refrigerate. When you’re ready to serve, reheat on the grill and brush with fresh sauce. Not quite as good as fresh, but still pretty damn good.
Common Variations to Try
Kansas City Style: Use a thicker, sweeter tomato-based sauce. Heavy on the molasses and brown sugar.
Memphis Style: Skip the sauce completely. Let that dry rub and smoke do all the talking. Dust with more rub before serving.
St. Louis Style: Trim spare ribs into a rectangular shape. Season with a simpler rub – just salt, pepper, and paprika. Light on the sauce.
Korean BBQ Ribs: Swap the rub for a marinade of soy sauce, ginger, garlic, sesame oil, and brown sugar. Glaze with gochujang mixed with honey at the end.
Spicy Ribs: Double the cayenne in the rub. Add some chipotle powder. Finish with a spicy hot sauce mixed into your BBQ sauce.
Troubleshooting Guide
Problem: Ribs are done but not tender
Solution: Wrap them back up in foil and give them another 30-45 minutes. Sometimes they just need more time.
Problem: Temperature keeps dropping
Solution: You’re not adding charcoal early enough. Stay ahead of it. Also check if your vents are too closed.
Problem: Too much smoke, bitter taste
Solution: You used too much wood or the wood is smoldering instead of burning clean. Use less wood and make sure your coals are hot enough.
Problem: Meat is dry
Solution: Temperature was too high or you cooked them too long. Also, did you spritz them regularly? That moisture helps.
Problem: No smoke ring
Solution: Smoke ring forms in the first few hours. If you wrapped too early, you might not get one. Also, make sure you’re using real wood, not just charcoal.
Problem: Sauce is burnt and black
Solution: You sauced too early. Sugar burns. Sauce only goes on in the last 20-30 minutes. That’s it.
Why These Ribs Hit Different
Look, there are a thousand ways to make ribs. You can bake them in the oven. You can boil them first (don’t do that). You can use a smoker, a pellet grill, whatever.
But there’s something about cooking over charcoal that just works. Maybe it’s that you’re actually tending a fire. Maybe it’s that real wood smoke. Maybe it’s just that you’re outside, enjoying the process, watching the smoke curl up into the sky.
Whatever it is, ribs from a charcoal grill just taste better. They taste like summer. Like weekends. Like the kind of meal where everyone sits around the table a little longer because nobody wants it to end.
That’s what we’re really making here. Not just food. An experience.
One Last Thing
Here’s what nobody tells you about learning to make great ribs – you’re gonna mess up. Your first rack might be a little dry. Your second might not have enough smoke. Your third might be too saucy.
That’s how it works. Every pitmaster you see who’s crushing it? They burned ribs. They made them too tough. They ran out of charcoal halfway through.
The difference is they kept going. They learned. They adjusted.
So don’t stress if your first attempt isn’t perfect. Just pay attention. Notice what worked and what didn’t. Make adjustments next time.
And enjoy the process. Because honestly, even mediocre ribs that you made yourself taste pretty damn good when you’re sitting outside with friends, relaxing, watching the sun go down.
That’s the real secret. It’s not just about the ribs. It’s about everything around them.
Now fire up that grill and get after it.