
Look, nobody’s judging you for using a box mix. Between work deadlines, kids’ soccer practice, and whatever else life throws at you, sometimes you just need cake to happen without spending three hours measuring flour. But here’s the thing—that box sitting in your pantry? It’s got potential. Serious potential.
Most people think box cakes taste “fine” but nothing special. They’re not wrong if you’re just following those basic instructions on the back. Water, oil, eggs—boom, done. But what if I told you that with basically the same effort, you could turn that mix into something your neighbor Susan would totally ask for the recipe for?
The Real Deal About Box Mixes
Here’s what most folks don’t realize: those cake mix companies aren’t dumb. They’ve got labs full of people making sure that powder creates a decent cake. The formula works. Where things go sideways is when you add the boring stuff they recommend because it’s cheap and everyone’s got it.
Think about it. Water doesn’t taste like anything. Vegetable oil is neutral on purpose. The bare minimum eggs give structure, but that’s about it. You’re essentially building a cake with the blandest possible ingredients on top of decent chocolate powder.
Now flip that script. What if you swapped out every single one of those basic additions for something with actual flavor? You’re still following the same easy mixing method, but suddenly you’ve got depth, moisture, and that “wait, did you really make this from a box?” factor.
Coffee Is Your Secret Weapon
Forget the water. Seriously, just pretend that instruction doesn’t exist. Brew some coffee instead—and make it strong. The cheap stuff from the back of your cupboard works fine. Let it cool down while you’re getting everything else ready.
Why coffee? Because chocolate and coffee are basically best friends. The coffee doesn’t make your cake taste like a latte or anything weird like that. What it does is wake up all those chocolate flavors hiding in the mix. Suddenly your cake tastes richer, darker, more grown-up. Even people who hate coffee won’t detect it—they’ll just wonder why your chocolate cake tastes so much better than theirs.
Can’t do coffee? Whole milk works great too. It adds creaminess and a little natural sweetness. Some people swear by buttermilk for that tangy bakery vibe. Really, anything but water.
Butter Makes Everything Better
The box says oil. Cool. Ignore that too. Melt some real butter instead—the same amount the box wants, just butter instead of oil. Butter has flavor. Butter smells amazing. Butter makes people lean toward the oven and ask what you’re baking.
Here’s a move that’ll seriously level things up: brown that butter first. Sounds fancy, but it’s stupid easy. Toss your butter in a small pot on medium heat. It’ll melt, then foam up, then start turning golden and smell like heaven. That nutty, caramel-ish aroma? That’s going straight into your cake. Just let it cool a bit before adding it so you don’t accidentally scramble your eggs.
More Eggs, Richer Cake
The box probably wants two or three eggs. Give it what it wants, then throw in an extra yolk or two. You’re not changing the structure much—just adding richness. Those yolks have fat and flavor that make your cake taste more like it came from an actual bakery instead of a cardboard box.
Some people get weird about having leftover egg whites. Make an omelet for breakfast. Toss them in a smoothie. Problem solved.
Sour Cream Changes the Game
This is the secret ingredient professional bakers won’t shut up about. Half a cup of sour cream mixed into your batter creates this incredible tender crumb that stays moist for days. Not dry-within-24-hours moist. Actually genuinely moist.
Don’t have sour cream? Greek yogurt does the exact same thing. So does mayo, believe it or not. Yeah, mayonnaise sounds bizarre in a cake, but it’s just eggs and oil anyway. You won’t taste it, promise.
Let’s Actually Make This Cake
What You’ll Need
- That box of chocolate cake mix sitting in your pantry
- 1 cup of strong coffee (cooled down) or whole milk
- Half a cup of melted butter (browned if you’re feeling ambitious)
- 3 eggs plus 2 extra yolks
- Half a cup of sour cream or Greek yogurt
- 2 teaspoons vanilla extract (the real stuff, not imitation)
- 2 tablespoons instant espresso powder
- Half a teaspoon salt
- Small box of instant chocolate pudding mix (just the powder, don’t make the pudding)
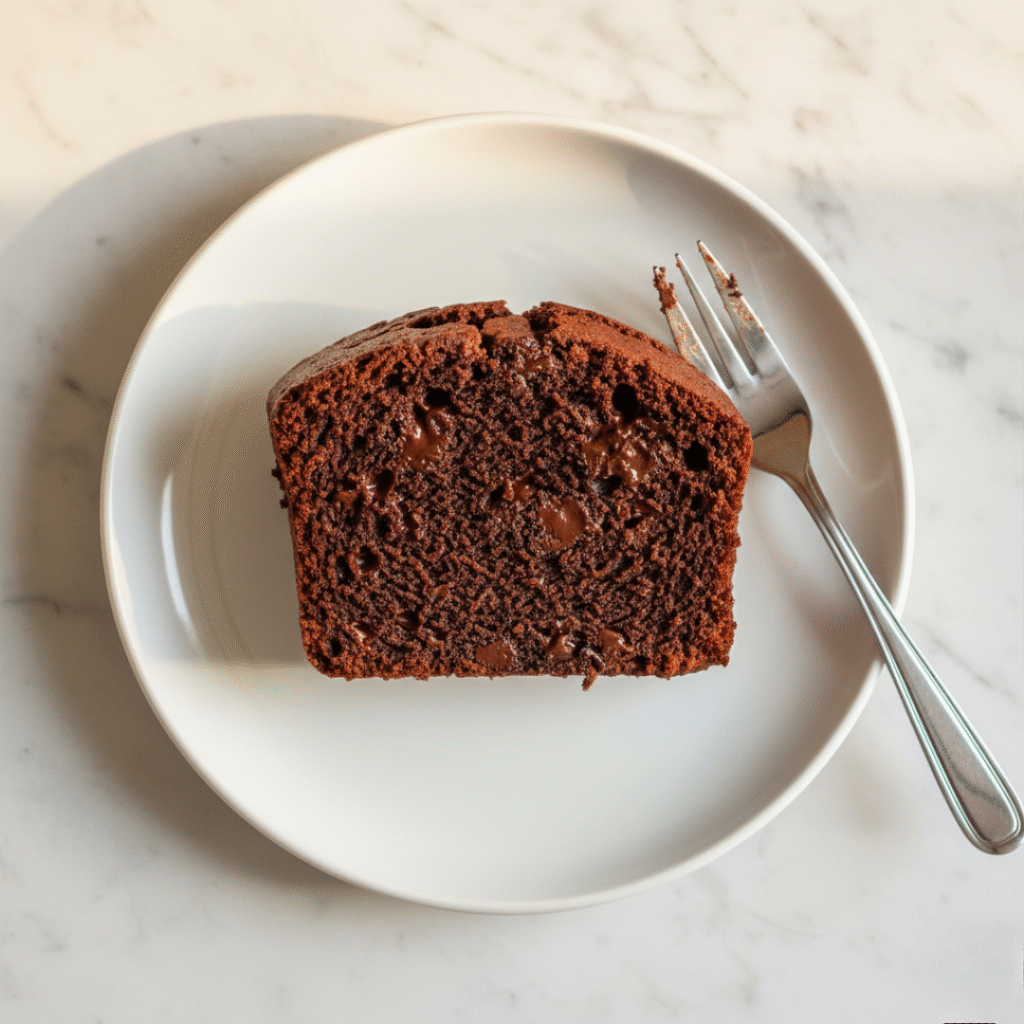
- A cup of chocolate chips if you want pockets of melty chocolate throughout
Getting Started
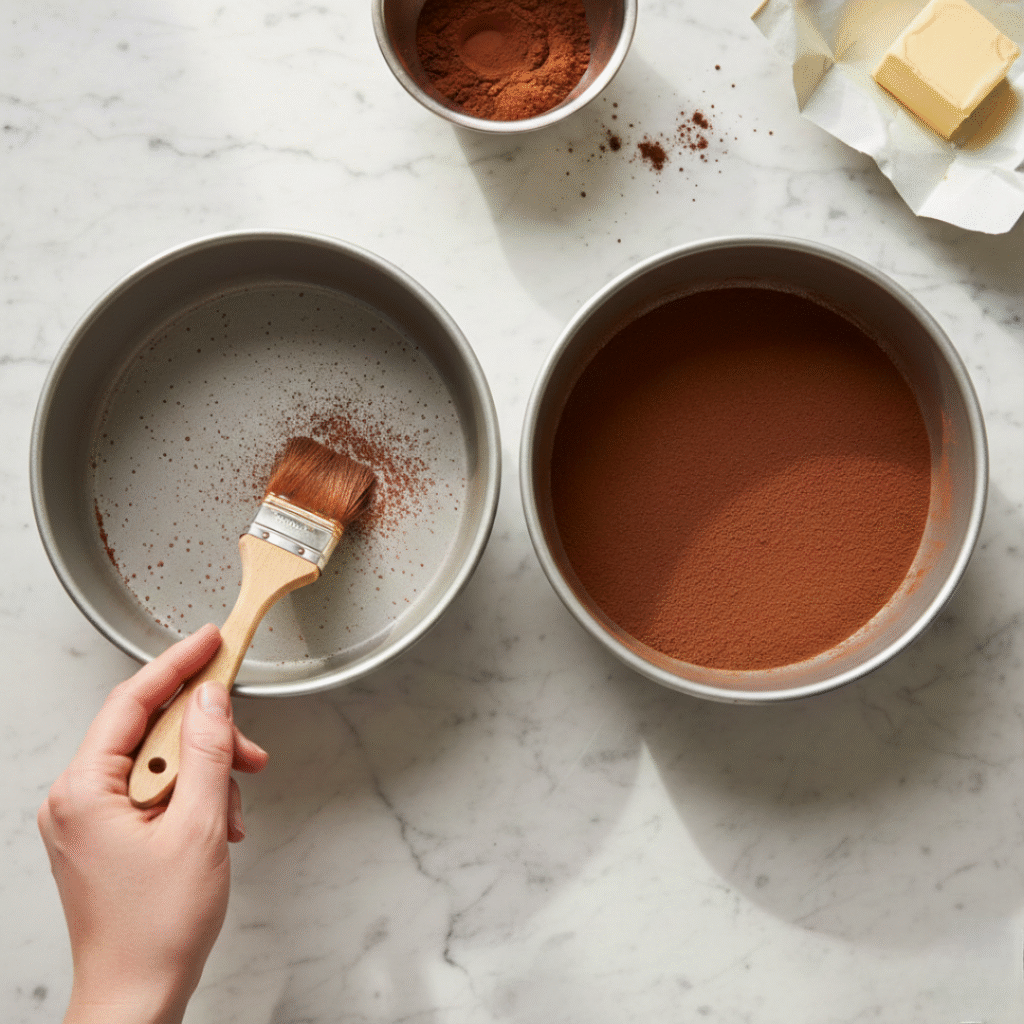
Crank your oven to 350 degrees. Grab two round cake pans—9-inch works perfect—and grease them really well. Butter works, cooking spray works, whatever you’ve got. Then dust them with a little cocoa powder instead of flour. Keeps your dark cake from having those weird white streaks on the sides.
Mixing It Up
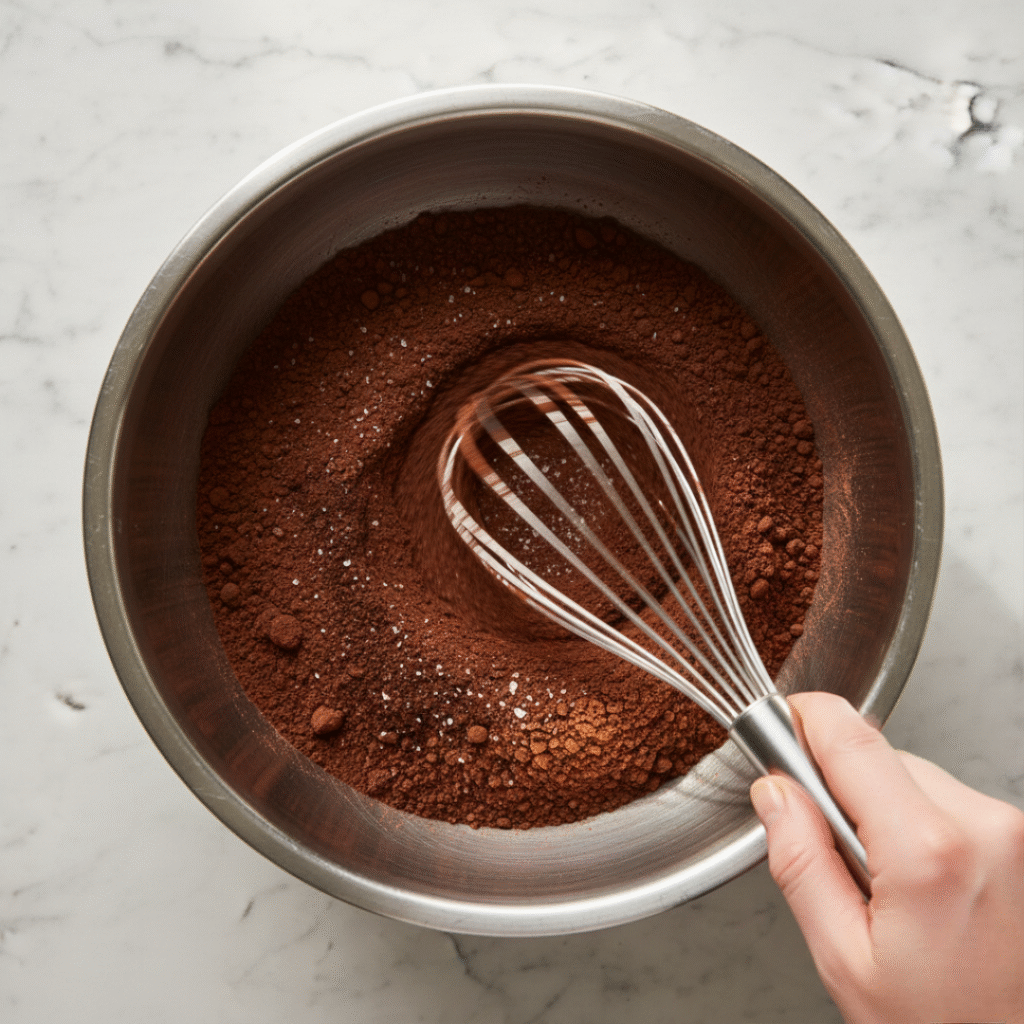
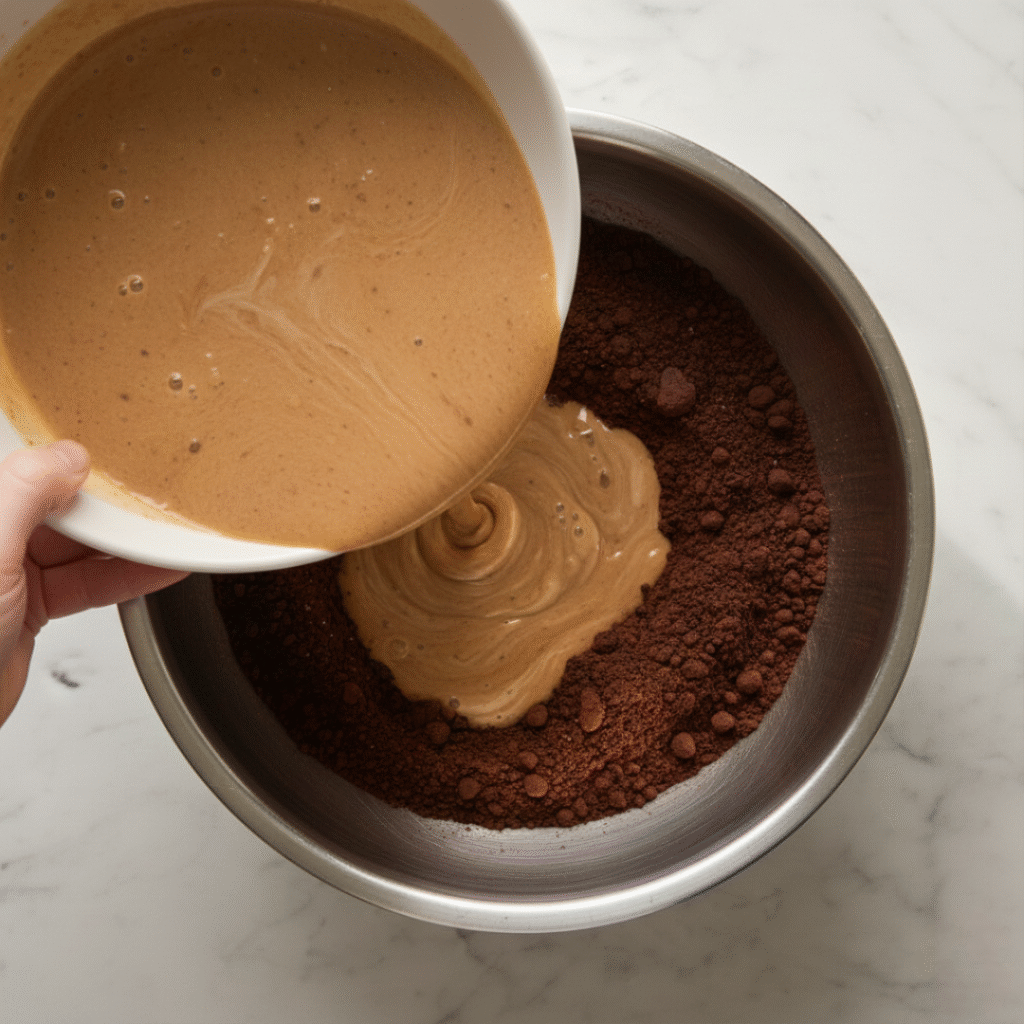
Dump your cake mix into a big bowl. Add that pudding powder, the espresso powder, and salt. Whisk it around for a minute so everything’s mixed together. The pudding mix is going to make your cake crazy moist and give it almost a fudgy texture. The espresso powder makes the chocolate taste more intense without adding coffee flavor.
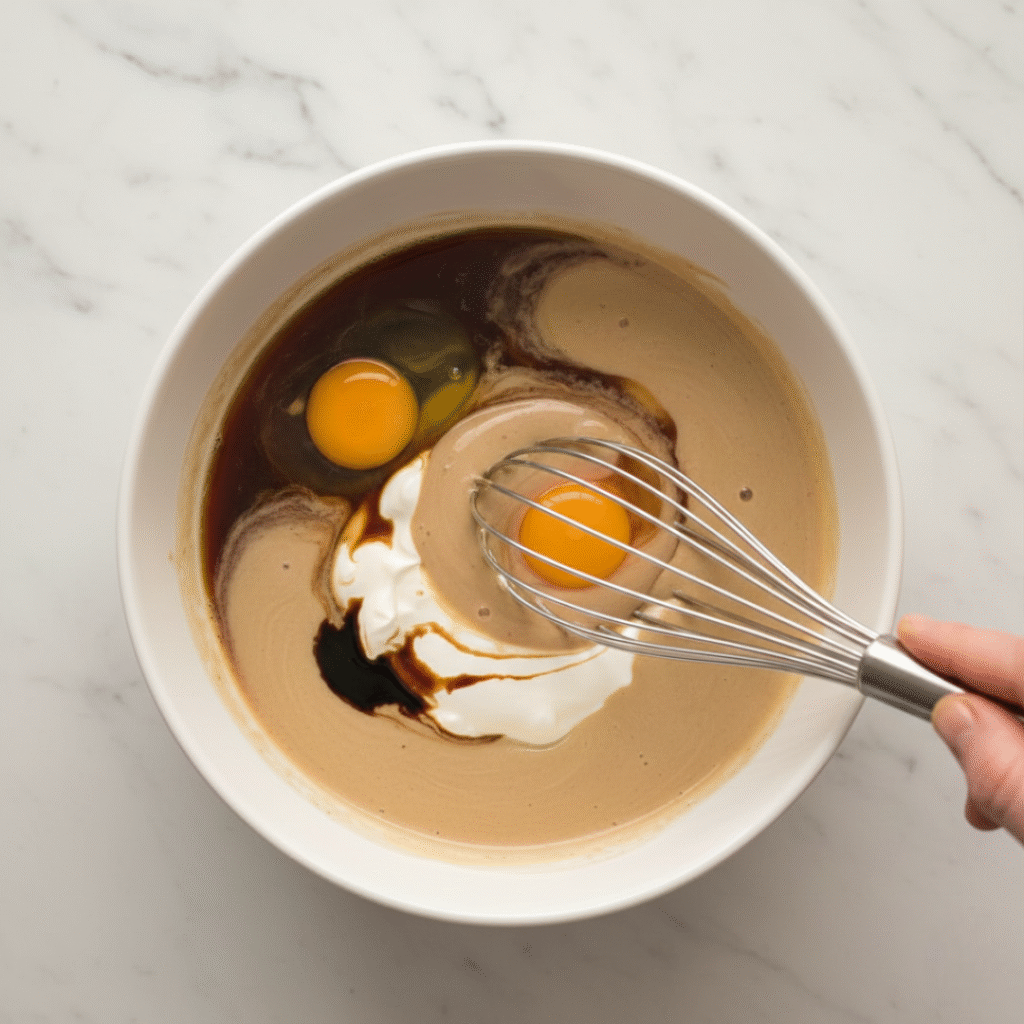
In another bowl, whisk together your coffee (or milk), melted butter, all those eggs and yolks, the sour cream, and vanilla. Make sure your butter isn’t piping hot or you’ll cook the eggs—learned that one the hard way. Everything should be around the same temperature.
Pour the wet stuff into the dry stuff. Mix it with a hand mixer for about two minutes. You want it smooth and lump-free, but don’t go crazy mixing for five minutes. Once you don’t see any dry patches, you’re good.
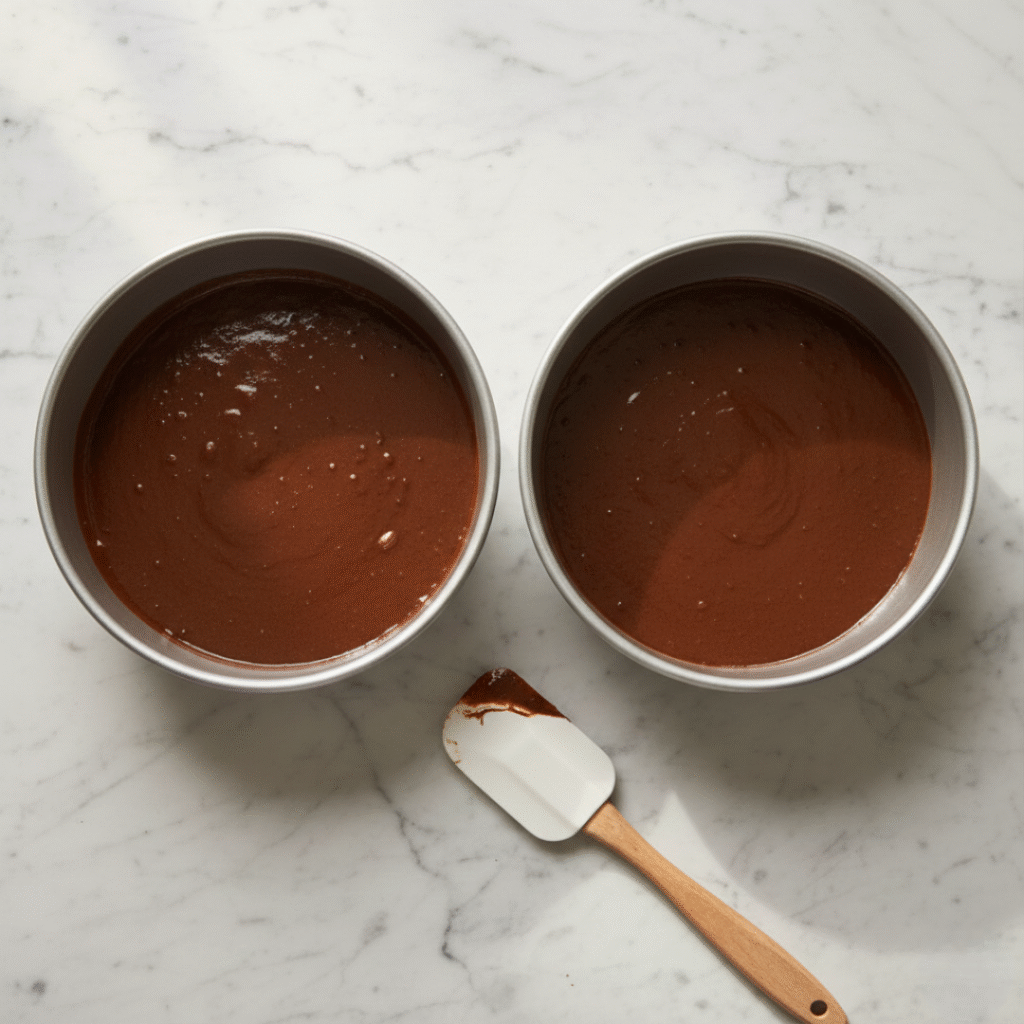
Fold in your chocolate chips with a spatula. Gently does it—you’re not trying to deflate all the air you just mixed in.
Baking Time
Split that batter between your two pans. Eyeball it or use a scale if you’re picky about having even layers. Tap the pans on the counter a couple times to knock out big air bubbles.
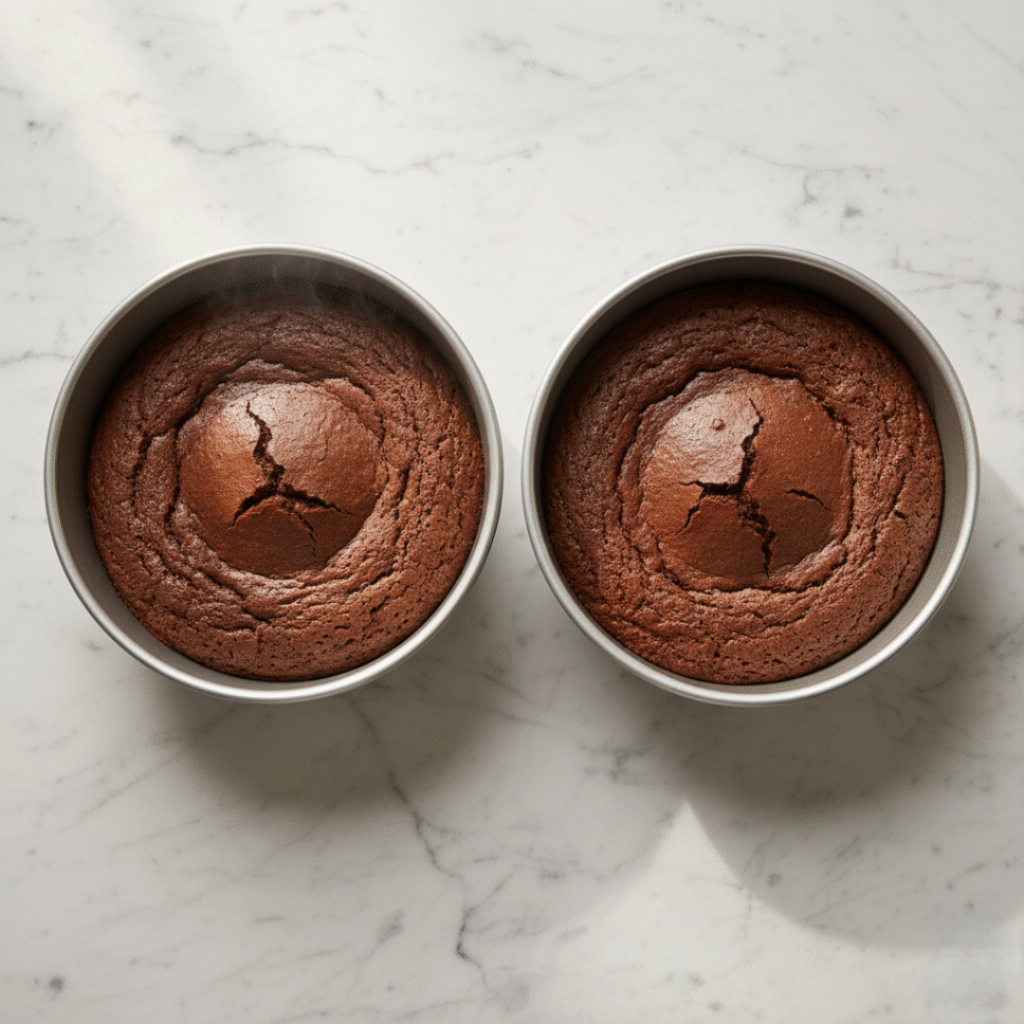
Slide them into your oven and set a timer for 28 minutes. Don’t open the oven door before then—I know it’s tempting, but every time you peek, you let out heat and your cakes might sink in the middle.
After 28 minutes, stick a toothpick in the center. It should come out with a few moist crumbs stuck to it. If it’s got wet batter, give it another three or four minutes. If it comes out totally clean, you might’ve gone a touch too long, but it’ll still taste great.
Cooling Down
Let those cakes hang out in their pans for about 15 minutes. Then run a butter knife around the edges and flip them onto wire cooling racks.
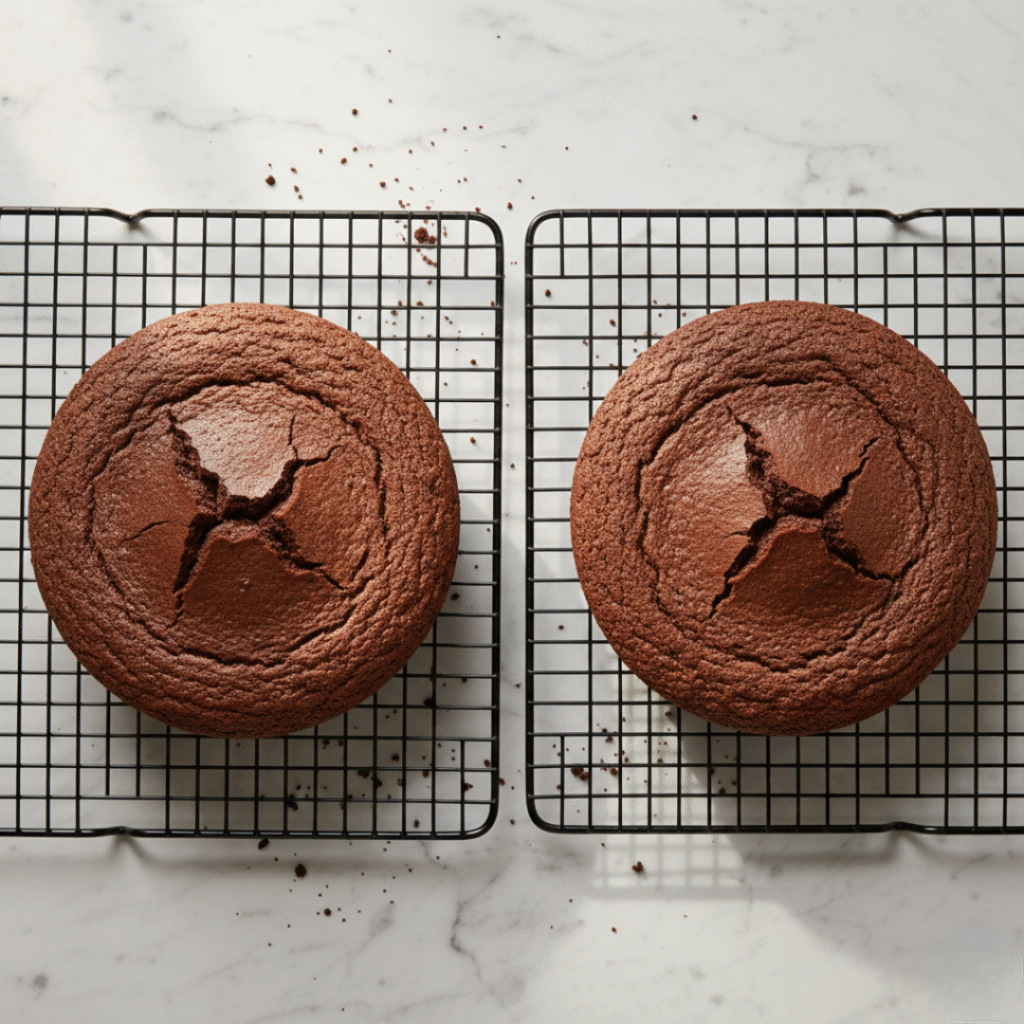
They need to cool completely before you frost them—we’re talking at least an hour. Go watch an episode of something. Do the dishes. Whatever keeps you from rushing this part.
Frosting That’s Actually Good
Sure, you could use canned frosting. It’s fine. But if you’ve already gone through the trouble of upgrading your cake, why not take ten more minutes to make frosting that’ll knock people’s socks off?
Beat a cup of softened butter (seriously, let it sit out until it’s squishy) until it’s fluffy. Takes about three or four minutes with a mixer. Add half a cup of cocoa powder and a pinch of salt, beat that in. Then start adding powdered sugar—you’ll need somewhere between three and four cups depending on how thick you want it.
Pour in a little heavy cream as you go to keep it from being too stiff. Add a couple teaspoons of vanilla at the end. Beat it until it’s light and fluffy and looks like frosting instead of chocolate butter.
Spread about a cup on your first layer, plop the second layer on top, then frost the whole thing. Use an offset spatula if you have one, a butter knife if you don’t. Dip it in hot water and wipe it off between swipes if you want it smooth.
Tricks That Actually Matter
Room temperature ingredients mix better. Cold eggs and cold sour cream create lumpy batter. Leave them out for 30 minutes before you start. If you forgot, put your eggs in a bowl of warm water for five minutes.
Your oven lies. Most ovens run hot or cold. Grab a cheap oven thermometer and check what temperature you’re actually baking at. Makes a huge difference.
Bundt pans are your friend. Don’t feel like dealing with layers and frosting? Dump all this batter into a greased bundt pan and bake for 45-50 minutes. Dust it with powdered sugar when it cools. Done.
Cake strips prevent domes. Wet some fabric strips and wrap them around your pans before baking. They insulate the sides so the edges don’t set faster than the middle. Your cakes come out flat instead of domed.
Add booze for grown-up cake. Replace a quarter cup of your coffee with Kahlua or bourbon. Takes it to another level for dinner parties.
Keeping Your Cake Fresh
Leave it covered on the counter for up to three days. Use a cake dome if you’ve got one, or just loosely tent some foil over it. Don’t wrap it tight—traps moisture and makes frosting weird and slippery.
Fridge works too, especially if your house is hot or you used cream cheese frosting. It’ll last almost a week. Just pull it out 20 minutes before serving so it’s not rock-hard and cold.
Freezer’s great for planning ahead. Wrap unfrosted layers really well in plastic wrap, then foil. They’ll keep for three months easy. Thaw them overnight in the fridge, then frost when you’re ready.
When Things Go Wrong
Cake sank in the middle? Probably opened the oven too early, or your oven was too hot and the outside set before the inside finished cooking. Still tastes fine—just frost it and nobody will know.
Dry cake? You overbaked it. Set your timer for less next time, and pull it when the toothpick has a few crumbs on it, not when it’s bone dry.
Frosting’s too soft? Add more powdered sugar. Too stiff? Add more cream, a tablespoon at a time.
Dense and heavy instead of fluffy? You probably overmixed the batter. Mix just until the flour disappears, then stop.
Questions Everyone Asks
Does this work with other flavors? Totally. Yellow cake, vanilla, strawberry—same tricks apply. Just swap the coffee for milk or juice that matches your flavor.
Can I make cupcakes? Yeah, this recipe makes about 24 cupcakes. Bake at 350 for 18-20 minutes. They’ll be incredibly moist and tender.
What if I don’t have a mixer? Whisk by hand. Your arm will get tired, but it works. Mix for an extra minute to make up for less power.
How far ahead can I bake this? Bake your layers two days ahead and store them wrapped at room temperature. Frost the day you’re serving it.
My frosting looks grainy. Your butter wasn’t soft enough. Let it sit out longer next time. You can try warming your bowl slightly with a hairdryer while mixing to smooth it out.
Can I halve this recipe? Sure, but honestly box mixes are already portioned out. Easier to make the whole thing and freeze half for later.
Other Cakes Worth Trying
Once you nail this, branch out to Mississippi Mud Cake, Texas Sheet Cake, Molten Chocolate Cakes, Black Forest Cake, or even Chocolate Zucchini Cake. All of them benefit from the same principles—better ingredients, proper technique, and not being afraid to deviate from basic instructions.
The Bottom Line
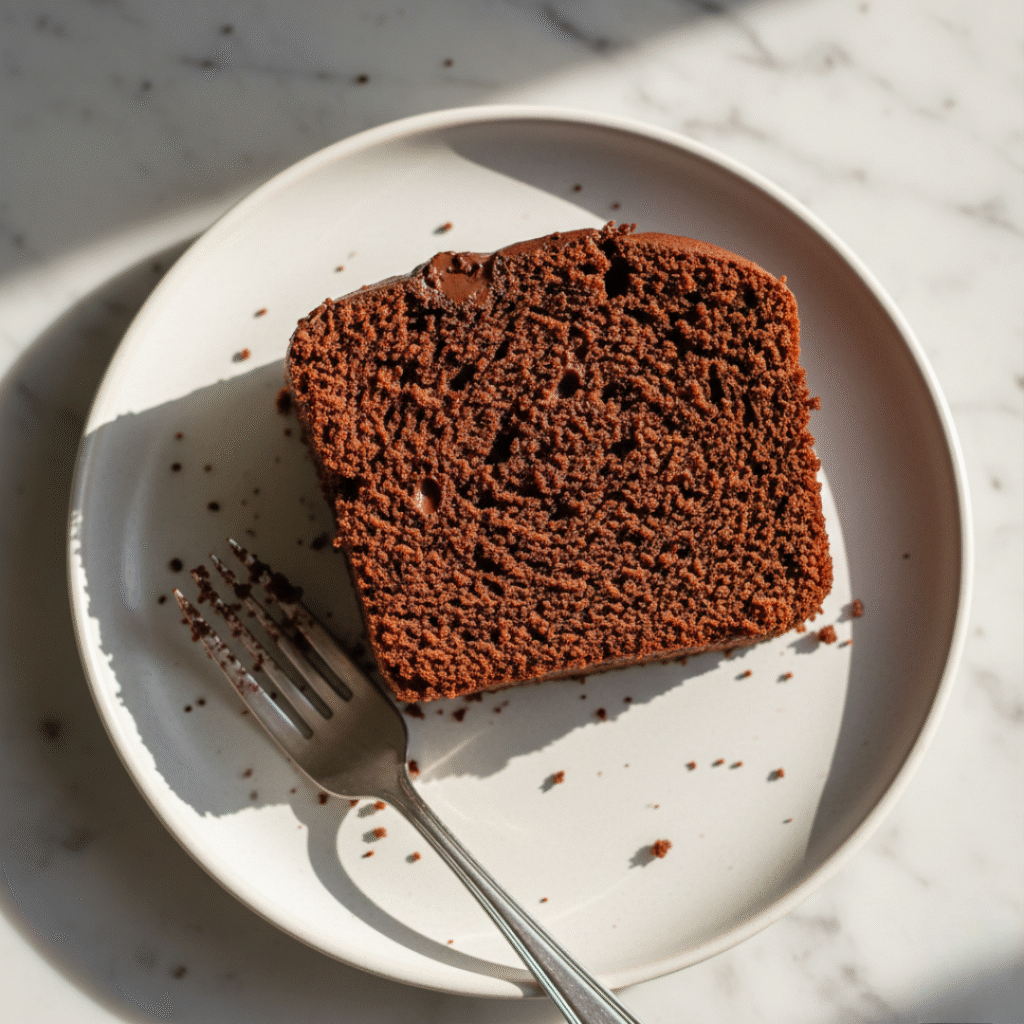
Nobody needs to know you started with a box. They’re just going to taste this incredibly moist, rich, deeply chocolatey cake and assume you spent all afternoon baking from scratch. Let them think that. You’ll know you spent 15 minutes doing simple swaps that made all the difference.
The goal here isn’t perfection. It’s making something delicious without losing your mind over complicated recipes and precise measurements. Box mixes are actually brilliant for that—the hard work’s done, you’re just elevating it from “fine” to “fantastic.”
Next time someone asks you to bring dessert, grab that box from your pantry with confidence. Add your coffee, your butter, your extra eggs. Mix it up, bake it, frost it. Watch people go back for seconds. This is the kind of baking that actually fits into real life—easy enough for a Tuesday, impressive enough for a birthday.
Leave a Comment