
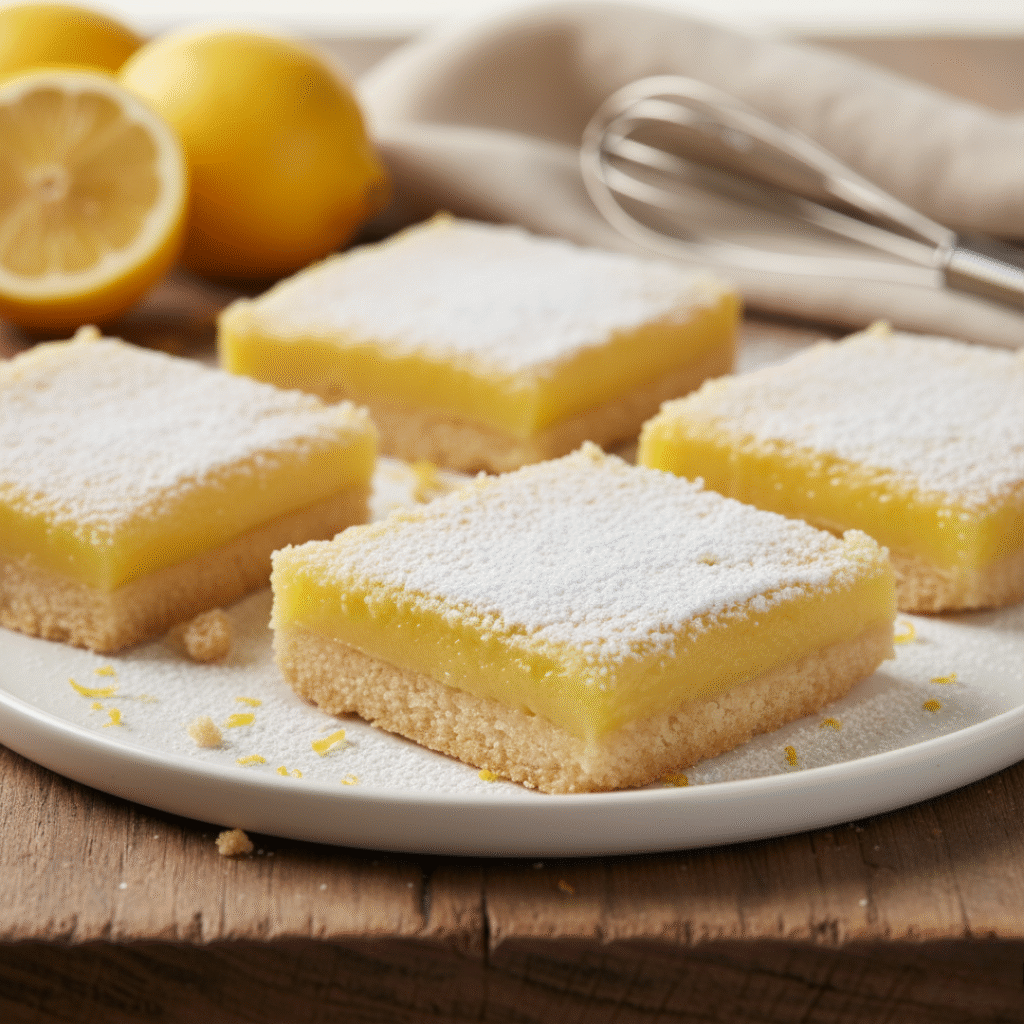
Close your eyes for a second. Imagine biting into something that tastes like like a fresh start in every bite. The first thing you feel is powdered sugar melting on your lips. Then your teeth sink through creamy lemon filling that’s both sweet and mouth-puckeringly tart. Finally, you hit buttery crust that crumbles like the world’s best cookie.
That’s a lemon bar done right.
Now open your eyes. Because today, you’re making them. And I’m telling you right now – this is easier than you think. Way easier.
No mixer needed. No complicated steps. No fails. Just you, some lemons, and a little bit of time. That’s all it takes to make something that’ll have people begging for the recipe.
Why These Lemon Bars Are Special
You know that feeling when you bite into something and your whole face lights up? When your eyes close automatically because the taste is just that good? That’s what happens with proper lemon bars.
The secret isn’t in fancy ingredients. It’s in the balance.
Think about it like this. The crust is rich and buttery. Super rich. Almost too rich on its own. But then you add that tart lemon filling on top. The tartness cuts through all that butter. Balances it out. Makes it perfect.
And here’s what most people don’t get. The filling can’t be too sweet. If it’s too sweet, it’s just sugar. Boring. But if it’s too tart, your face scrunches up like you bit a raw lemon. The magic happens right in the middle. Sweet enough to taste good. Tart enough to wake up your taste buds.
The texture matters too. That crust needs to crumble when you bite it but hold together when you pick it up. The filling needs to be creamy and smooth, not rubbery or runny. Everything working together. That’s the goal.
Quick Guide
Table of Contents
What You Need (Nothing Fancy)
For the Crust:
- 2 cups regular flour
- 1/2 cup powdered sugar
- 1 cup butter (must be cold – straight from fridge)
- 1/4 teaspoon salt
For the Lemon Part:
- 4 eggs
- 2 cups white sugar
- 1/3 cup flour
- 2/3 cup fresh lemon juice (4 to 5 lemons)
- 1 tablespoon lemon zest (the yellow part scraped off)
- Tiny pinch of salt
To Make It Pretty:
- Extra powdered sugar
What You’ll Use:
- One 9×13 baking pan
- Parchment paper
- Two mixing bowls
- A whisk (or just a fork works too)
- Something to zest the lemon
See? Nothing crazy. Everything’s probably in your kitchen right now.
Step 1: Heat the Oven, Prep the Pan
Turn your oven to 350°F. Do this first. Give it fifteen minutes to get hot. A cold oven will wreck your timing.
Now grab your pan. Rip off a big piece of parchment paper. Line the bottom of the pan with it. Let the paper hang over two opposite sides. These overhangs are handles. Later, you’ll grab them and lift everything out in one piece. No fighting. No broken bars. Just easy.
This trick is a game-changer. Trust me on this.
Step 2: Make the Crust (The Foundation)
Grab a big bowl. Dump in your flour, powdered sugar, and salt. Mix it with your hand. Just swirl it around. Break up any lumps in the sugar.
Now the butter. This part is important. The butter MUST be cold. Not soft. Not room temperature. Cold. Take it out of the fridge and immediately cut it into small chunks. Like the size of grapes.
Throw those cold butter chunks into the flour.
Now use your hands. This is the fun part. Grab the butter pieces. Squeeze them. Smash them flat between your fingers. Rub them into the flour. It feels weird at first. Messy. Like nothing’s happening.
Keep going.
Your fingers warm the butter slightly. The butter starts coating the flour. After three or four minutes, something amazing happens. The whole mixture changes. It goes from dry flour with butter chunks to something that looks like damp sand. Like the sand at the beach when a wave just rolled over it.
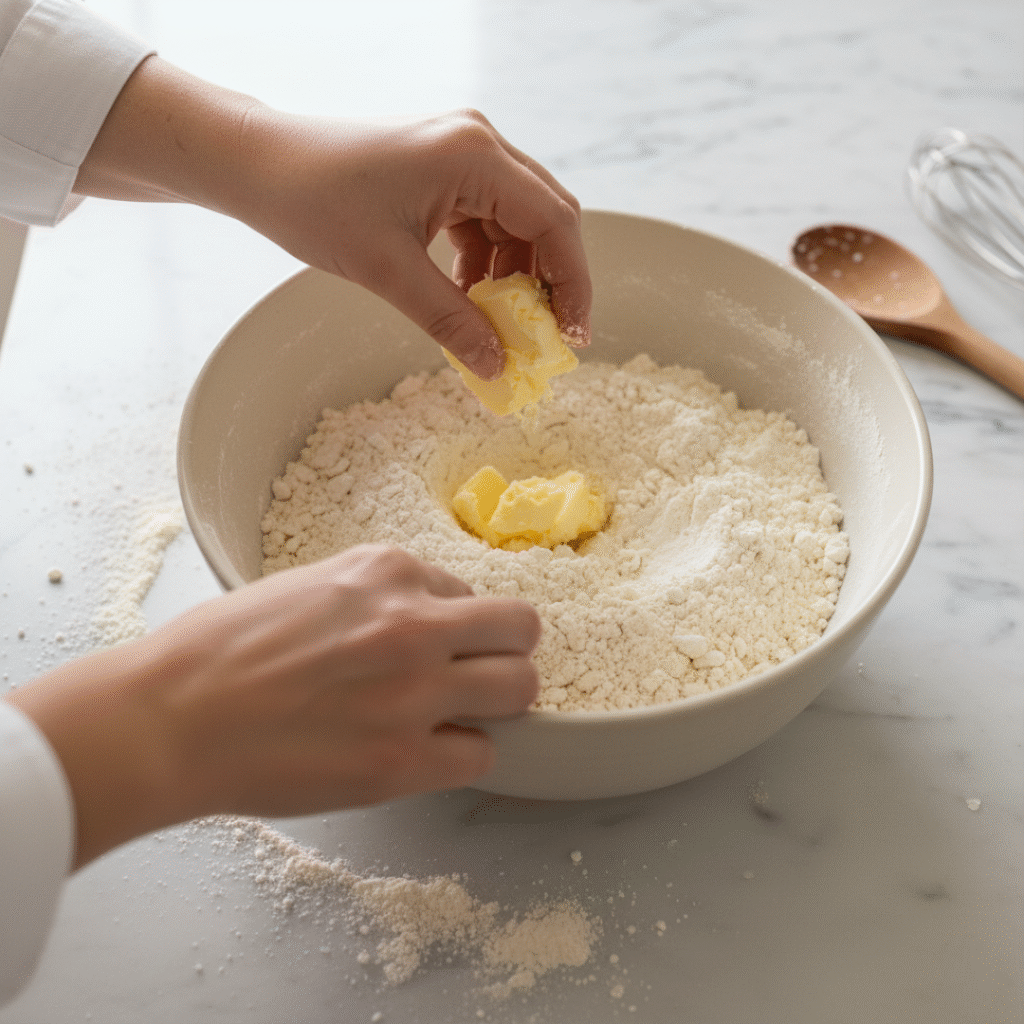
Grab a handful and squeeze. Does it hold together? Good. You’re done. Some butter pieces will still be visible. About the size of peas. That’s exactly right.
Warning: Don’t skip the hand-mixing. Yeah, you could use a food processor. But hands work better. You feel when it’s ready. Machines over-mix.
Step 3: Press It Down, Bake It
Dump all that crumbly mixture into your lined pan. Now press it down. Use your hands. Really push. This isn’t a gentle suggestion. Pack it tight.
Spread it evenly across the whole bottom. Push it into the corners. No thin spots anywhere. Make it flat and even. About a quarter inch thick everywhere.
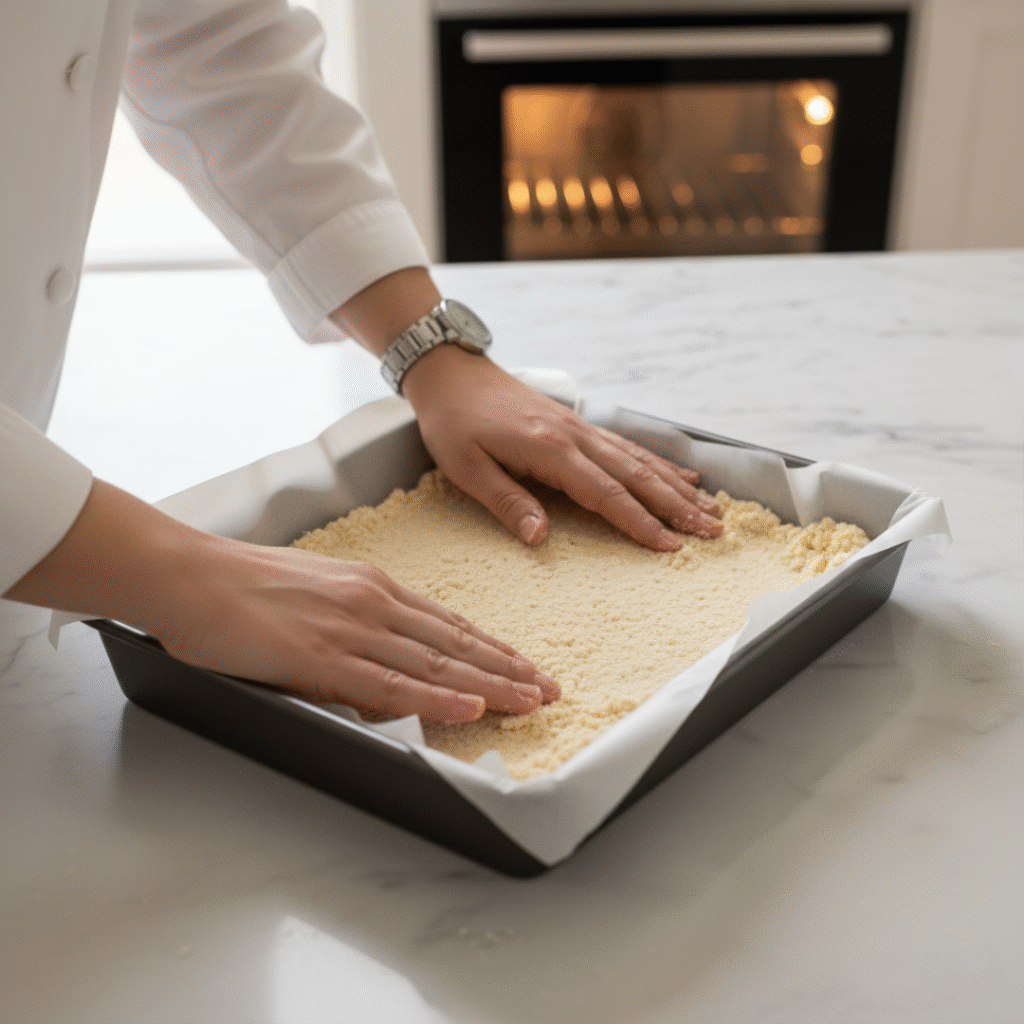
Important: Press HARD. If you don’t pack it tight, it’ll crumble apart later when you try to cut it.
Slide the pan into your hot oven. Set a timer for 18 minutes.
Now watch. Well, not the whole time. But check it at 18 minutes. The edges should start turning golden. Like the color of beach sand. The middle might still look pale. That’s fine. Pull it out when you see that golden color at the edges.
The smell hits you fast. Warm butter. Toasted sugar. It smells like cookies baking. Your mouth starts watering. That’s normal.
Step 4: The Lemon Filling
While the crust bakes, make the filling. This is where those fresh lemons come in.
Take a lemon. Put it on your counter. Now roll it back and forth, pressing down HARD with your palm. Really crush it. You’re breaking up the juice sacs inside. This makes it easier to squeeze.
Do this with all your lemons.
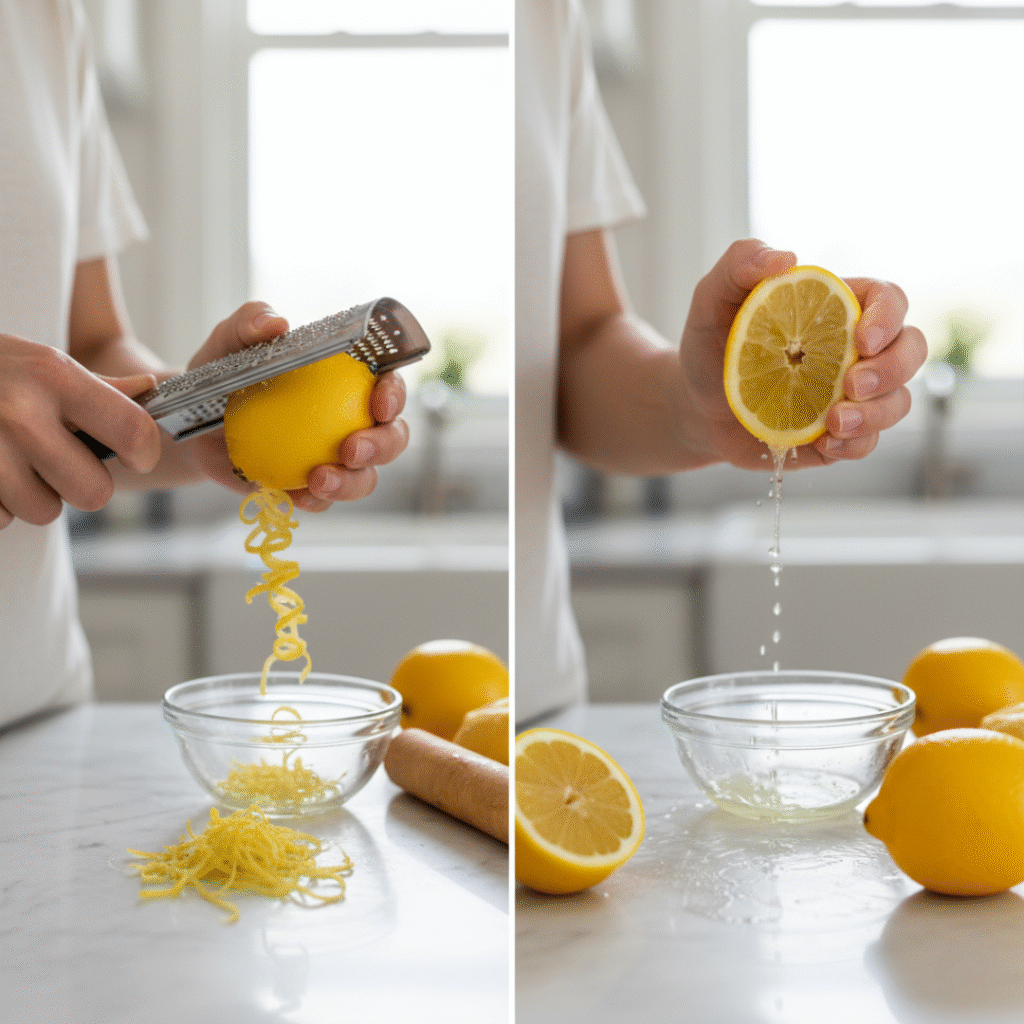
Cut them in half. Squeeze the juice into a bowl. You need about two-thirds of a cup. Pour it through a strainer to catch the seeds. But keep the pulp. That pulp is flavor.
Before you cut one lemon, zest it. Take your grater. The small holes, not the big ones. Run the lemon across it. Only scrape the yellow part. When you see white, stop. The white is bitter. The yellow is pure lemon oil. It smells incredible.
Now crack your eggs into a bowl. Add the white sugar. Take a whisk (or a fork). Whisk them together until they blend and get slightly thick. About sixty seconds. Your arm might get tired. Keep going.
Pour in that lemon juice you squeezed. Add the zest. Watch what happens. The whole thing turns this gorgeous bright yellow. Like sunshine in a bowl. The smell is incredible. Fresh. Bright. Clean.
Add the flour and tiny pinch of salt. Whisk again. Keep whisking until it’s completely smooth. No lumps floating around. No streaks of unmixed egg. Just silky, smooth, bright yellow liquid.
Pro tip: Fresh lemons make ALL the difference. Bottled lemon juice tastes fake. Like chemicals. Real lemons taste like sunshine. Worth the extra effort.
Step 5: Pour It On Hot
Your crust comes out of the oven. It’s hot. The edges are golden. Perfect.
Don’t let it cool. Not even a little. Pour that lemon filling over the hot crust RIGHT NOW.
Start pouring in the center. Slowly. The filling spreads out by itself. It flows like water, finding its own level. Just let it go. If it doesn’t quite reach the corners, gently nudge it with a spoon.
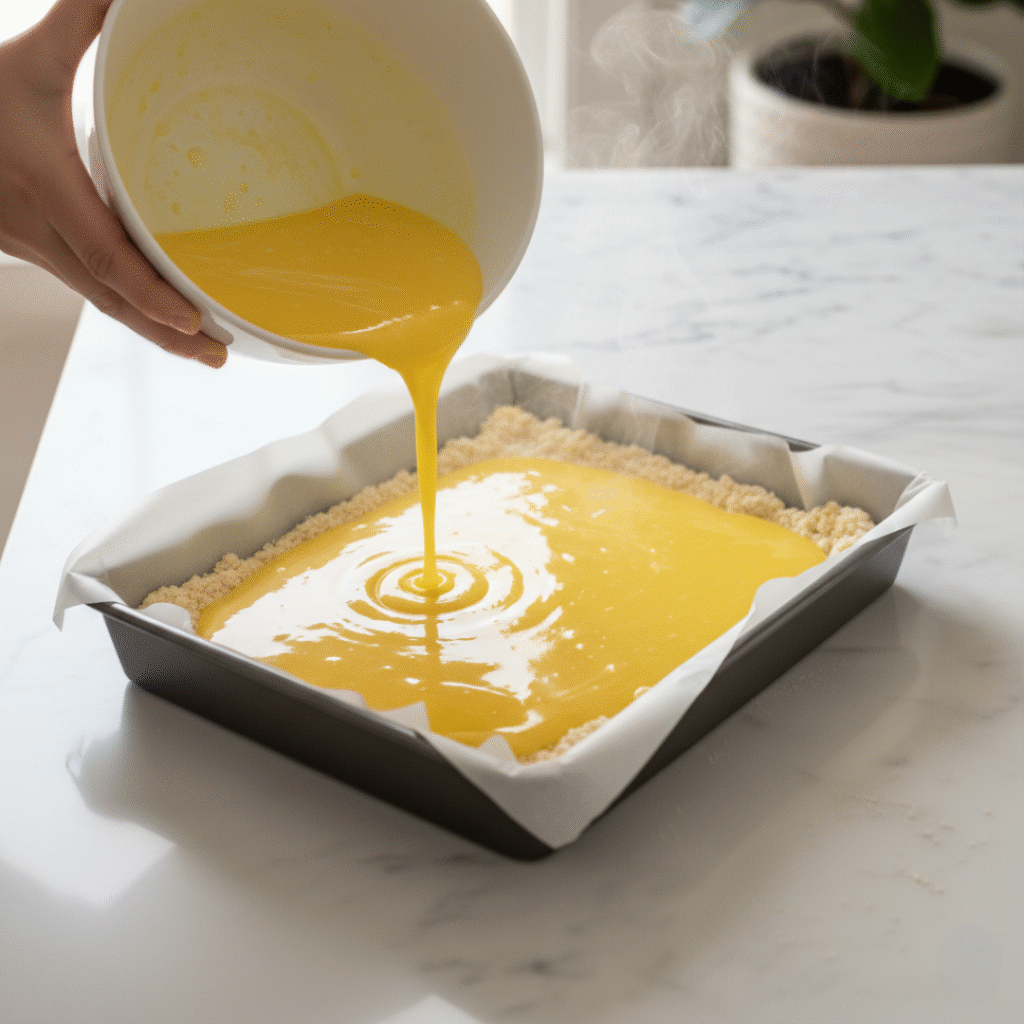
Look at what you’ve got now. Golden crust on the bottom. Bright sunshine-yellow filling on top. The contrast is beautiful. Already looks amazing.
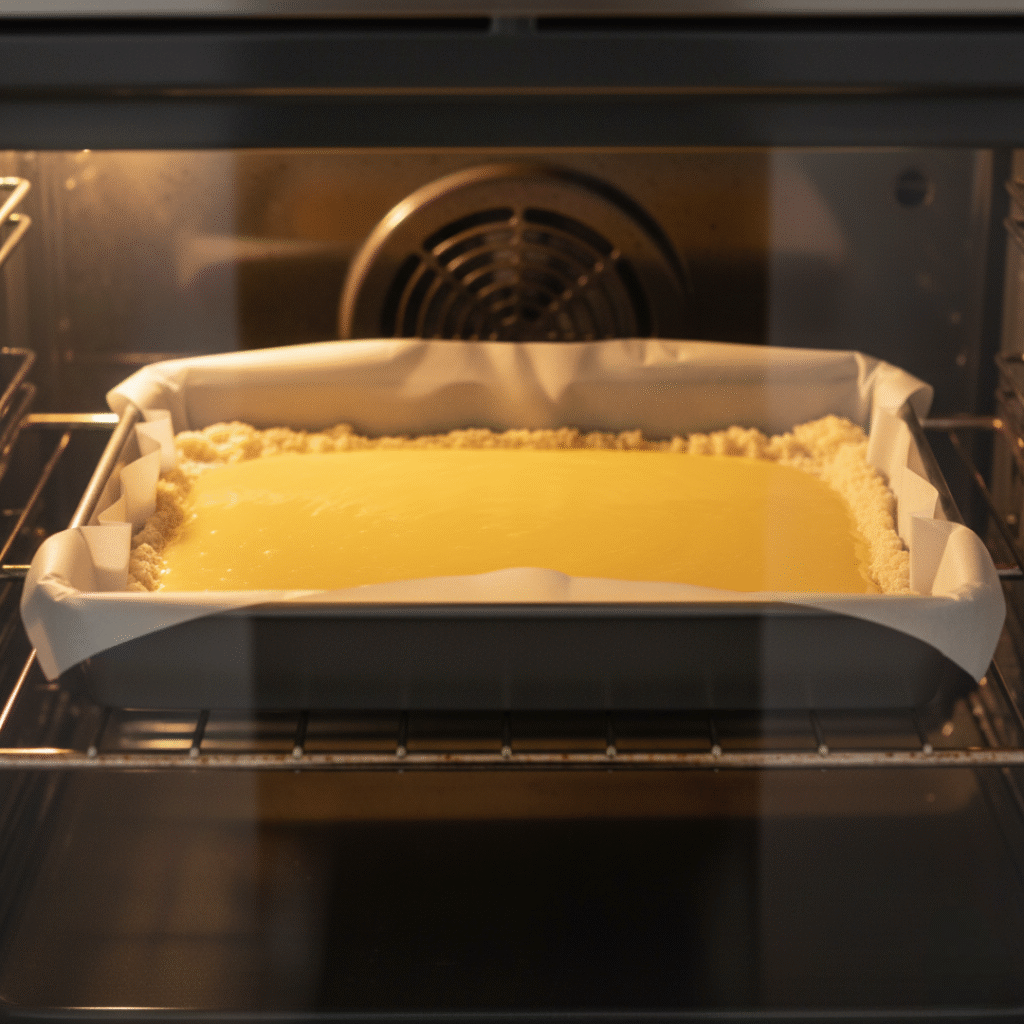
Now carefully pick up the pan. Both hands. The filling is liquid. It’ll splash everywhere if you tilt it. Move slowly. Walk slowly. Slide it back into the oven. Middle rack.
Warning: This is the most dangerous moment. That filling is pure liquid. If you rush, it spills. Move like you’re carrying something precious. Because you are.
Step 6: Bake Until It Jiggles Just Right
Set your timer for 22 minutes.
The filling needs to set. But here’s the tricky part. You can’t overbake it. Overbaked lemon bars get tough and rubbery. Like trying to chew an eraser. Gross.
At 22 minutes, open the oven. Look at the bars. The edges should look set. Firm. They might pull away from the pan slightly.
Now gently shake the pan. Just a tiny shake. Watch the center of the filling. Does it jiggle? It should. But just a little. Like Jell-O that’s almost set but not quite.
If the whole thing is sloshing around like water, close the oven. Give it two more minutes.
If there’s just a tiny wobble in the very center – like a quarter-sized spot – pull it out immediately.
Key point: When in doubt, underbake slightly. The bars keep cooking from the pan’s heat after you take them out. Underbaked bars are creamy and smooth. Overbaked bars are rubbery and sad.
Step 7: Wait (The Hardest Part)
Pull the pan out. Set it on the counter. Or on a cooling rack if you have one.
Now. Deep breath. You have to wait.
I know. They’re right there. Looking perfect. Smelling like heaven. Your mouth is watering. You want to cut into them RIGHT NOW.
Don’t.
They need to cool completely. And I mean completely. Room temperature. That takes about two hours just sitting there.
Want to speed it up? After an hour at room temperature, stick them in the fridge for another hour. That works.
If you try to cut them hot, disaster strikes. The filling is too soft. It’ll squish everywhere. Smear all over. Make a huge mess. Your perfect bars will look like someone stepped on them.
As they cool, watch the transformation. The filling goes from wet and shiny to matte and smooth. The surface changes. It gets that slight skin on top. The whole thing firms up. When you look at it and think “that looks solid,” they’re ready.
Use this waiting time to clean up. Wash your bowls. Put away ingredients. Wipe the counter. Makes the time pass faster.
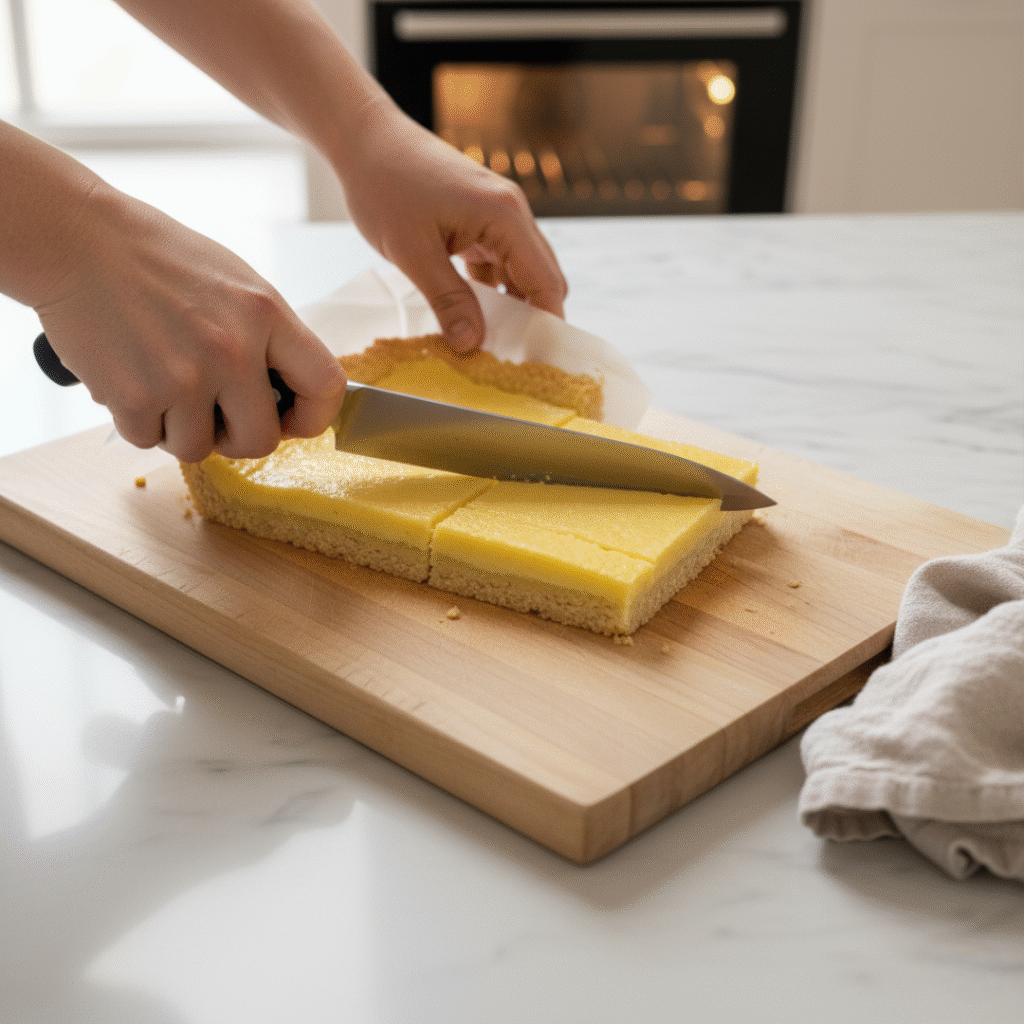
Step 8: Cut Perfect Squares (The Right Way)
They’re cool now. Completely cool. Time for the best part.
Grab those parchment paper handles. Lift up. The whole slab comes out of the pan in one piece. Set it on a cutting board.
Get your sharpest knife. The biggest one you have.
Here’s the secret to clean cuts. After every single slice, wipe the knife with a damp towel. Every. Single. Cut.
Why? The lemon filling sticks to the blade. If you don’t wipe it off, each cut gets messier. The filling smears. Your neat squares turn into a disaster.
Wipe the knife. Cut. Wipe the knife. Cut. Keep doing this.
Cut them however you want. Four cuts lengthwise. Six cuts the other way. That gives you 24 perfect squares.
Want bigger bars for a dessert? Make fewer cuts. Want tiny bites for a party? Make more cuts. Your bars. Your choice.
Each cut reveals that perfect cross-section. Golden buttery crust on the bottom. Bright yellow silky filling on top. Two distinct layers. Beautiful.
Pro tip: Use a ruler if you want them all the exact same size. Makes them look extra professional.
Step 9: The Snow Effect (Don’t Skip This)
Grab powdered sugar. Put a handful in a small strainer. The kind with tiny holes.
Hold the strainer over your cut bars. Tap the side gently with your finger.
Watch the magic. White powder floats down. Drifts through the air. Settles on the bars like fresh snow. The contrast is gorgeous. Pure white on bright yellow.
This isn’t just for looks. Though they do look bakery-perfect now. That powdered sugar adds a hit of sweetness right when your lips touch the bar. Then you get the tart lemon. Then the buttery crust. All three flavors in one bite.
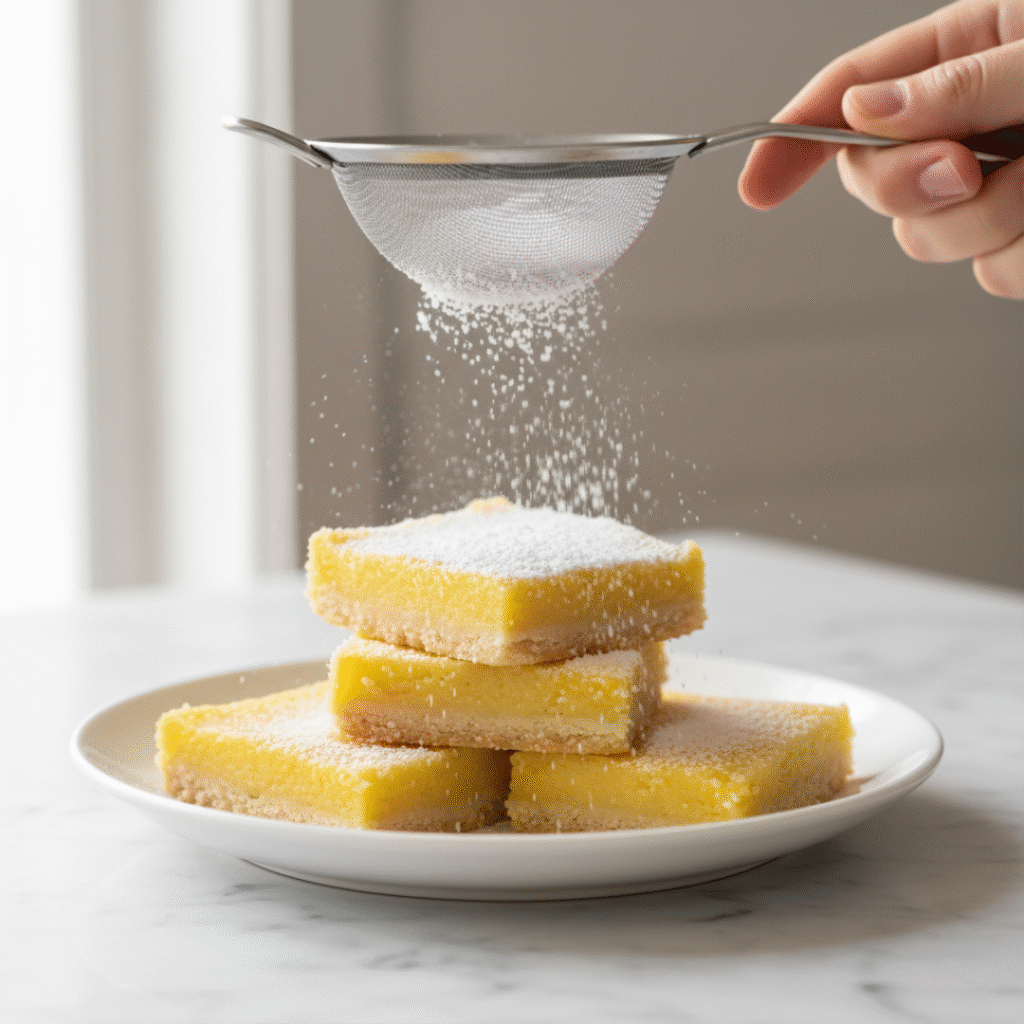
Don’t dust them too early. If they’re even slightly warm, the sugar melts and disappears. Wait until they’re completely cool. Then the sugar stays powder-white and pretty.
Why Every Step Mattered.
Let’s talk about what just happened. Why each thing we did was important.
Baking the crust first: This gave it a head start. It got firm and crispy before wet filling touched it. If you mixed them together from the start, the crust would soak up the filling. Turn soggy. Nobody wants soggy crust.
Cold butter in the crust: Cold butter doesn’t fully blend into the flour. It stays in little pieces. When those pieces hit the oven heat, they melt. Leave tiny air pockets behind. Those pockets make the crust tender and crumbly instead of tough and dense.
Fresh lemon juice: Real lemons taste bright and complex. Sweet and tart at the same time. Bottled juice tastes flat. Artificial. One bite and you can tell the difference.
The lemon zest: Those yellow peels are packed with lemon oil. Super concentrated flavor. A little bit adds huge lemon punch. Way more than just juice alone.
Flour in the filling: This thickens everything as it bakes. Turns liquid into something firm you can slice. Without it, you’d have lemon soup.
Not overbaking: Pulling the bars when there’s still that tiny jiggle keeps the filling creamy. Like soft custard. Overbaking makes it rubbery. Big difference.
Pro Tips That Actually Help
Lemons not juicy enough? Microwave them for 10 seconds before rolling and cutting. The heat loosens everything inside. You’ll get twice as much juice.
Cold eggs don’t mix well. Take them out of the fridge 30 minutes early. Forgot? Put them in a bowl of warm water for 5 minutes. Problem solved.
Want extra lemon flavor? Add another tablespoon of zest. Or use Meyer lemons instead of regular ones. Meyer lemons are sweeter and more floral.
Too tart for you? Cut the lemon juice down by 2 tablespoons. Add a teaspoon of vanilla extract instead. Vanilla softens the tartness without killing the lemon flavor.
Storing them: Put them in a container with a lid. Keep in the fridge. They last a week easy. Maybe longer but they never last that long because everyone eats them.
Freezing them: You can freeze these for up to 3 months. Wrap them individually in plastic wrap first. Then put them all in a freezer bag. Thaw in the fridge overnight.
Serving These Golden Beauties
These bars need nothing else. No whipped cream. No ice cream. No berries on top. They’re perfect exactly as they are.
You can serve them cold straight from the fridge. They’re firmer that way. More refreshing. Great on a hot day.
Or let them sit at room temperature for 20 minutes. The filling softens slightly. The flavors come out stronger. The lemon taste really shines.
Put them on a pretty plate. Arrange them nicely. Watch what happens.
People see them. Eyes light up. They grab one. Take a bite. Their eyes close. A smile spreads across their face. Maybe a little “mmm” sound.
That’s the sound of success.
These work for everything. Birthday parties. Potlucks. Bake sales. Random Tuesday afternoon when you want something sweet. Bring them to work. Become the office hero.
They travel well. Don’t fall apart in a container. Look fancy. Taste expensive. But cost almost nothing to make.
Main Dishes to Serve with Lemon Bars
Light Mains: Grilled chicken salad, baked salmon, shrimp pasta, Greek salad with chicken, chicken wraps, tuna sandwiches, turkey club, caprese panini
Comfort Foods: Roasted chicken, quiche, lasagna, mac and cheese, chicken pot pie, stuffed peppers, baked ziti
Soups: Tomato soup with grilled cheese, chicken noodle soup, minestrone, broccoli cheddar soup, creamy mushroom soup
Brunch Options: Eggs benedict, French toast, breakfast casserole, avocado toast, pancakes, waffles, smoked salmon bagels
Casual Foods: BBQ chicken, fish tacos, pizza, burgers, chicken wings, sliders
Asian-Inspired: Teriyaki chicken bowls, fried rice, lo mein, orange chicken, pad thai
Party Foods: Finger sandwiches, mini quiches, cheese platters, bruschetta, meatballs (chicken/beef)
The Real Victory Here
Stop for a second. Think about what you just did.
You made bakery-quality lemon bars. From scratch. In your own kitchen. With your own hands.
No special training. No fancy equipment. No expensive ingredients. Just basic stuff and a little time.
That buttery crust that melts in your mouth. That silky filling that tastes like concentrated sunshine. That perfect balance of sweet and tart. You created that.
People are going to eat these and think you bought them from some fancy bakery. Or that you’re some kind of baking genius. Let them think that. You earned it.
The best part? Each time you make these, they get easier. You’ll learn exactly how your oven runs. You’ll figure out your perfect level of tartness. You’ll get faster at the steps.
Pretty soon, you’ll be making these without even looking at the recipe. Just muscle memory. Hands knowing what to do.

How to Make Lemon Bars Easy Recipe
Equipment
- 9×13 inch baking pan
- Parchment paper
- Large mixing bowls (2)
- Whisk or fork
- Fine grater or zester
- Sharp knife
- Measuring cups and spoons
- Cooling rack
Ingredients
Shortbread Crust:
- 2 cups all-purpose flour
- ½ cup powdered sugar
- 1 cup unsalted butter cold and cubed
- ¼ teaspoon salt
Lemon Filling:
- 4 large eggs
- 2 cups granulated sugar
- ⅓ cup all-purpose flour
- ⅔ cup fresh lemon juice from 4-5 lemons
- 1 tablespoon lemon zest
- Pinch of salt
Topping:
- Powdered sugar for dusting
INSTRUCTIONS
Prepare:
- Heat oven to 350°F. Line a 9×13 pan with parchment paper, leaving overhang on two sides.
Make the Crust:
- Mix flour, powdered sugar, and salt in a bowl.
- Add cold butter cubes. Work with fingers until mixture looks like damp sand.
- Press firmly into prepared pan, making an even layer.
- Bake 18-20 minutes until edges turn light golden.
Make the Filling:
- While crust bakes, whisk eggs and sugar until blended.
- Add lemon juice, zest, flour, and salt. Whisk until smooth.
Assemble and Bake:
- Pour filling over hot crust immediately.
- Bake 22-25 minutes until edges are set but center still jiggles slightly.
- Cool completely at room temperature (2 hours) or refrigerate after 1 hour.
Finish:
- Lift from pan using parchment handles.
- Cut into squares, wiping knife between cuts.
- Dust with powdered sugar before serving.
Notes
- Fresh lemons work much better than bottled juice for authentic flavor
- The slight jiggle in the center when you remove them from the oven is what keeps the filling creamy instead of rubbery
- Cold butter creates the flaky, crumbly texture in the crust – room temperature butter makes it tough
- Store in an airtight container in the refrigerator for up to one week
- These bars can be frozen for up to three months when wrapped individually
- For sweeter bars, reduce lemon juice by two tablespoons
- For more intense lemon flavor, add extra tablespoon of zest
- Wiping the knife between cuts prevents messy edges and keeps squares looking clean
- Let bars sit at room temperature for 15 minutes before serving for best flavor
Your New Superpower
Next time someone says “bring dessert,” you know what to do. These lemon bars are your secret weapon now.
They look impressive. They taste incredible. They’re not that hard to make. But nobody needs to know that last part.
So keep some lemons in your house. Keep butter in the fridge. When the craving hits. When you need to impress someone. When you just want to make your day a little brighter.
You’ve got this recipe. You’ve got the knowledge. You’ve got the power.
Go bake something that makes you smile. Your kitchen is waiting.
Leave a Comment