
CHOCOLATE Brownies are everywhere these days. Every bakery has them. Every cafe sells them. Your neighbor probably makes them for every party. But most brownies? They’re just okay. Some taste dry. Some are way too sweet. And some just don’t have that chocolate kick you want.
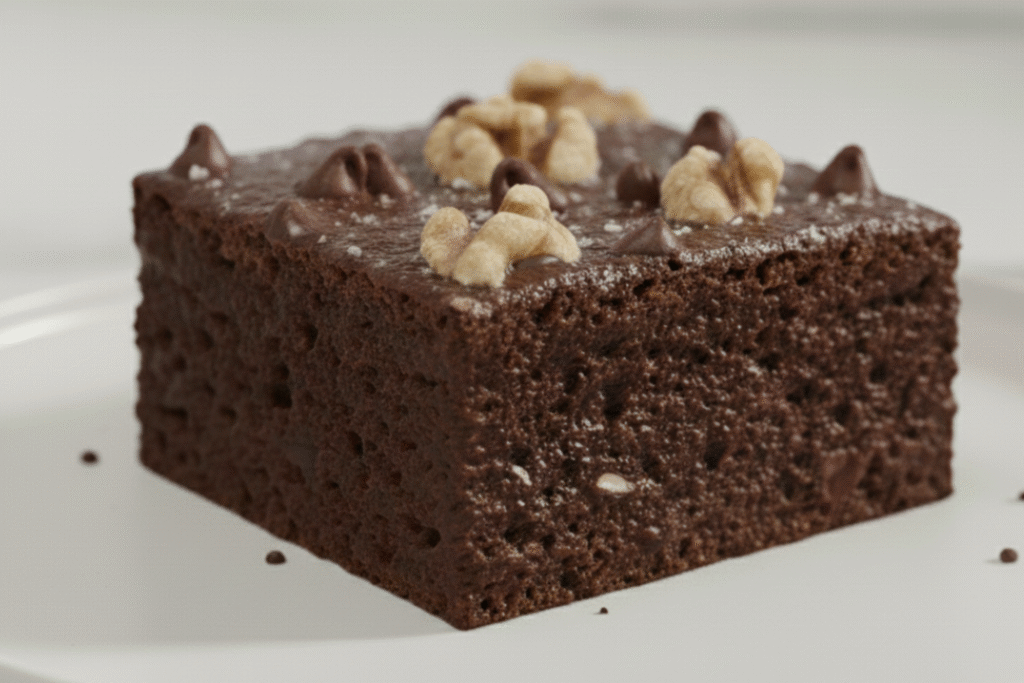
Making really good brownies isn’t that hard though. You just need the right recipe and a few tricks. That’s what this is about. Brownies that come out fudgy in the middle, a bit chewy on the edges, with tons of chocolate flavor. And yeah, that crackly top everyone loves.
Nothing complicated here. No fancy tools. No ingredients you can’t find at a regular store. Just stuff you probably already have in your kitchen.
Why These Brownies Are Better
Most recipes use cocoa powder OR melted chocolate. This one uses both. That’s the big difference. Cocoa powder packs a lot of chocolate punch. Melted chocolate makes things rich and fudgy. Put them together and you get way more flavor.
The other thing is how much you mix everything. Lots of people mess this up. They mix and mix and mix because they think it needs to be smooth. But too much mixing makes brownies tough. You want to mix just enough and then stop.
And the last thing? Don’t bake them too long. Most people do. They think brownies need to be totally done in the oven. Nope. Pull them out when they still look a tiny bit underdone. They keep cooking after you take them out.
What You Need to Get
Main stuff:
- 3/4 cup butter (get the unsalted kind)
- 8 ounces dark chocolate (chop it up into chunks)
- 1½ cups sugar (regular white sugar)
- 3 eggs (not cold from the fridge)
- 2 teaspoons vanilla
- 1 cup flour
- 1/2 cup cocoa powder (unsweetened)
- 1/2 teaspoon salt
- 1/4 teaspoon baking powder
If you want extras:
- Chocolate chips (about a cup)
- Nuts like walnuts or pecans (chop them up)
- Tiny bit of instant coffee powder (makes chocolate stronger)
- Sea salt to put on top
- White chocolate chunks
- Crushed up Oreos
- Peanut butter chips
How to Make Them
Getting Started
First thing, turn your oven to 350°F. Let it heat up for like 15 minutes. Some ovens don’t heat up right, so give it time.
Cut parchment paper to fit your pan. Let it hang over the sides a bit. You’ll grab those later to pull everything out. Makes life way easier.
Take your eggs out of the fridge now. They need to warm up. Cold eggs don’t work as well.
Melting the Chocolate
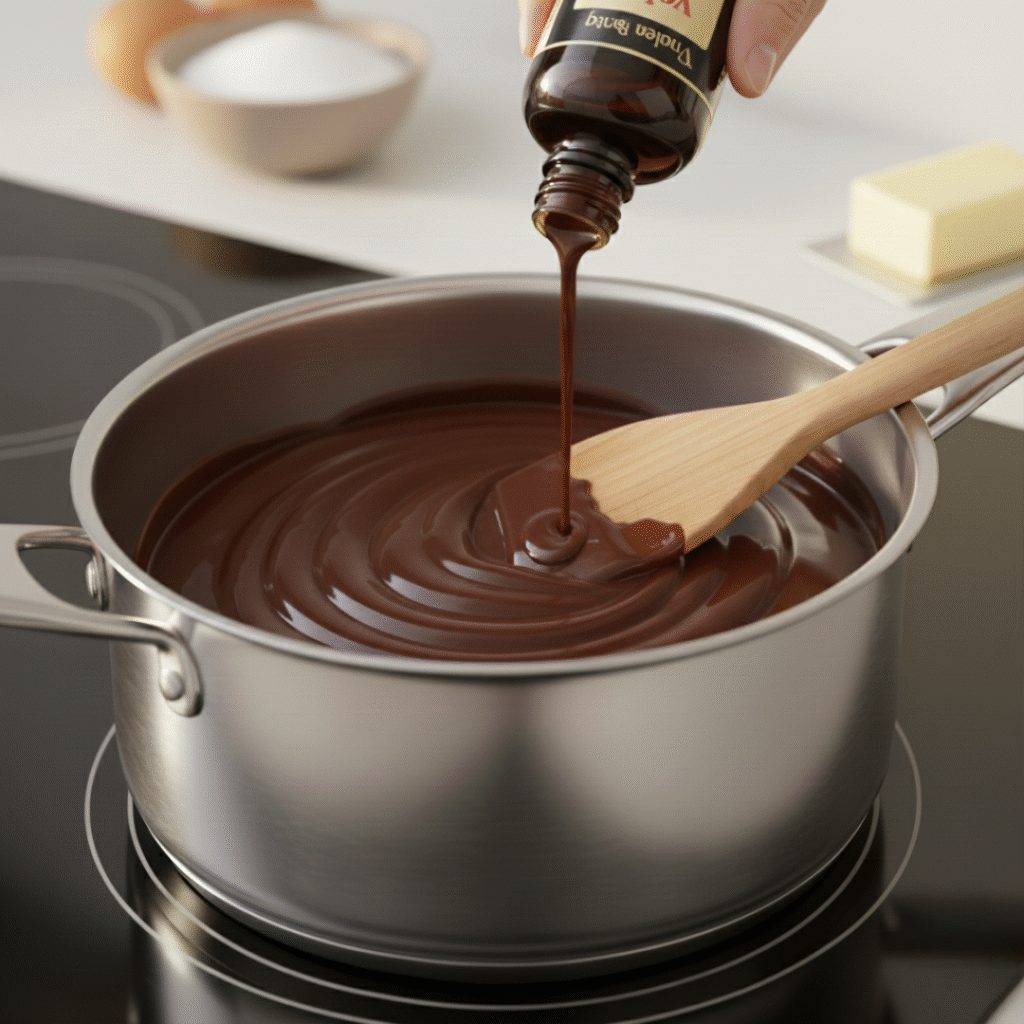
Chop your chocolate into small bits. Smaller pieces melt faster. Put butter and chocolate in a pot. Turn the stove to low. Low heat matters here. Chocolate burns quick and burnt chocolate tastes nasty.
Stir it while it melts. Don’t leave it alone. Takes maybe 5 minutes for everything to melt smooth. No lumps. When it’s done, take it off the stove. Let it sit for 5 minutes to cool down. Too hot and it’ll cook the eggs later.
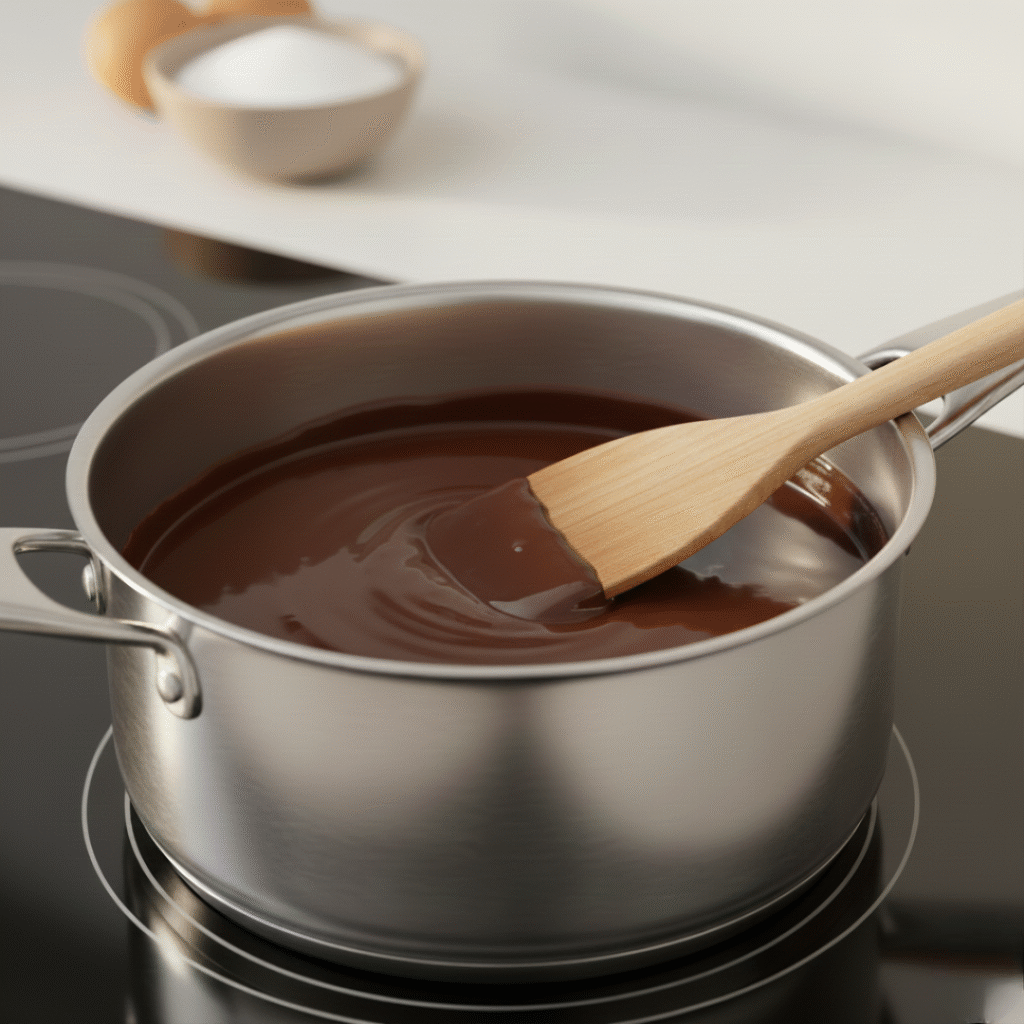
Sugar Goes In
Dump all your sugar into the chocolate. Mix it up good. It’s gonna look grainy. That’s fine. Sugar doesn’t melt at this point. Just stir for a minute until it’s all mixed. Should look thick and shiny.

Adding the Eggs
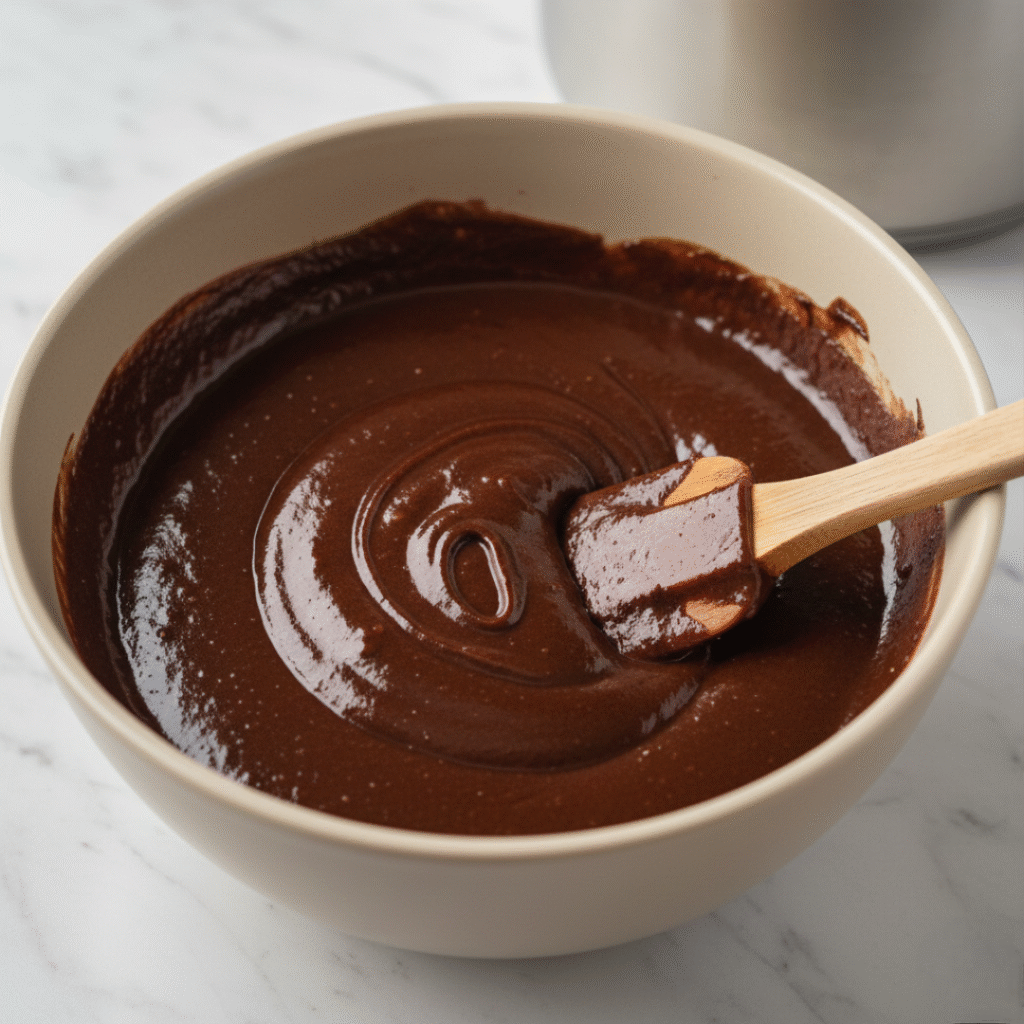
This part matters. Crack one egg into the chocolate. Beat it in for like 30 seconds. Really mix it. Make it smooth. Then add egg number two. Beat that one for 30 seconds too. Then the third egg. Same thing.
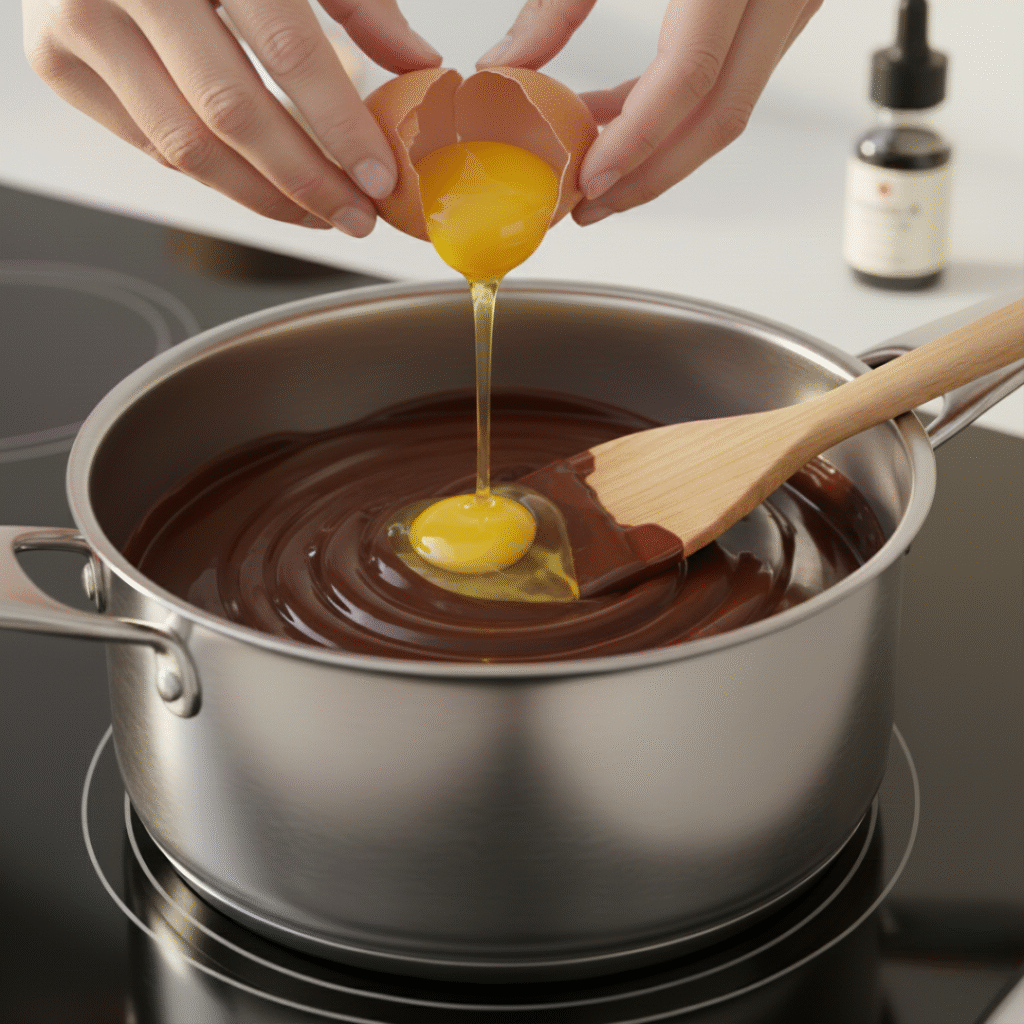
This is what makes that shiny crackly top happen. Each egg gets mixed in really well one at a time. Don’t rush. After all three eggs are in and it looks smooth and glossy, throw in your vanilla. Mix that in too.
Flour and Other Dry Stuff
Get another bowl. Put flour, cocoa powder, salt, and baking powder in there. Use a whisk to mix it all up. Gets rid of lumps. Mix it for like 30 seconds.

Putting It All Together
Pour the flour stuff into the chocolate stuff. Now listen up – this is where people mess up. Don’t overmix. Use your spatula and fold it together easy. Scrape from the bottom up and over. Turn the bowl while you do it.
Stop when you can’t see flour anymore. Seriously, stop right there. Some tiny lumps? That’s okay. Keep mixing and you’ll make them tough and cakey. Just until combined and done.
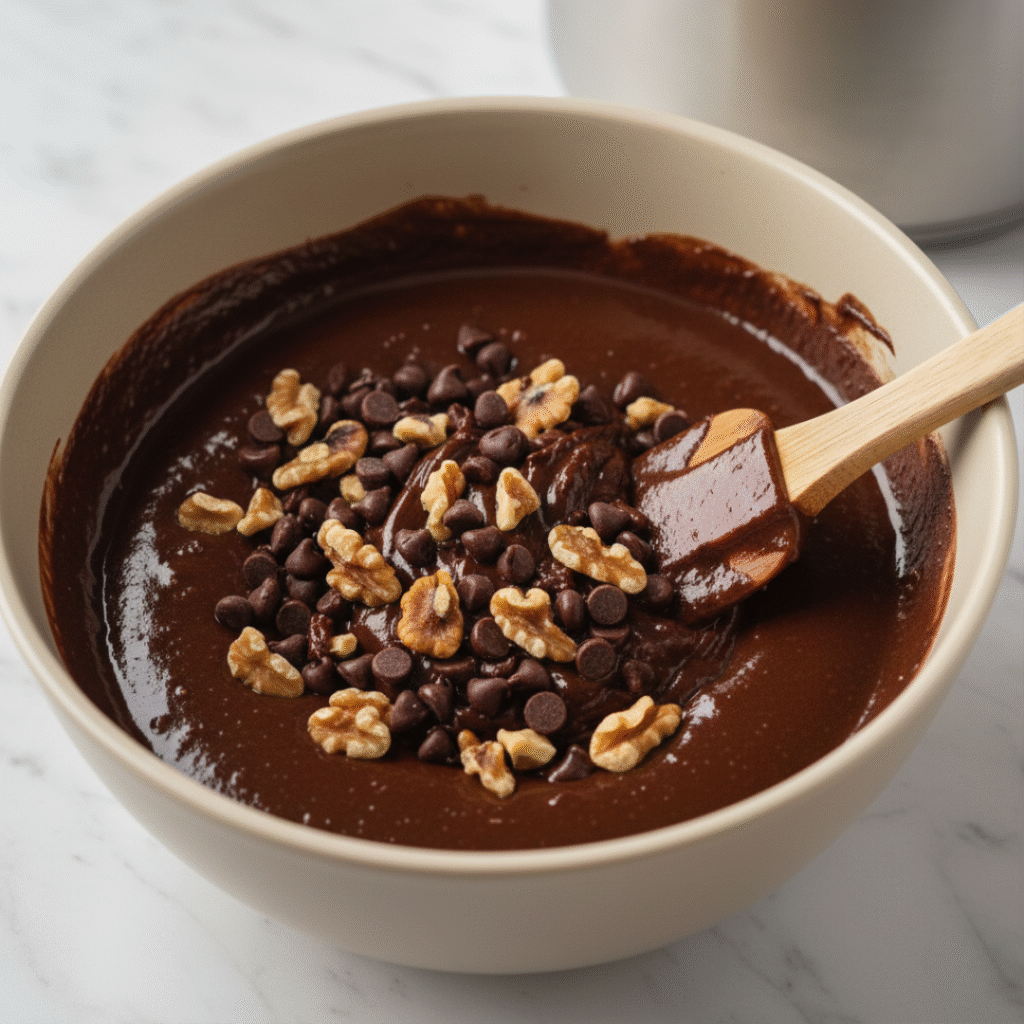
Throwing in Extras
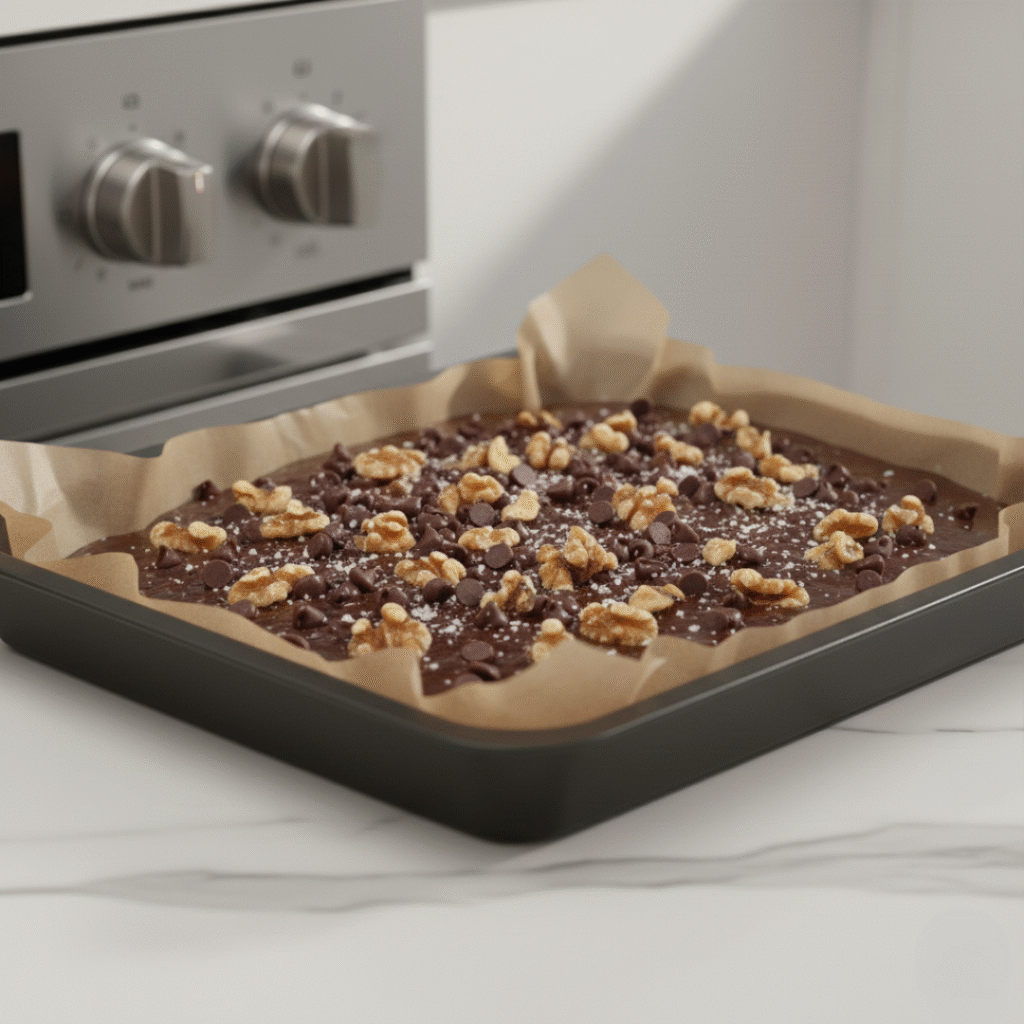
Got chocolate chips or nuts? Put them in now. Few stirs with the spatula. Don’t mix a ton. Just get them spread around. Save some for the top if you want them to look nice.
Baking Time
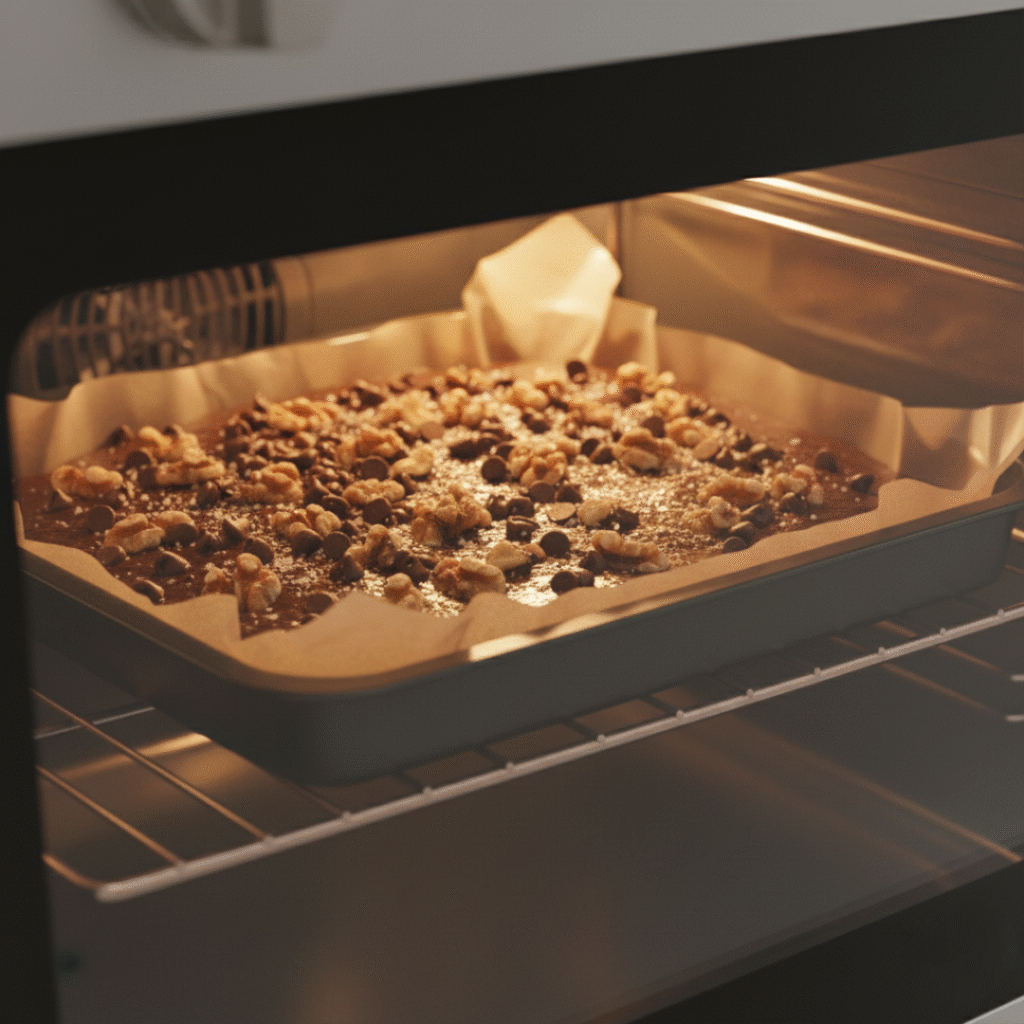
Pour everything into your pan. Spread it out so it’s even. Get it in all the corners. Put those extra chips or nuts on top if you saved some. Maybe some sea salt too.
Stick the pan in the oven. Middle rack. Set timer for 25 minutes. Don’t open the door before that. Opening it lets heat out and messes things up.
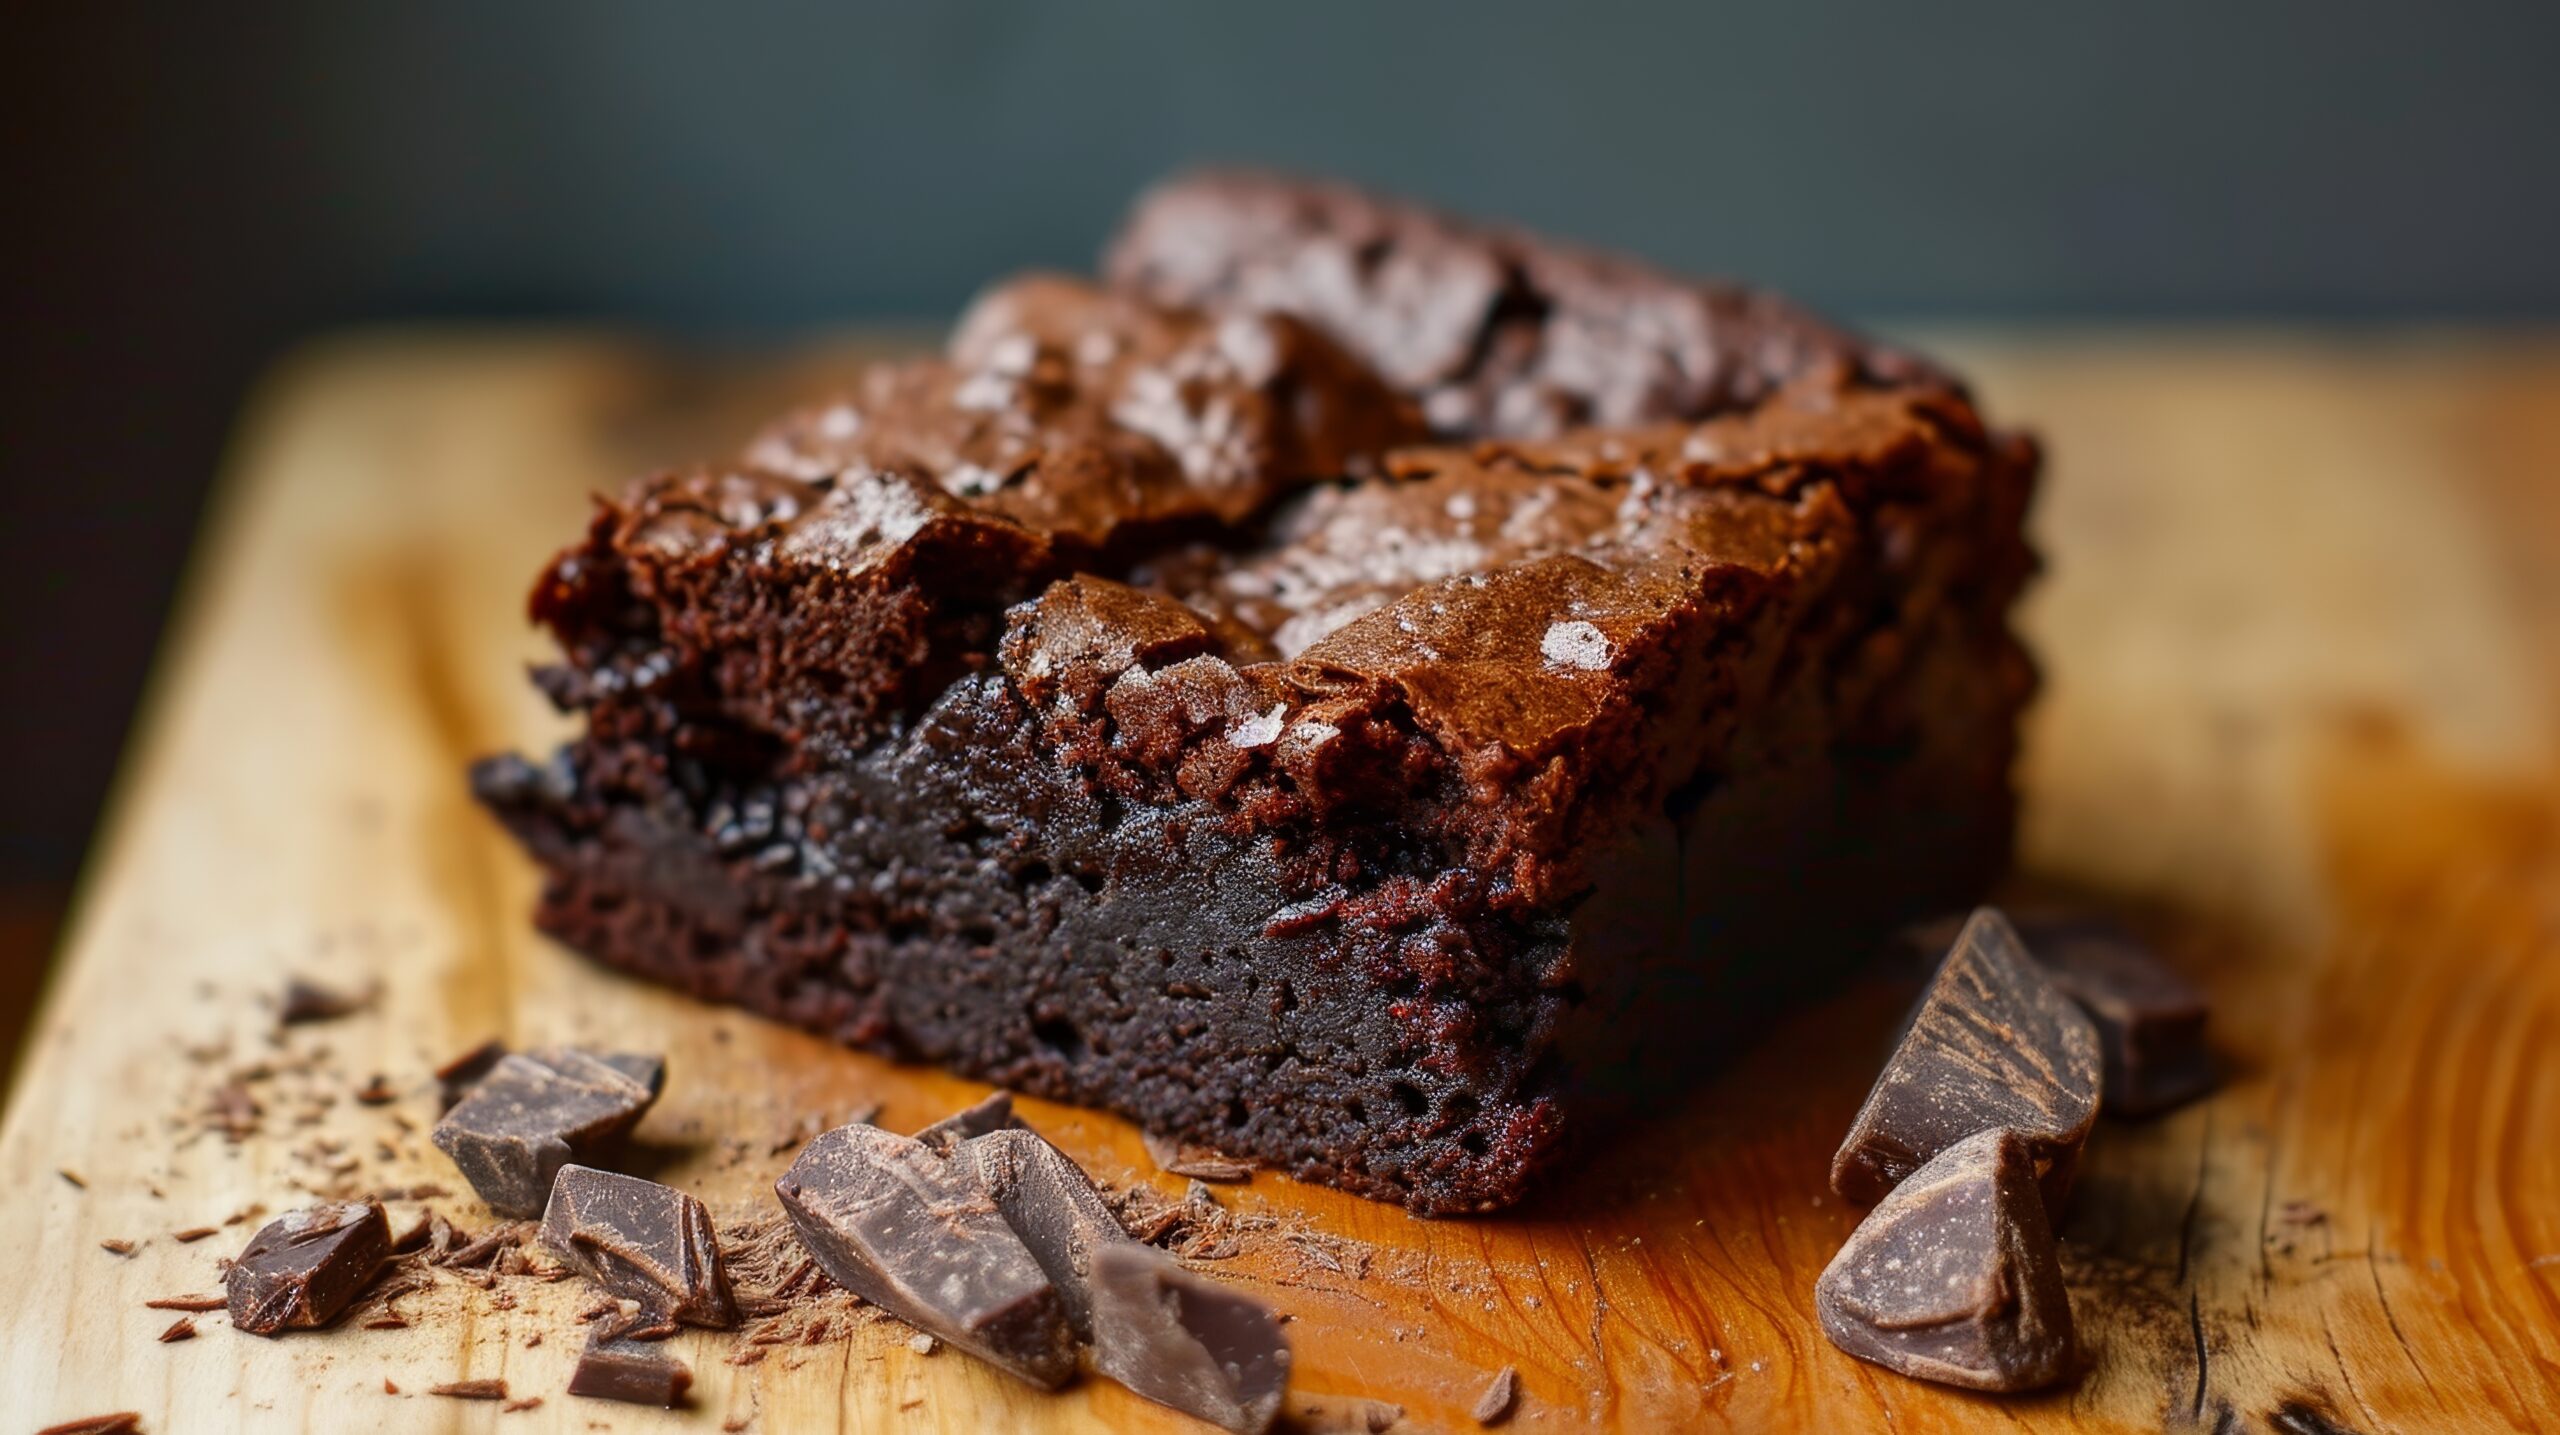
When 25 minutes hits, check them. Stick a toothpick in the middle. Pull it out. Should have wet crumbs on it. Not dripping wet batter, but not clean either.
Still has wet batter? Give it 3-5 more minutes. Check again. Comes out clean? They’re overdone but whatever, they’ll still be good.
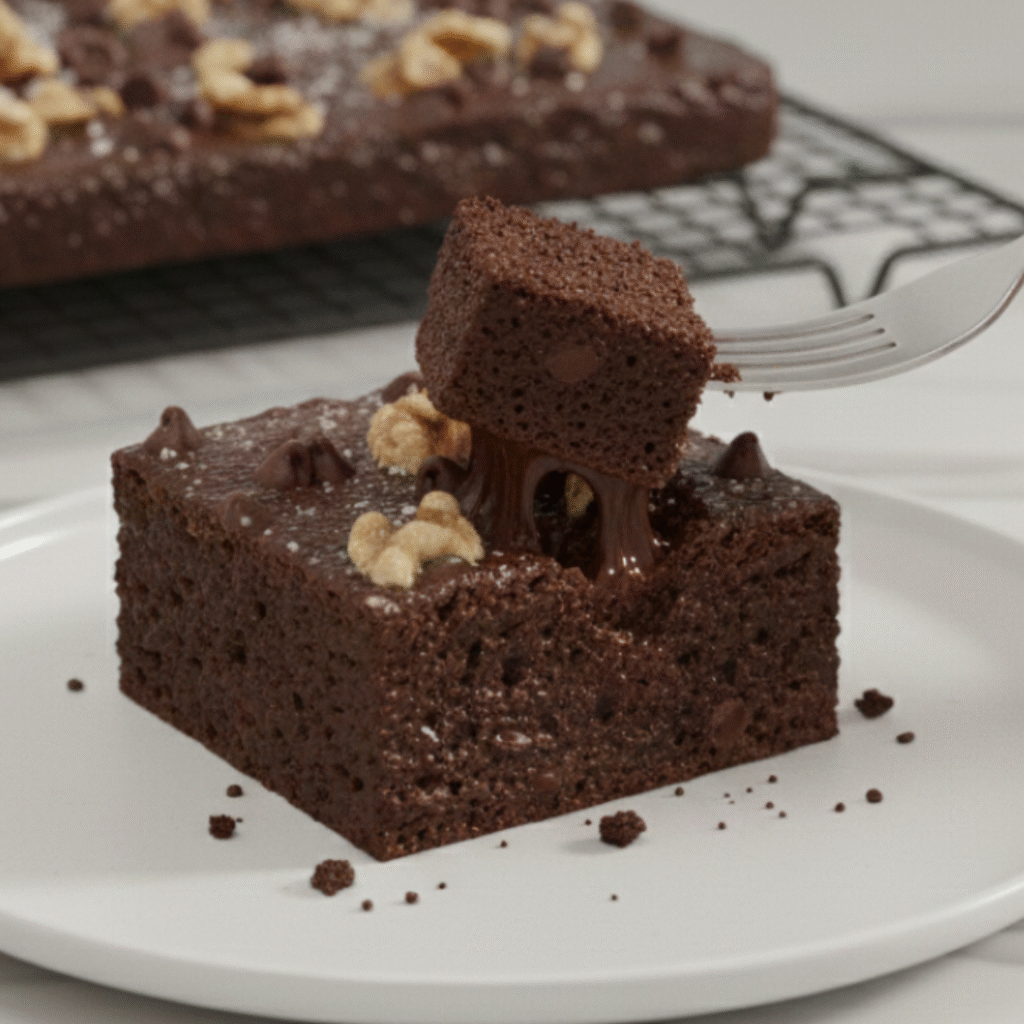
Middle should look kinda underdone still. Should move a bit when you shake the pan. That’s what you want. They cook more after you take them out. Look done in the oven means overdone when they cool.
Cooling Down
Take the pan out. Set it somewhere to cool. Leave it alone for 2 hours minimum. Maybe longer.
Don’t cut them hot. They’ll fall apart. Need time to firm up. Yeah they smell great. Yeah it’s hard to wait. But you gotta.
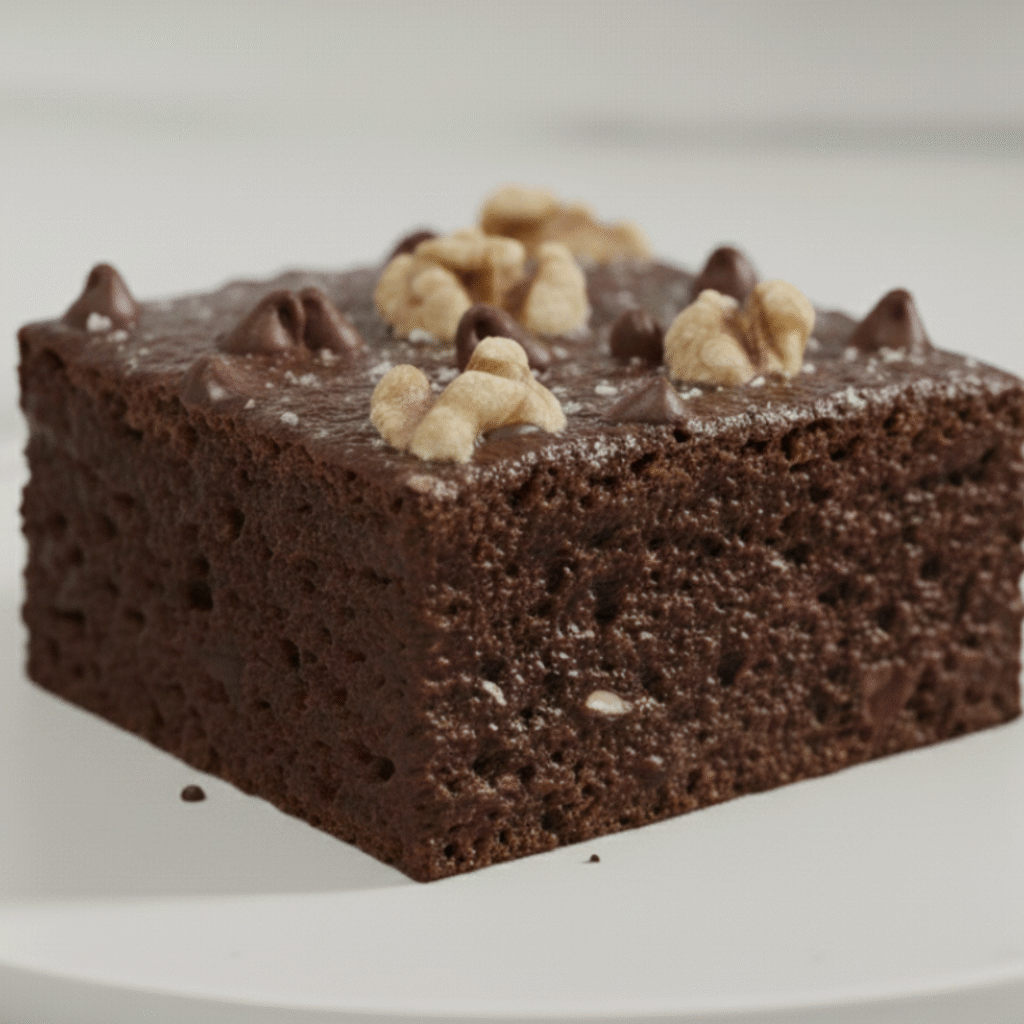
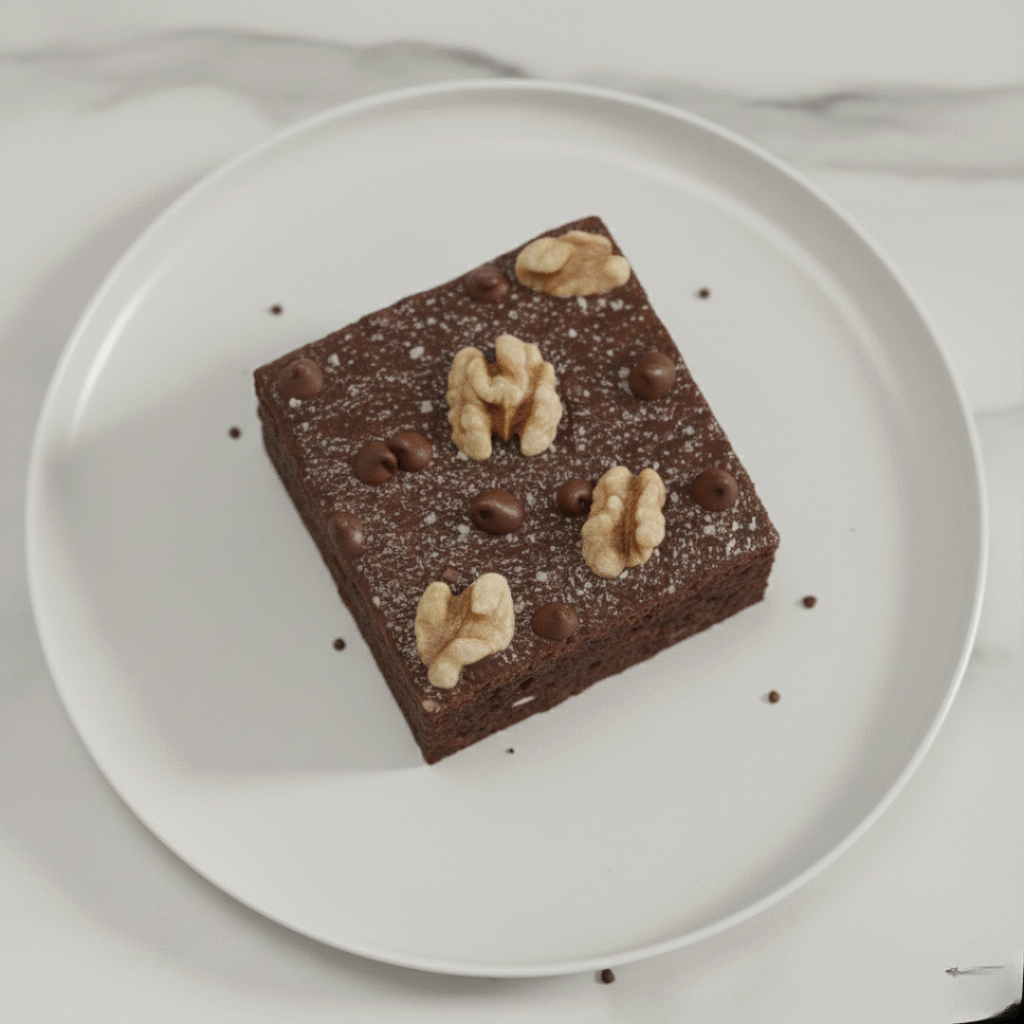
When they’re totally cool – like the pan feels room temperature cool – then you can cut them. Grab that parchment paper and lift everything out. Put it on a cutting board.
Get a big sharp knife. Cut into squares. Wipe the knife between cuts. Keeps it neat. Make them whatever size you want. Big ones, small ones, whatever.
Easy Chocolate Brownie Recipe You’ll Bake Again & Again
Equipment
- 9×13 inch baking pan
- Parchment paper
- Medium saucepan
- 2 mixing bowls
- whisk
- Rubber spatula
- Toothpick
Ingredients
- ¾ cup 170g unsalted butter
- 8 oz 225g dark chocolate, chopped
- 1½ cups 300g sugar
- 3 large eggs room temperature
- 2 tsp vanilla extract
- 1 cup 125g all-purpose flour
- ½ cup 50g cocoa powder
- ½ tsp salt
- ¼ tsp baking powder
- 1 cup chocolate chips optional
INSTRUCTIONS
- Preheat oven to 350°F. Line 9×13 pan with parchment paper.
- Melt butter and chocolate together over low heat. Stir until smooth. Cool 5 minutes.
- Stir sugar into chocolate mixture.
- Add eggs one at a time, beating well after each. Add vanilla.
- Mix flour, cocoa, salt, and baking powder in separate bowl.
- Fold dry ingredients into wet until just combined. Don’t overmix.
- Pour into pan. Add chocolate chips on top if using.
- Bake 25-30 minutes until toothpick has moist crumbs.
- Cool completely (2 hours) before cutting.
Stuff That Helps
Get okay chocolate. Doesn’t need to be crazy expensive. But don’t get the cheapest stuff either. Better chocolate makes better brownies. Look for something that says 60% cocoa or more.
Don’t bake them too long. Biggest mistake ever. Way more brownies get ruined from too much baking than anything else. Should still be kinda underdone when you pull them out. They cook more while cooling. Better underdone than overdone.
Warm up those eggs. Cold eggs don’t mix right. Can make the chocolate get weird and lumpy. Just set them on the counter 30 minutes before starting. Easy.
Measure flour the right way. Too much flour makes them dry and cakey. Don’t jam the measuring cup into the flour bag. That packs it in tight. Spoon flour into the cup. Level it with a knife.
Use that parchment paper. Greasing the pan is okay but parchment is way better. Nothing sticks. Lift everything out easy. Cuts clean. Just use it.
Actually wait for them to cool. Hardest part because they smell so good. But hot brownies are messy to cut. They need to cool and get firm. Be patient.
Pan size changes things. This recipe works for 9×13 pan. Makes thinner brownies with chewy edges. Want thicker fudgier ones? Use 8×8 pan. But bake them 5-10 minutes longer.

Try these Recipes also:
When Things Go Wrong
They’re cakey: Baked too long probably. Maybe too much flour. Maybe mixed too much. Next time, pull them out sooner. Check how you measured flour. Stop mixing sooner.
Top isn’t shiny: Eggs didn’t get mixed enough. When you put each egg in, really beat it for 30 seconds before the next one. That’s what makes the shine.
Stuck to the pan: Parchment paper fixes this every time. No parchment? Grease the pan really good with butter. Dust it with cocoa powder.
Too dry: Overbaked for sure. Toothpick should have wet crumbs when you pull them out. Not clean. Next time, less time in the oven. Check if your oven runs hot.
Too gooey in the middle: Either needed more oven time or didn’t cool long enough. Raw batter means underbaked. Cooked but gooey means needs more cooling time.
Edges are hard: Oven too hot or in there too long. Try dropping the temperature 25 degrees next time.
Middle sank down: Pan was too full or oven was too hot. Make sure you’re using the right size pan. Check oven temperature.
Different Ways to Make Them
Made the basic ones a few times? Try these:
Peanut Butter style: Make batter normal. Pour it in the pan. Drop spoonfuls of peanut butter on top. Use a knife to swirl it around. Bake like usual. Chocolate and peanut butter together is always good.
Cream Cheese ones: Mix 8 ounces cream cheese with 1/3 cup sugar and 1 egg. Pour half the brownie batter in the pan. Spread cream cheese stuff over it. Pour rest of brownie batter on top. Swirl with a knife. Bake normal. Really rich.
Salted Caramel: Make them normal. When they come out hot, poke holes all over with something sharp. Pour caramel sauce in the holes. Let it soak while cooling. Throw sea salt on top. Really good.
Mint kind: Put 1/2 teaspoon peppermint extract in with the vanilla. Mix in chopped Andes mints or crushed candy canes. Put more on top before baking.
Coffee style: Add 1 tablespoon instant coffee powder to the flour mixture. Makes chocolate taste stronger. Won’t taste like coffee though. Just deeper chocolate.
White Chocolate Raspberry: Mix in 1 cup white chocolate chips and 1 cup raspberries. Tart berries balance the sweet.
Oreo ones: Crush like 10 Oreos. Mix them in. Put whole Oreos on top. Kids love these.
Nutella swirl: Drop spoonfuls of Nutella on top. Swirl it with a knife. More chocolate hazelnut stuff.
Keeping Them Good
Room temperature works fine. Put them in a container with a lid. Or cover the pan tight with plastic wrap. Stay good for 5 days. Maybe a week if it’s not hot.
Want them to last longer? Freeze them. Cut them up first. Wrap each piece in plastic wrap. Put all of them in a freezer bag. Keep for 3 months frozen.
To eat frozen ones, leave on counter for an hour. Or microwave 15-20 seconds if you want them warm. Eating them frozen is pretty good too.
Don’t put them in the fridge unless your kitchen is super hot and they’re melting. Fridge dries them out.
Ways to Eat Them
Plain is good. But try these:
With ice cream: Heat brownie for 10 seconds. Put vanilla ice cream on top. Warm brownie melts the ice cream a little. Perfect.
Brownie sundae: Put brownie in a bowl. Add ice cream, hot fudge, whipped cream, cherry on top. Full dessert thing.
With whipped cream and berries: Put fresh whipped cream on brownie. Add raspberries or strawberries. Tart fruit cuts the richness.
Pour sauce on them: Heat up chocolate sauce or caramel. Pour over brownies. Simple but looks fancy.
Make a trifle: Cut brownies into small cubes. Layer in a glass with pudding, whipped cream, berries. Do more layers. Looks impressive.
With coffee or milk: Sometimes simple is best. Brownie and coffee. Or cold milk. Classic.
Making Ahead
Brownies taste better the next day anyway. Flavors get stronger. Texture settles. Make them a day before you need them if you can.
Good for meal prep too. Make them Sunday. Cut up and freeze single pieces. Pull one out when you want dessert. Thaws fast or eat frozen.
For parties, make them two days ahead. Cover them and leave at room temperature. Still fresh.
Why Homemade Beats Box Mix
Box mixes seem convenient. But they’re not much faster than from scratch. Still gotta add eggs and oil. Still gotta bake.
From scratch tastes way better though. More chocolate. Better texture. You know what’s in them. No weird fake stuff or chemicals.
Money wise, about the same. Maybe homemade costs less if you buy stuff in bulk. And people think you’re impressive when you say you made them yourself.
Bottom Line
Making good brownies is easy. Need a good recipe and follow some basic rules. Don’t mix too much. Don’t bake too long. Let them cool all the way. That’s it.
This recipe works. The amounts are right. The steps are clear. Follow it and you’ll get brownies that are fudgy, chocolatey, perfect texture. No guessing.
Making them for something special or just craving chocolate? Doesn’t matter. This recipe works every time. Make them once and you’ll keep making them. They’re just that good.
Get your stuff and start baking. Your place is gonna smell amazing.
Leave a Comment