Homemade Popcorn – Quick, Crunchy & Irresistible Snack
Make crispy, buttery popcorn at home in just minutes. A quick and fun snack perfect for movie nights, parties, or whenever cravings hit.
Equipment
- Medium to large pot with lid
- Oil (preferably not nonstick)
- Measuring spoons and cups
- Wooden spoon (optional, for stirring)
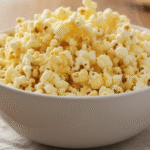
- Bowl for serving
- Airtight container for storage (optional)
Ingredients
Ingredients (Basic):
- ¼ cup popcorn kernels
- 2 tbsp oil vegetable, coconut, or ghee
- ½ tsp salt or to taste
Ingredients (For Flavored Versions):
- Melted butter 3 tbsp - for buttered popcorn
- Parmesan cheese 1/4 cup - for cheesy popcorn
- Cinnamon 1 tbsp + sugar (3 tbsp) - for sweet popcorn
- Hot sauce - for spicy popcorn
- Garlic powder 1 tsp + herbs - for savory popcorn
Instructions
1. Choose Your Pot:
- Get a medium to large pot with a lid that fits reasonably well. Nonstick isn't ideal because of the high heat. Regular stainless steel or cast iron works best. The pot needs to be big enough for kernels to move around but not so big that heat gets distributed unevenly.
2. Add Oil To Pot:
- Pour 2 tablespoons of oil into your pot. Coconut oil, vegetable oil, or ghee all work. Avoid olive oil because it has a low smoke point and will burn at the temperature you need.
3. Heat The Oil:
- Put the pot on medium-high heat. Let it warm for about 1 minute. You want the oil hot but not smoking. If it's smoking, your heat is too high. Lower it. The oil should shimmer but not actively smoke.
4. Add Kernels Quickly:
- Once the oil is at the right temperature, add your 1/4 cup of popcorn kernels. They should immediately start moving around in the hot oil.
5. Cover Immediately:
- Put the lid on right away. Kernels will start popping within 15-20 seconds and you don't want them flying everywhere. Make sure the lid fits reasonably well on the pot.
6. Start Shaking:
- This is the most important part. Grab the pot handle and gently shake the pot every 5-10 seconds. You're trying to keep the unpopped kernels moving and prevent the popped ones from sitting on the heat and burning.
7. Listen For The Sound:
- You'll hear the first pops pretty quickly after covering. The popping will speed up and then slow down again. When the pops slow to about 3-5 seconds apart, most of the kernels have popped and you're waiting for stragglers.
8. Turn Off Heat:
- Once the pops are 3-5 seconds apart, turn off the heat. Leave the lid on for about 10 seconds so any last kernels can pop.
9. Remove Lid Carefully:
- Carefully remove the lid, tilting it away from you so the steam escapes away from your face. Be careful not to burn yourself. There might be a few unpopped kernels at the bottom - that's normal and fine.
10. Transfer To Bowl:
- Pour the popcorn into a serving bowl. Some unpopped kernels will likely stay at the bottom of the pot - that's fine, just leave them.
11. Add Basic Seasoning:
- Sprinkle 1/2 teaspoon of salt over the warm popcorn. Or adjust to taste. You can always add more salt if you want. Toss gently to distribute.
12. Add Flavoring If Desired:
- If you're making flavored popcorn, this is when you do it. For buttered: drizzle melted butter and toss. For cheesy: sprinkle Parmesan while hot so it sticks. For sweet: mix cinnamon and sugar and sprinkle over warm popcorn. For spicy: drizzle hot sauce. The popcorn is still warm so seasonings stick better.
13. Serve Immediately:
- Eat while it's still warm and crispy. Popcorn stays crunchy longest right after it's made. Once it cools and sits it gets less crispy.
Storage:
- Room temperature: 2-7 days in airtight container (depends on humidity)
- Refrigerator: Not recommended (makes it soggy)
- Freezer: Not necessary
- Unpopped kernels: Years in sealed container in cool, dry place